Equipment Notes: Toro e-Dingo

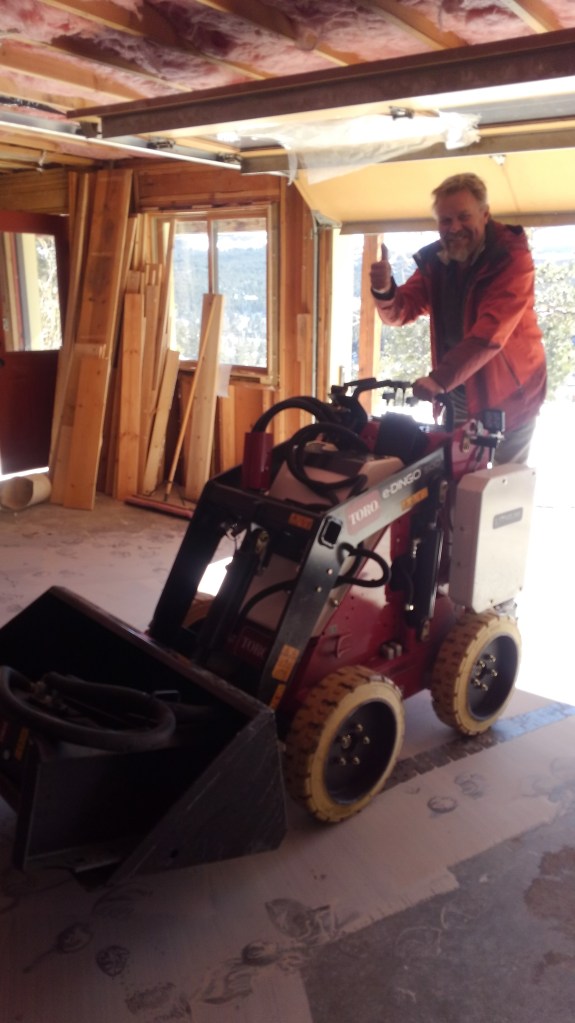
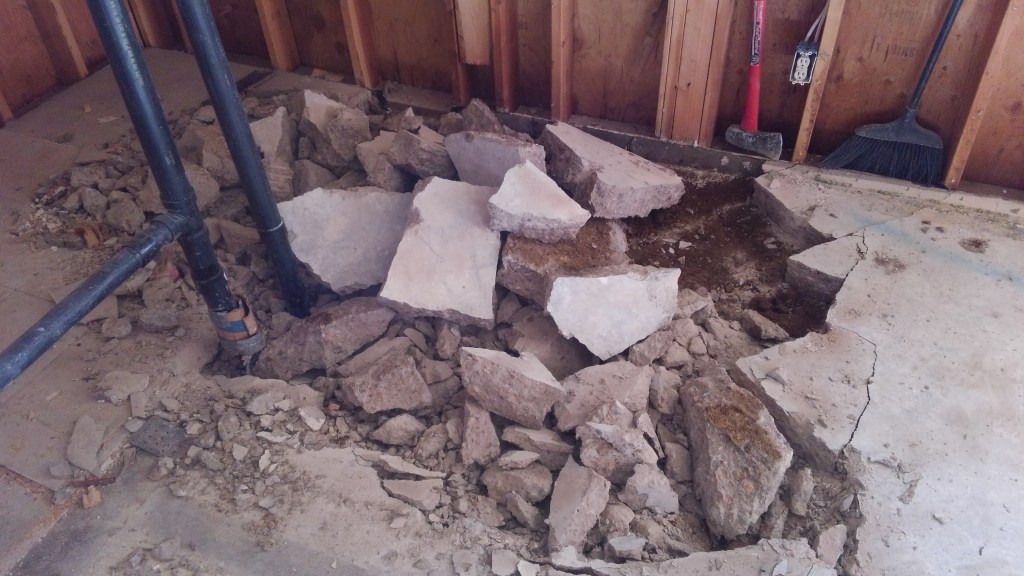
The e-Dingo was rented from Sunbelt Rentals in Boulder. A relatively new toy to their rental stable, this machine seemed to be the answer to how the basement floor could be jack hammered up without anyone suffering from carbon monoxide poisoning from diesel equipment operating in the basement. The Toro sings the praises of it e-Dingo here. The question is did a real world application match up with the marketing?

The short answer is the e-Dingo did the job it was asked to do. No one suffered carbon monoxide poisoning. The long answer isn’t that simple. The job took longer due to the cold (50 degrees Fahrenheit) accelerating the battery drain. A 6 hour run time was reduced to 3 hours. Throw in 8 hours to fully charge the battery, not a lot of work could be accomplished in a day. The experience renting from Sunbelt was not the smoothest; the poor e-Dingo may be suffering a bit from its association with Sunbelt.

Would we rent the e-Dingo again? This is our last major house remodel. So no. There will be no need. Unless we do a project like this again, then yes, we’d likely rent a e-Dingo.

PROS

  • Can be operated safely indoors – no carbon monoxide risk from diesel exhaust
  • Jack hammer attachment worked well
  • Easy to maneuver indoors
  • Easy to change the attachment (e.g. bucket, jackhammer)
  • House didn’t reek of diesel exhaust
  • Charges on 110 A outlet.

CONS

  • Battery life was 1/2 advertised. It was also February in the mountains. Maybe if the job site was in Miami the battery would have lasted 6 hours.
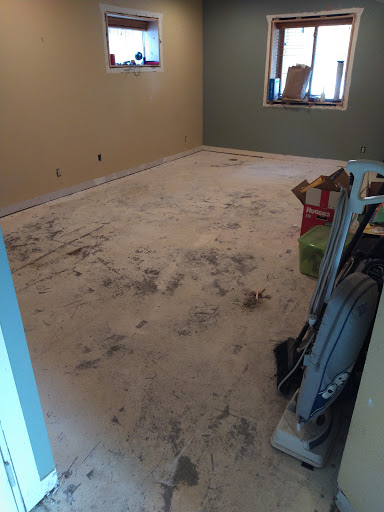
  • Took 8 hours to charge the battery. 3 hours of work then 8 hours to charge. In 3 hours the e-Dingo could break up 300 square feet of 4″ thick concrete lacking any sort of metal reinforcement.
  • Charges on 110 A outlet.
  • Wheels did not inspire confidence crossing rough terrain. It will do it, but it is bumpy and awkward.
Dave operating the eDingo while (excavator) Dave directs.

Downstairs: Demo

With the garage addition, demolition was rather limited. The real demo for the project was Dave breaching the foundation wall. This was messy work, as all demo should be, but it was not extensive. But not to fear, the first floor renovation provided an excellent opportunity to vent frustration through demolition. For a reminder of the master plan for the downstairs – wander over to this post.

First things first, the downstairs had to be cleared out. A vicious purge was held. Things given away willy nilly. Three crockpots is sufficient, having four is just heading into largess. Baby toys Evan has out grown. Currently used items were shifted upstairs. Dining room? A wonderful office. Toys creatively stashed in the living room and Alex’s room. But even then, it wasn’t enough. A storage unit was rented and the extra odds and ends that didn’t fit into the new garage or house were mothballed for storage.

After that, demo fun began. To no one’s surprise, quite the graveyard of mice were discovered. The poor things would run along in the ceiling joists then make their way down into the cavities and get trapped. Mice are not welcome in the house, but they are not wished a long and inhumane death.

The shortcuts and questionable decisions during the initial construction were discovered. The even more questionable decisions made by the previous owner during the installation of the illegal rental apartment were exposed. It was a longer than expected process, but the critical step to making things better.

Shoddy Shortcomings

  • “What we lack in quality of materials we will make up for in nails” was the theme of the original builder. Shitty materials? Use 75 million nails to hold it together?
  • It is a mountain build in the early 90s! Use whatever is on the truck so we don’t have to run down to the building supply yard in Boulder.
  • There were building codes in the early 90s. Either no one checked this build or some palms were seriously greased.
  • The house is not built according to the plans submitted to the town.
  • The steel beam to allow for a clear span garage was an after thought. Evidence: there was no pocket for it to sit in within the foundation wall (best practice) and the 3 2 x 6s were barely sitting above the footer.
  • Front wall had no vapor barrier and clear cracks and the fiberglass insulation had strips of dust where wind had been blowing in.
  • The original builder failed to seal around the windows properly allowing mice easy access into the house.
  • Two 15 amp electrical circuits for the entire first floor. No wonder singed wires were found.
  • Tiled around bathroom vanity.
  • There is more that has been blocked out with margaritas. At some point it will be remembered and shared.

Phase 2: Downstairs

After a grueling 6 months of construction the new garage, a well earned 6 week break was enjoyed before embarking on Phase 2 of the massive house remodel. Phase 2 involves completely overhauling the downstairs of the house.

  • Converting the garage over to a new kitchen/dining area.
  • Moving the guest/playroom to the back side of the house creating an open space floor plan (or as close as it will get in this house)
  • Expanding the full bath to allow for a barrier less (roll in shower). The full bath won’t be completely ADA compliant, but too much space needed to be taken out of the living room to accomplish that designation.
  • Sneaking a half bath in under the stairs.
  • Replacing the 25 year old furnace rated for elevations of less than 2500 feet (hello 8500 feet) with a boiler and radiant heat system.
  • Replacing the water heater with a new side arm.
  • Replacing the 25 year old windows.
  • Replacing the garage door with sliding glass doors and panels.
  • Insulating.
  • Fixing any surprises/deficiencies from original construction/past remodels.

True to all construction projects, the plans have been modified between “finalization” and demo day.

  • Barrier free shower has been widened to 6’6″ (removing storage shelves) and deepened to 42″
  • Island has been shrunk to 6’6 to allow for a wider walkway.
  • Bar/coffee station has become an extension of west kitchen counter top (left hand side).
  • Triple sliding door has been replaced with a double slider with two fixed outside panes.

Garage: Green Roof and Exterior Stairs

The last two features of the garage, the green roof and exterior stairs, were finished after the fine details of the interior. Not the way a job would normally roll, but the timeline got out of sync because of weather delays.

When the garage project was replanned, a green roof was chosen for environmental, aesthetic, and practical reasons. The environmental factors include reduced water run of and improved energy efficiency. Aesthetically, a shed roof would have looked odd against the back of the house and a green roof would replace some of the mountain flora we excavated. And finally, any other type of roof would have impeded the rear bedroom’s egress window and thus eliminating a legal bedroom from the house.

The green roof begins with a flat roof: 5% pitch (1 inch drop per 4 feet of run). The truss system was designed to hold 40 pounds dead weight (roof decking, membrane, soil, plants) and 60 pounds live weight (snow) per square foot. The dead weight limits determine the depth of soil, and in this instance, the green roof matrix was able to be spread to a depth of 3 inches. This depth is enough to support sedum, and perhaps a few wildflowers will be able to survive.

Between the roof membrane and soil is a drainage/filtration system. The filtration system allows water to pass through into the drainage layer and the retention of the soil matrix. The drainage system is essentially a layer of connected plastic nubs that create channels for water to move off of the roof (water is heavy, water sitting on a green roof only pushes the live weight closer to capacity). This roof is a continuous, extensive green roof. This link provides a good explanation.

The roof matrix (soil) was carried up in buckets ahead of a November snow storm. The rush was on because once the roof was covered with snow, it would be difficult to find another opportunity until Fake Spring 1 (usually mid February) to finish the roof. Fortunately, unsaturated green roof matrix is light weight. Wild flower seed were spread over a quarter of the roof after the soil was in place. The best time is to spread seeds in the fall – overwintering helps the germination process.

So, the exterior stairs. Not part of the original plan, but a solution that was necessary because of the problem created by good news from the soils engineer. The soils engineer declared our cut into the hillside stable, which meant no retaining wall was needed. Much rejoicing followed because this was a significant savings. But the problem with this was discovered when it was time to back fill.

The retaining wall was supposed to connect with the side of the garage and hold back the backfill. Without the retaining wall, it became a question of how to hold back the soil. Fortunately, excavator Dave had a solution – stone steps along the side of the of the garage. Not only did the solution solve the issue with backfill stabilization, but provided a way to access the yard from the garage without having to go through or around the house.

Steps were ordered from Lyons Sandstone and were installed. It was an interesting process that relied on a pulley and Excavator Dave’s knowledge of knots from his Coastguard days. It is important to note, no one was injured during the process and no pictures were taken for reasons of plausible deniability.