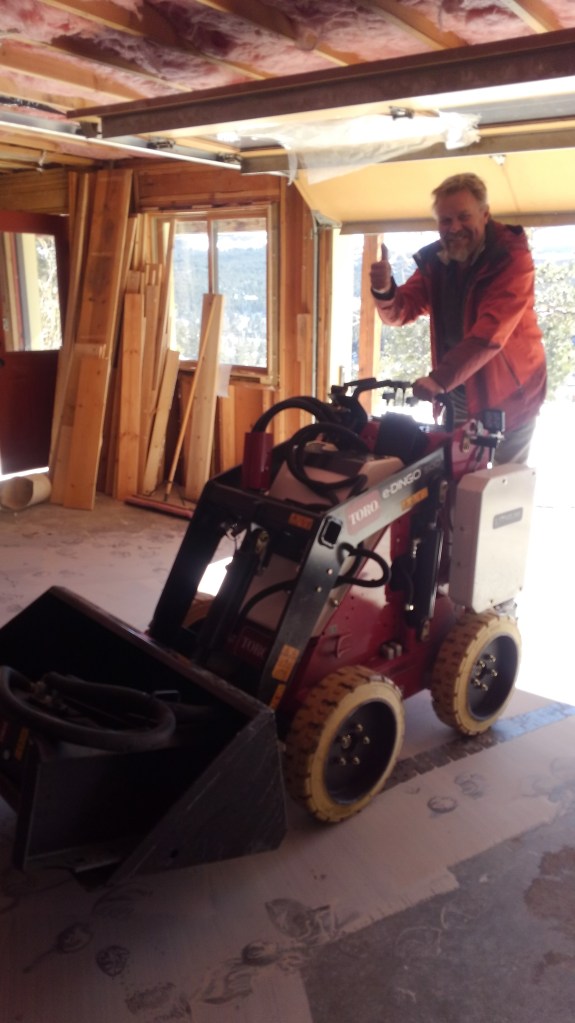
The e-Dingo was rented from Sunbelt Rentals in Boulder. A relatively new toy to their rental stable, this machine seemed to be the answer to how the basement floor could be jack hammered up without anyone suffering from carbon monoxide poisoning from diesel equipment operating in the basement. The Toro sings the praises of it e-Dingo here. The question is did a real world application match up with the marketing?
The short answer is the e-Dingo did the job it was asked to do. No one suffered carbon monoxide poisoning. The long answer isn’t that simple. The job took longer due to the cold (50 degrees Fahrenheit) accelerating the battery drain. A 6 hour run time was reduced to 3 hours. Throw in 8 hours to fully charge the battery, not a lot of work could be accomplished in a day. The experience renting from Sunbelt was not the smoothest; the poor e-Dingo may be suffering a bit from its association with Sunbelt.
Would we rent the e-Dingo again? This is our last major house remodel. So no. There will be no need. Unless we do a project like this again, then yes, we’d likely rent a e-Dingo.
PROS
Can be operated safely indoors – no carbon monoxide risk from diesel exhaust
Jack hammer attachment worked well
Easy to maneuver indoors
Easy to change the attachment (e.g. bucket, jackhammer)
House didn’t reek of diesel exhaust
Charges on 110 A outlet.
CONS
Battery life was 1/2 advertised. It was also February in the mountains. Maybe if the job site was in Miami the battery would have lasted 6 hours.
Took 8 hours to charge the battery. 3 hours of work then 8 hours to charge. In 3 hours the e-Dingo could break up 300 square feet of 4″ thick concrete lacking any sort of metal reinforcement.
Charges on 110 A outlet.
Wheels did not inspire confidence crossing rough terrain. It will do it, but it is bumpy and awkward.
Dave operating the eDingo while (excavator) Dave directs.
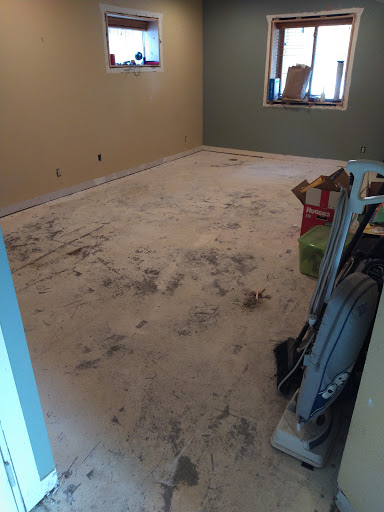
With the garage addition, demolition was rather limited. The real demo for the project was Dave breaching the foundation wall. This was messy work, as all demo should be, but it was not extensive. But not to fear, the first floor renovation provided an excellent opportunity to vent frustration through demolition. For a reminder of the master plan for the downstairs – wander over to this post.
First things first, the downstairs had to be cleared out. A vicious purge was held. Things given away willy nilly. Three crockpots is sufficient, having four is just heading into largess. Baby toys Evan has out grown. Currently used items were shifted upstairs. Dining room? A wonderful office. Toys creatively stashed in the living room and Alex’s room. But even then, it wasn’t enough. A storage unit was rented and the extra odds and ends that didn’t fit into the new garage or house were mothballed for storage.
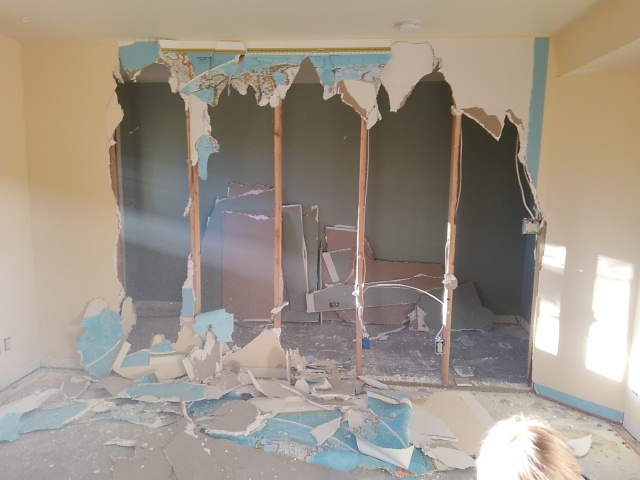
After that, demo fun began. To no one’s surprise, quite the graveyard of mice were discovered. The poor things would run along in the ceiling joists then make their way down into the cavities and get trapped. Mice are not welcome in the house, but they are not wished a long and inhumane death.
The shortcuts and questionable decisions during the initial construction were discovered. The even more questionable decisions made by the previous owner during the installation of the illegal rental apartment were exposed. It was a longer than expected process, but the critical step to making things better.
Shoddy Shortcomings
“What we lack in quality of materials we will make up for in nails” was the theme of the original builder. Shitty materials? Use 75 million nails to hold it together?
It is a mountain build in the early 90s! Use whatever is on the truck so we don’t have to run down to the building supply yard in Boulder.
There were building codes in the early 90s. Either no one checked this build or some palms were seriously greased.
The house is not built according to the plans submitted to the town.
The steel beam to allow for a clear span garage was an after thought. Evidence: there was no pocket for it to sit in within the foundation wall (best practice) and the 3 2 x 6s were barely sitting above the footer.
Front wall had no vapor barrier and clear cracks and the fiberglass insulation had strips of dust where wind had been blowing in.
The original builder failed to seal around the windows properly allowing mice easy access into the house.
Two 15 amp electrical circuits for the entire first floor. No wonder singed wires were found.
Tiled around bathroom vanity.
There is more that has been blocked out with margaritas. At some point it will be remembered and shared.
Engineered flooring has been ripped out.
Vanity that was tiled around.
Base plate sitting in the concrete.
A wall has been breached!
Starting the mouse body count.
Demoing with concerns about hantavirus were the greatest concern
Piece of drywall vapor barrier?
Another wall has come down! Great room concept takes shape.
Singed wires.
An amazing example of the scraps of lumber the original builder used to support half the house.
After a grueling 6 months of construction the new garage, a well earned 6 week break was enjoyed before embarking on Phase 2 of the massive house remodel. Phase 2 involves completely overhauling the downstairs of the house.
Converting the garage over to a new kitchen/dining area.
Moving the guest/playroom to the back side of the house creating an open space floor plan (or as close as it will get in this house)
Expanding the full bath to allow for a barrier less (roll in shower). The full bath won’t be completely ADA compliant, but too much space needed to be taken out of the living room to accomplish that designation.
Sneaking a half bath in under the stairs.
Replacing the 25 year old furnace rated for elevations of less than 2500 feet (hello 8500 feet) with a boiler and radiant heat system.
Replacing the water heater with a new side arm.
Replacing the 25 year old windows.
Replacing the garage door with sliding glass doors and panels.
Insulating.
Fixing any surprises/deficiencies from original construction/past remodels.
Floor plan prior to remodel
Floor plan for Phase 2
The before and after floor plans.
True to all construction projects, the plans have been modified between “finalization” and demo day.
Barrier free shower has been widened to 6’6″ (removing storage shelves) and deepened to 42″
Island has been shrunk to 6’6 to allow for a wider walkway.
Bar/coffee station has become an extension of west kitchen counter top (left hand side).
Triple sliding door has been replaced with a double slider with two fixed outside panes.
The last two features of the garage, the green roof and exterior stairs, were finished after the fine details of the interior. Not the way a job would normally roll, but the timeline got out of sync because of weather delays.
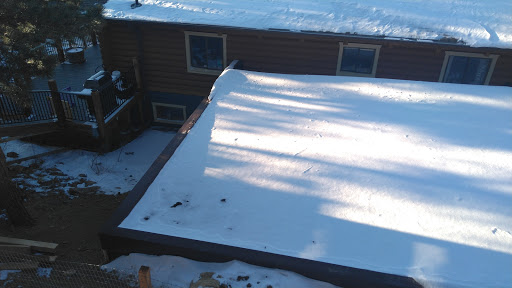
When the garage project was replanned, a green roof was chosen for environmental, aesthetic, and practical reasons. The environmental factors include reduced water run of and improved energy efficiency. Aesthetically, a shed roof would have looked odd against the back of the house and a green roof would replace some of the mountain flora we excavated. And finally, any other type of roof would have impeded the rear bedroom’s egress window and thus eliminating a legal bedroom from the house.
The green roof begins with a flat roof: 5% pitch (1 inch drop per 4 feet of run). The truss system was designed to hold 40 pounds dead weight (roof decking, membrane, soil, plants) and 60 pounds live weight (snow) per square foot. The dead weight limits determine the depth of soil, and in this instance, the green roof matrix was able to be spread to a depth of 3 inches. This depth is enough to support sedum, and perhaps a few wildflowers will be able to survive.
Between the roof membrane and soil is a drainage/filtration system. The filtration system allows water to pass through into the drainage layer and the retention of the soil matrix. The drainage system is essentially a layer of connected plastic nubs that create channels for water to move off of the roof (water is heavy, water sitting on a green roof only pushes the live weight closer to capacity). This roof is a continuous, extensive green roof. This link provides a good explanation.
The roof matrix (soil) was carried up in buckets ahead of a November snow storm. The rush was on because once the roof was covered with snow, it would be difficult to find another opportunity until Fake Spring 1 (usually mid February) to finish the roof. Fortunately, unsaturated green roof matrix is light weight. Wild flower seed were spread over a quarter of the roof after the soil was in place. The best time is to spread seeds in the fall – overwintering helps the germination process.
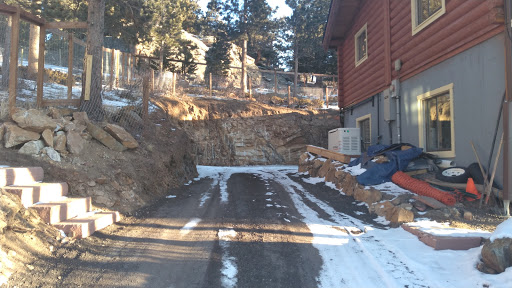
So, the exterior stairs. Not part of the original plan, but a solution that was necessary because of the problem created by good news from the soils engineer. The soils engineer declared our cut into the hillside stable, which meant no retaining wall was needed. Much rejoicing followed because this was a significant savings. But the problem with this was discovered when it was time to back fill.
The retaining wall was supposed to connect with the side of the garage and hold back the backfill. Without the retaining wall, it became a question of how to hold back the soil. Fortunately, excavator Dave had a solution – stone steps along the side of the of the garage. Not only did the solution solve the issue with backfill stabilization, but provided a way to access the yard from the garage without having to go through or around the house.
Steps were ordered from Lyons Sandstone and were installed. It was an interesting process that relied on a pulley and Excavator Dave’s knowledge of knots from his Coastguard days. It is important to note, no one was injured during the process and no pictures were taken for reasons of plausible deniability.
So close to being done bucketing up the green roof media.
Green roof with a dusting of snow .
The rock steps.
Big picture of the locations of the rock steps.
Rock steps to the property line to facilitate happy hours with the neighbors.
After all of Dave’s hard work, the blog seemed like a good place for his reflections as well as some answers to questions asked during the process (by ourselves or others). It always a good thing to publish a long forgotten draft.
Q: How critical is that first row?
A: Extremely. Any mistake will be magnified in every following row. It will look terrible and there is the strong likelihood of having to rip a board (uneven and unsightly) or redo all the work. Or, ignore and let the next sap of a homeowner deal with it. Take the time, do it right the first time, starting at the first row.
Q: How did we ensure that all rows following the critical first row were done correctly? How did we keep the boards straight?
A: This is a benefit of manufactured decking. It is uniform coming from the factory. There was some slightly bowing due to transport and storage (the stuff is surprisingly flexible), but using clamps during the process solved that issue.
Pry bar and clamps to take the warp out of a board or adjust spacing.
For where wood was used (such as the framing), Dave took the time to hand select the pieces, eliminating anything that looked like snow skis (badly bowed).
Q: There is rot and structural deficiencies detailed in many photos. Wasn’t this caught on home inspection?
Dry rotted joist to be replaced.2 x 6 that is almost rotted through. The post that was askance and rotted out at the bottom was ‘attached’ in this area.
A: Some of it was. Our inspector found the issues with the stair joists and the cantilever. Unfortunately some of the issues were not visible until the decking was removed.
Q: What was holding parts of that deck together?
A: Nails. Luck. Carpenter ants holding hands and singing kumbaya.
So what should one do while winter is closing and and the garage roof is just not quite done? First, you tease (all in good fun) your son’s former pre-school teacher because her son is working on your roof for the roofing company. Second, cross your fingers and watch as winter starts to roll in. Third, you work on the finishing touches.
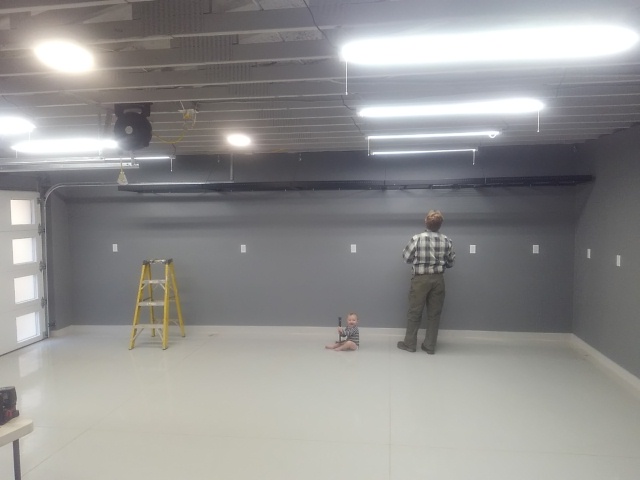
Floor: Sealed with epoxy. We chose ArmorPoxy based on their GarageJournal reviews. GarageJournal is the place to go to get your nuanced questions answered and to view garage porn. ArmorPoxy is some of the finest New Jersey water, er, chemicals, that can be purchased. We opted to go with their “job on a pallet” product which is everything you need to complete your job (acid etch, primer, epoxy, top coat, anti-slip additive, squeegees, boot spikes). Our job, at 625 square feet) wasn’t quite big enough to warrant a pallet, but the FedEx driver was not thrilled.
We were pleased with the product. Instructions were easy to follow. Biggest complaints were the primer had a strong smell and the our epoxy color was similar to the primer color (hard to tell where epoxy had been applied). Even with the anti-slip additive, it is a bit slick when you walk in with a snow packed boot on.
Paint: We painted the walls and ceiling. Ceiling was painted first with a light grey using a sprayer (purchased for the house staining project). This was the easiest way to get good coverage with the spray foam. The walls were painted a darker grey. The end result was a cross between an art gallery and an operating room.
Storage: After spending time in California, we have learned to utilize all 3 dimensions when it comes to space. Shelves were installed on the far wall and a set of our Costco Husky shelves (2000 lb capacity per shelf) are in use. After a summer of hard work, Dave earned himself a new tool bench. Gladiator cabinets added more space for his tools and even extra storage for winter gear.
Outlets/Lighting/Compressed Air:Our electrician (J Fitzer Electrical) thought we were slightly off when we he saw our electrical plan – outlets everywhere! After seeing the 2 amazing outlets in the soon to be obsolete garage, he understood. And Jeremiah delivered on the outlets. The only goof was on our end, we switched the location of Dave’s shop area after the electrical work was done, so there is an outlet heavy corner of the garage that became a storage zone.
In addition to outlets, we went nuts with the lights. Soon to be obsolete garage had 2 bare bulbs that cast shadows that you could lose a full grown man in. It was awful. We hated it. The new garage ended up with 40 linear feet of LED shop lights. It’s better lit than an operating theater. And we love it.
Dave also earned a new compressor. The poor 20+ year old craftsman gave up the ghost on the siding portion of the project and progress was slowed down due to constantly waiting for the compressor to come up to pressure to run the nailer. And waiting for the compressor to stop running so we could run the circular saw without tripping the lone breaker that ran the entire soon to be obsolete garage.
Epoxy and paint.
Open joists are great for running air lines
One way leads to the work bench, the other way to the air hose
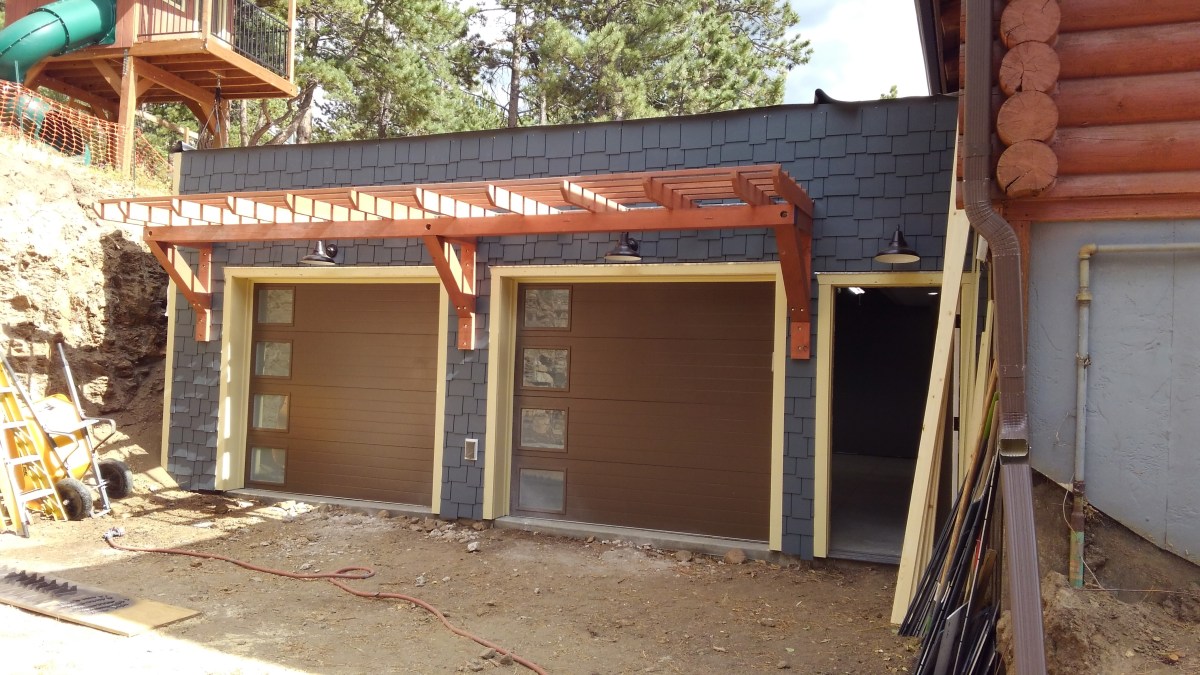
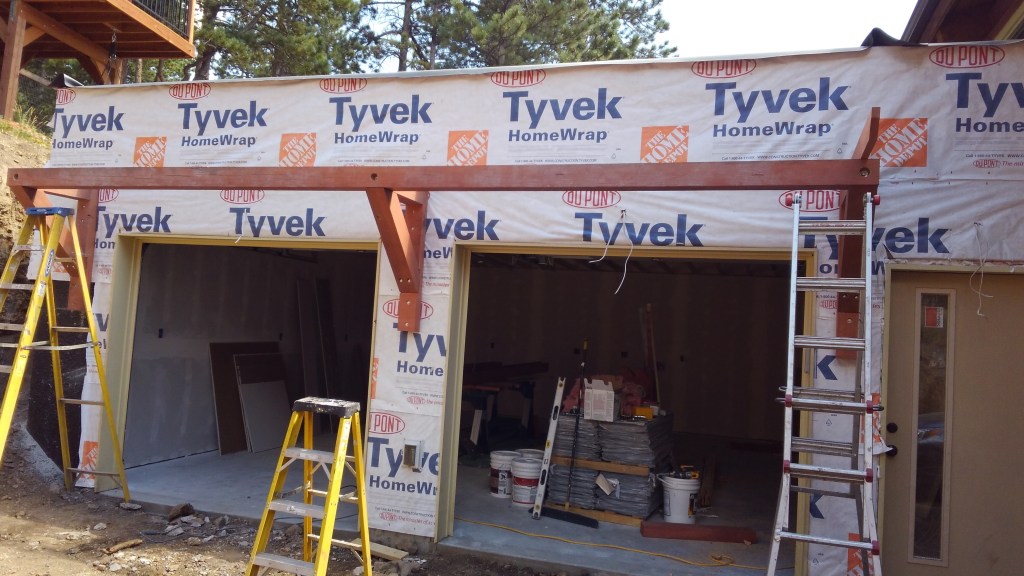
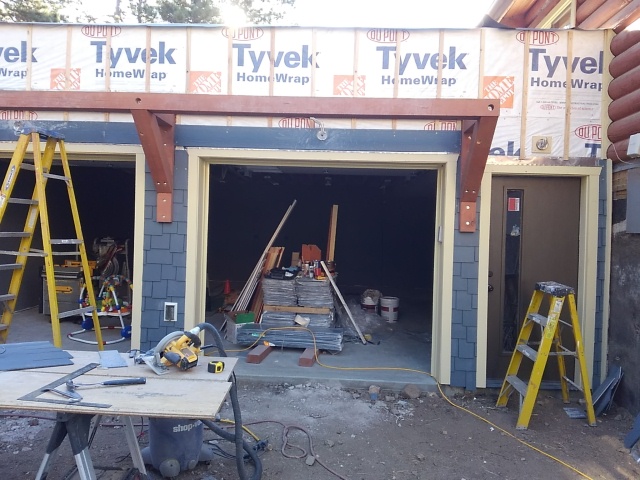
The architecture plans for the garage called for a decorative trellis. This single structure was the source of much debate in the garage build; unusual for two people who usually make their decisions quickly.
Without the trellis, the garage was going to have a very large, um, “forehead” (monotonous stretch of shingles above the garage door). The trellis would act like bangs and help add visual interest and help break up the shingles. The issue with adding the trellis is it had to be done before the shingles could be installed. The shingles had to be installed before the roof cap and flashing could be put on. And the exterior electrical work could be done. The roof cap and flashing and electrical work were essential to pass final inspection.
So one decorative feature had the potential to slow the entire project down. Added to the challenge, weather was the constant wild card. The project started in the snow (on the summer solstice!) which slowed excavation down and created longer cure times for concrete. September had arrived and the likelihood for snow was only increasing. The decision was made, and aesthetics won.
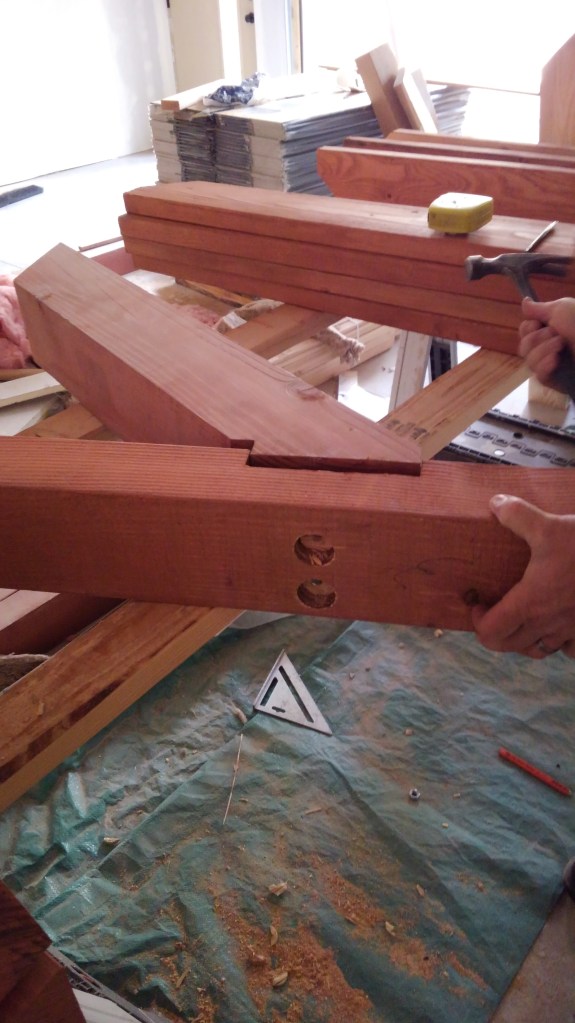
Jess was deemed competent enough to stain the pieces of wood that would make up the trellis, allowing Dave to focus on work and other garage tasks. Dave poured over architectural and engineering plans working out how to execute what was draw. This truly was the hardest part – determining how to mount the supports to the wall, making sure everything was positioned properly, and ensuring everything was even.
After that, getting a 16 foot 6×6 beam installed on the trellis support provided some suspenseful moments. Fortunately, Jess’ parents were in town, so Evan and Alex would be well cared for if the beam crushed Jess and Dave to death. As always, the job site is in no way OSHA compliant, so Jess and Dave hoisted the beam into position by each taking an end and climbing up a ladder. The beam had three pre-drilled holes to slip over the bolts in the trellis cross bracing; for the safest installation, all three bolts had to go through the holes simultaneously. To add to the challenge, one bolt was slightly askew, thwarting the simultaneous positioning plan. 2 of the 3 bolts were secured, and Dave used a mallet to get the third bolt through the beam. Jess’ parents were a huge help in ensuring that the beam installation was successful. It was definitely a 4 person job to position the beam.
Trellis cross supports
Trellis bracing
Close-up of bracing recess
Trellis support full assembled
Trellis support mounted. Ladder positioned for beam install
Trellis supports mounted, ladder positioned for beam install.
Beam installation a success! No one died.
Trellis construction and installation.
After the beam was placed, work on the siding began. The finishing details of the trellis could wait until after siding was installed. While the architectural plans called for plank siding, there were concerns how it would look against the horizontal logs of the house. Other options were weighed -specifically shingles and vertical siding. The staggered shingle was the preferred choice.
To ensure we weren’t straying from mountain home style, an informal survey was done by driving around town to determine if other houses/businesses used shingle siding. It was determined that yes, shingles are used more frequently than thought, and using them on the garage (and eventually house) would not be outside of design norms.
To help improve the house’s fire resistance, HardieShingle staggered panels were used. We were familiar with the product, having used it previously on our Delaware house (straight edge panel). Based on that experience, we ordered the circular saw blade specific for cutting cement board siding. We still had the shears, but knew that the saw blade would give us cleaner cuts.
The initial siding work went quickly, but slowed down once the trellis and angular trim pieces were reached. Careful cuts had to be made. After this point, the challenge was holding the shingle only pieces in place as the construction adhesive set. With the siding completed, waiting for the roof to be finished could begin.
Siding slowly making its way upward.
Dave’s wooden “fingers” holding the shingles in place.
Completed trellis and siding.
Siding!
Skill level: Expert. Sorting through the engineering plans and executing them was the challenge. The plans were triple checked – the scale is critically important. Problem solving skills are key.
One of the annoyances of the this portion of the addition has been accessing the build site. The opening for the door into the house had to be delayed until the garage doors and exterior door were installed. As much as we enjoy the potential of entertaining bears, we decided it was best to wait until we were secure before breaching the wall between the house and the garage.
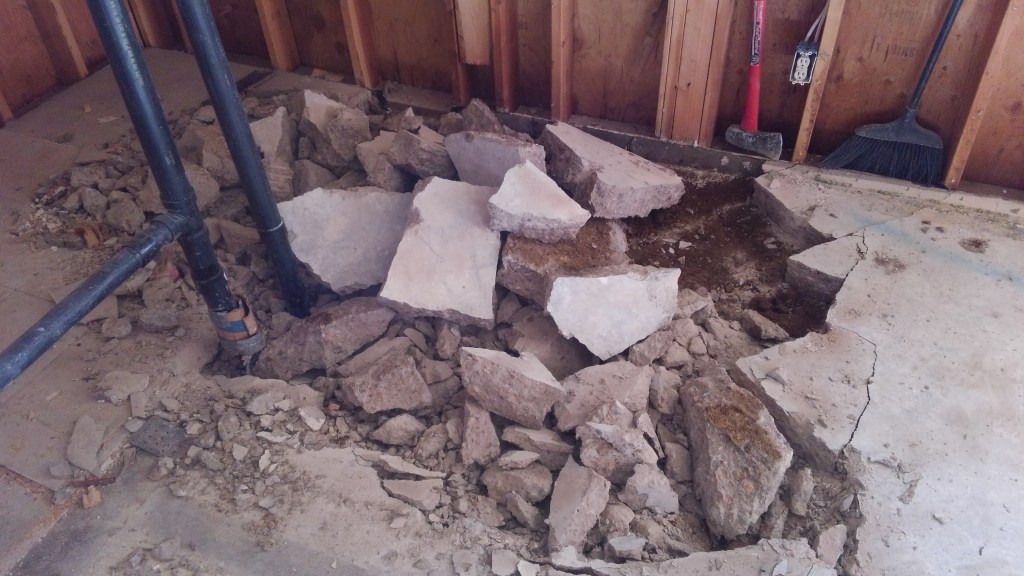
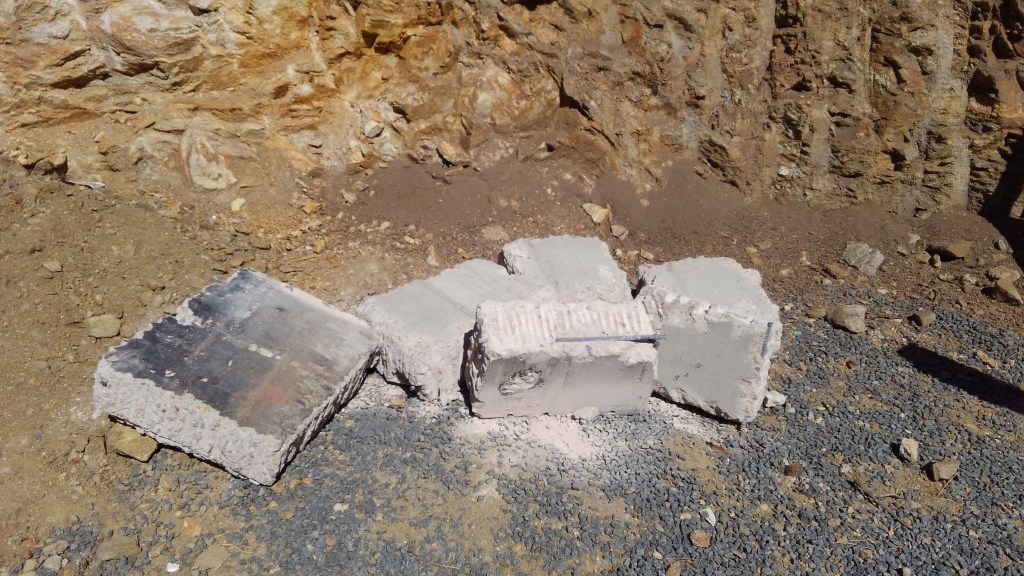
The process of breaching the wall was not for those who lack gumption. The poured concrete portion of the wall was 8 inches thick and reinforced with rebar (the foundation of this house is the one thing that was done correctly on this house; discovered during the wall breaching process). Fortunately for the project, Dave has gumption to spare.
Dave started by using a gas powered wet saw (Home Depot, rental department) to cut around the perimeter of the doorway. The saw blade only cut 4-5 inches deep. The idea was that once the cut was made, the wall would be weakened significantly and the doorway would open with a few hits of a sledge hammer. Unfortunately, this hypothesis was quickly proven false and a new plan was hatched.
Being the stubborn man of Scottish descent that he is, Dave took his impact driver, attached a masonry bit, and started drilling along the cut lines to further decrease the walls structural integrity. The DeWalt impact driver did its best, but the motor burned out. In further tribute to his ancestry, Dave replaced the motor on the impact driver. Realizing the tool was too small for the job at hand, a heavy duty Makita drill was rented (Home Depot, where else?) along with masonry and hammer drill bits. The perimeter was drilled and the sledge taken to the concrete wall. It still refused to budge.
Simple math was then employed and it was determined even if the entire section of wall could be knocked out in one piece, it would weigh over 1500 pounds and destroy the new concrete floor. So Dave decided that breaking the doorway into 8 sections would be the best option.
Dave continued to drill holes in the wall creating the 8 sections. When rebar was encountered, he drilled holes and chipped away at the concrete around the rebar. Once it was sufficiently exposed, Dave was able to cut the rebar with a grinder. This process was long, but ever so slowly the concrete wall came down.
Hope.
More hope.
Dave using the sledge to remove the last piece.
The fully breached concrete wall. Evan is trying to breach the baby gate.
The enemy, lying vanquished in pieces.
The process of breaching the concrete wall.
Even with the concrete removed, the process was not over. The door height was in no way legal unless you happen to be a hobbit. The next process was to cut out the top plate and a course of logs.
The challenge of removing the logs was the long pins between the courses to hold the walls together. The pins would definitely provide serious harm so care had to be used when going through the undersized door.
Compared to the concrete portion of the doorway, the top plate and logs were rather easy to remove. The laser level was employed to ensure that the doorway was cut square. Dave used a chainsaw to make the initial crude cuts and did the fine work with a saws-all. This was done quickly and soon enough there was a full sized door opening leading to the new garage!
It is always fun to take a chainsaw to your house. An example of the structural pins is visible in this photo.
Using a saws all to cut the along the joints between logs.
Wall sconce somehow surviving 😦
Removing the last piece .
Difficulty level (skills): low moderate – the tricky part was making sure the door opening was lined up properly with the stair landing and large enough (rough opening > finished opening). But if you can run a saw and swing a sledge, this job is in your wheelhouse.
Difficulty level (labor): extreme – this job was truly back breaking. The concrete was 8 inches thick and reinforced. We should have contracted this one out, but by the time that realization hit, Dave was far enough through the wall that he didn’t want to give up.
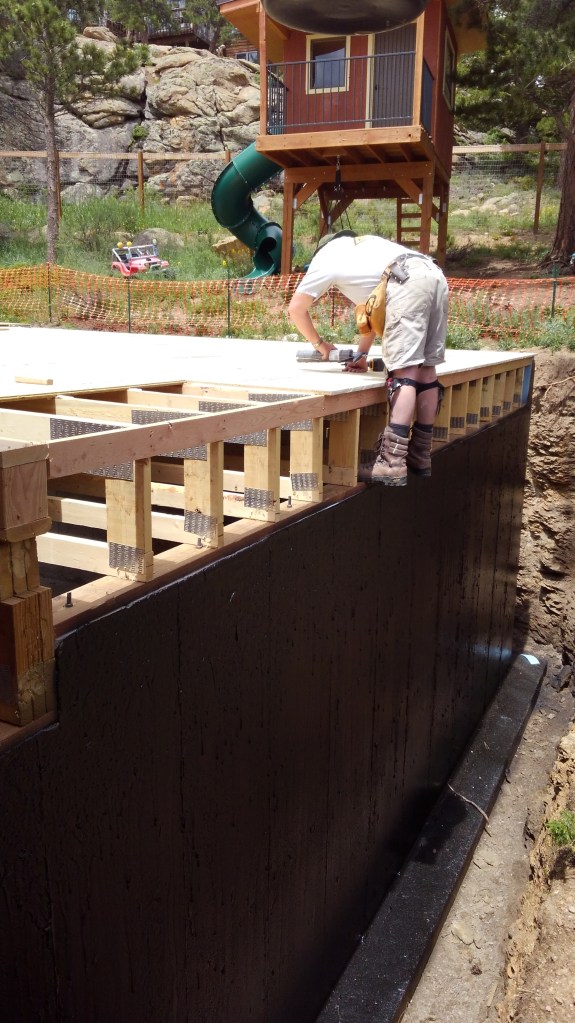
After a long excavation, jockeying for concrete, and getting the roof structure up, it was a relief to move on to interior work. While we weren’t completely weather tight since the roof membrane had not been installed, it was close enough to continue. The other relief was to have the pad poured and to be working on a flat surface. Setting up a ladder on gravel is not the most pleasant business.
All exterior walls received a layer of 1″ thick foam board, adhered with construction adhesive. This would seem like a simple task, but all the raised imperfections on the concrete walls had to be chipped away. Somehow, a piece of concrete debris always finds its way in behind one’s safety glasses. The end result of this step was a giant box that looked like it was papered in aluminum foil.
Once the insulation was up and taped (so it would function as a vapor barrier), it was time to start framing. The framing was relatively quick and easy because it there was only a single door to worry about. The front wall had already been framed to support the roof structure.
With these steps complete, the pile of construction supplies dwindled significantly. It was a rather bittersweet moment for the golden mantled ground squirrels because we removed their artificial habitat. However, we were pleased that we could move on with rough electrical. This occurred just after the roof membrane was installed.
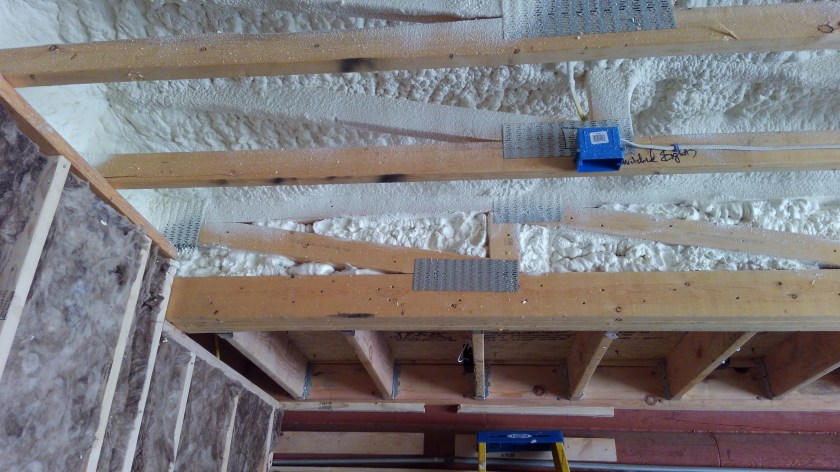
With rough electrical completed and inspection passed, we moved on to insulating the rest of the garage. The roof received approximately 7″ of spray foam (R-value ~49) and 2-layers recycled fiberglass batting (R-13) was installed between the studs and on the low roof.
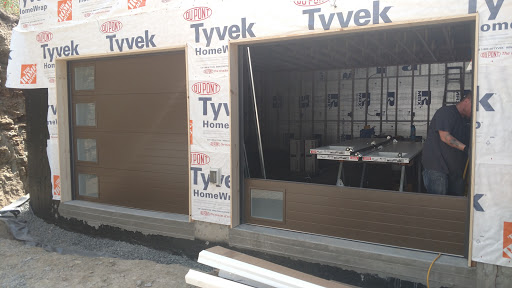
Additional progress was made when the garage doors were installed. We went with Clopay Modern Steel garage doors. The R-value was one of the highest we could find (R: 18.4). The modern style may seem a bit odd for a log home, but we are hoping to capture a modern rustic aesthetic. American Garage Door in Wheatridge, CO was the closest dealer. Seth was fantastic and was very patient as we tried to find the closest Sherwin Williams paint color to our preferred Benjamin Moore color (North Creek Brown). We didn’t quite nail it and the doors had to be repainted. A minor inconvenience for a really good looking door.
Alex playing on the garage roof membrane after watching “The Princess Bride”
Rigid foam insulation.
Spray foam insulation for ceiling
Good spray foam crew – caught that we had overlooked the knee wall.
Fiberglass insulation – no rigid foam because this is the shared wall with the house.
American Garage Door doing their thing.
Insulation and garage doors!
For the level of expertise – section was contracted out after we got the rigid foam board up. Spray foam is a bit of an art – if you put it on too thick it won’t cure right. If you are doing walls, you may have to shave it down. Better leave spray foam to the experts. They have the equipment and PPE. Installation of the garage was included in the price an the pros will get it done faster than we ever will. It was nice only having to worry about scheduling.
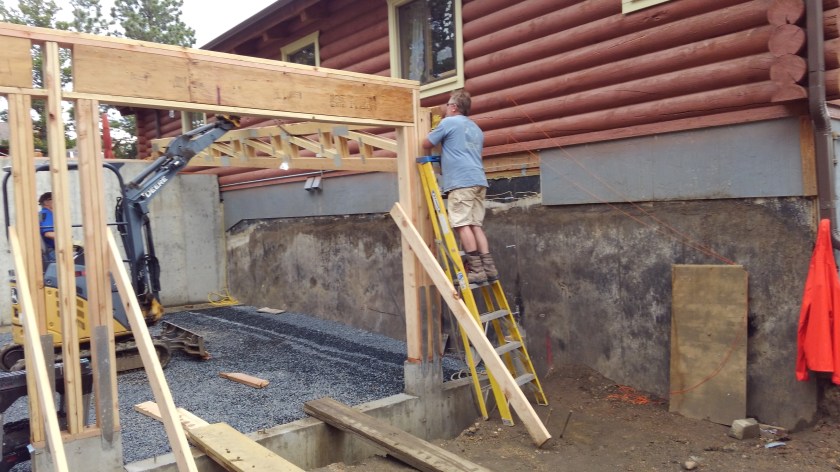
With the concrete walls set for the garage, it was time to build the front wall and get the roof trusses in place. . We were dreading the placement of what we simply dubbed, the “big truss”. Big truss is a 300 pound triple truss coming in at 26 feet long. The smaller trusses are singles at 26 feet long, and only weight 95 pounds.
It was key to ensure that the front wall was built properly – it supports the trusses. If the front wall height is incorrect, the roof will not slope properly leading to water drainage issues. Dave used his laser level to sight the wall heights and then ran plumb lines to ensure that everything as built to the appropriate height.
Dave and excavator Dave used his mini backhoe to move big truss into the garage. Big truss was so long, it could not be orientated properly in the build site. Dave and excavator Dave had to move the truss to the shared driveway, orientate it properly, and move it back to the build site (Jess was fortunately not home for this escapade). The escapade Jess got to witness was the lifting of big truss into place with the mini excavator. We are most definitely not a OSHA job site.
Front wall is being constructed. Orange string is the plumb line for the wall’s top plate.
Starting to lift big truss into place.
Big truss is getting closer to its resting place
Big truss is almost there.
Done! Big truss is secure.
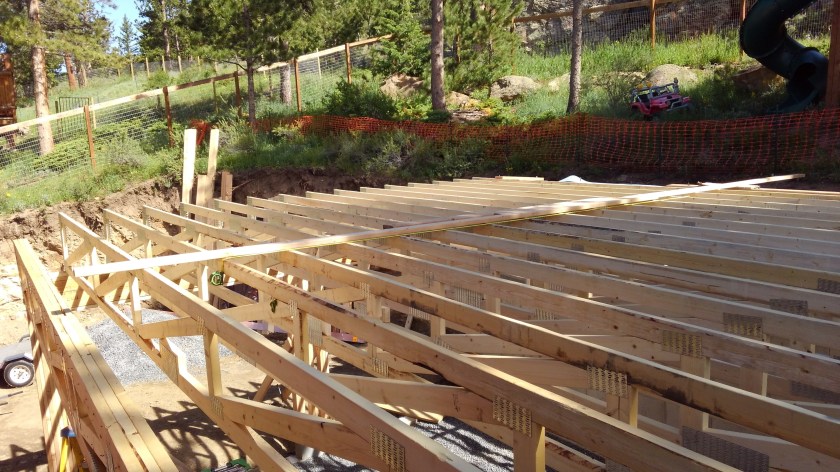
After big truss was secure, we used a materials lift (rented) to position the remaining 15 trusses. The materials lift was a back and lifesaver. The trusses were lifted and positioned 16 inches on center on the top plate of the front wall and rear concrete wall. Dave had pre-marked the top plate so the trusses could be quickly placed. Once the truss was in position, a nail gun was used to toe-nail the truss in place. The truss was then secured to a 2 x 4 running horizontally across the top to ensure that it remained 16 inches on center and perpendicular to the top plate. The tricky part to this step was the last two trusses – both had to be lifted to the top plates and secured to big truss. The reason for this was if the penultimate truss was placed, it would have prevented us from using the materials lift to get the last truss set.
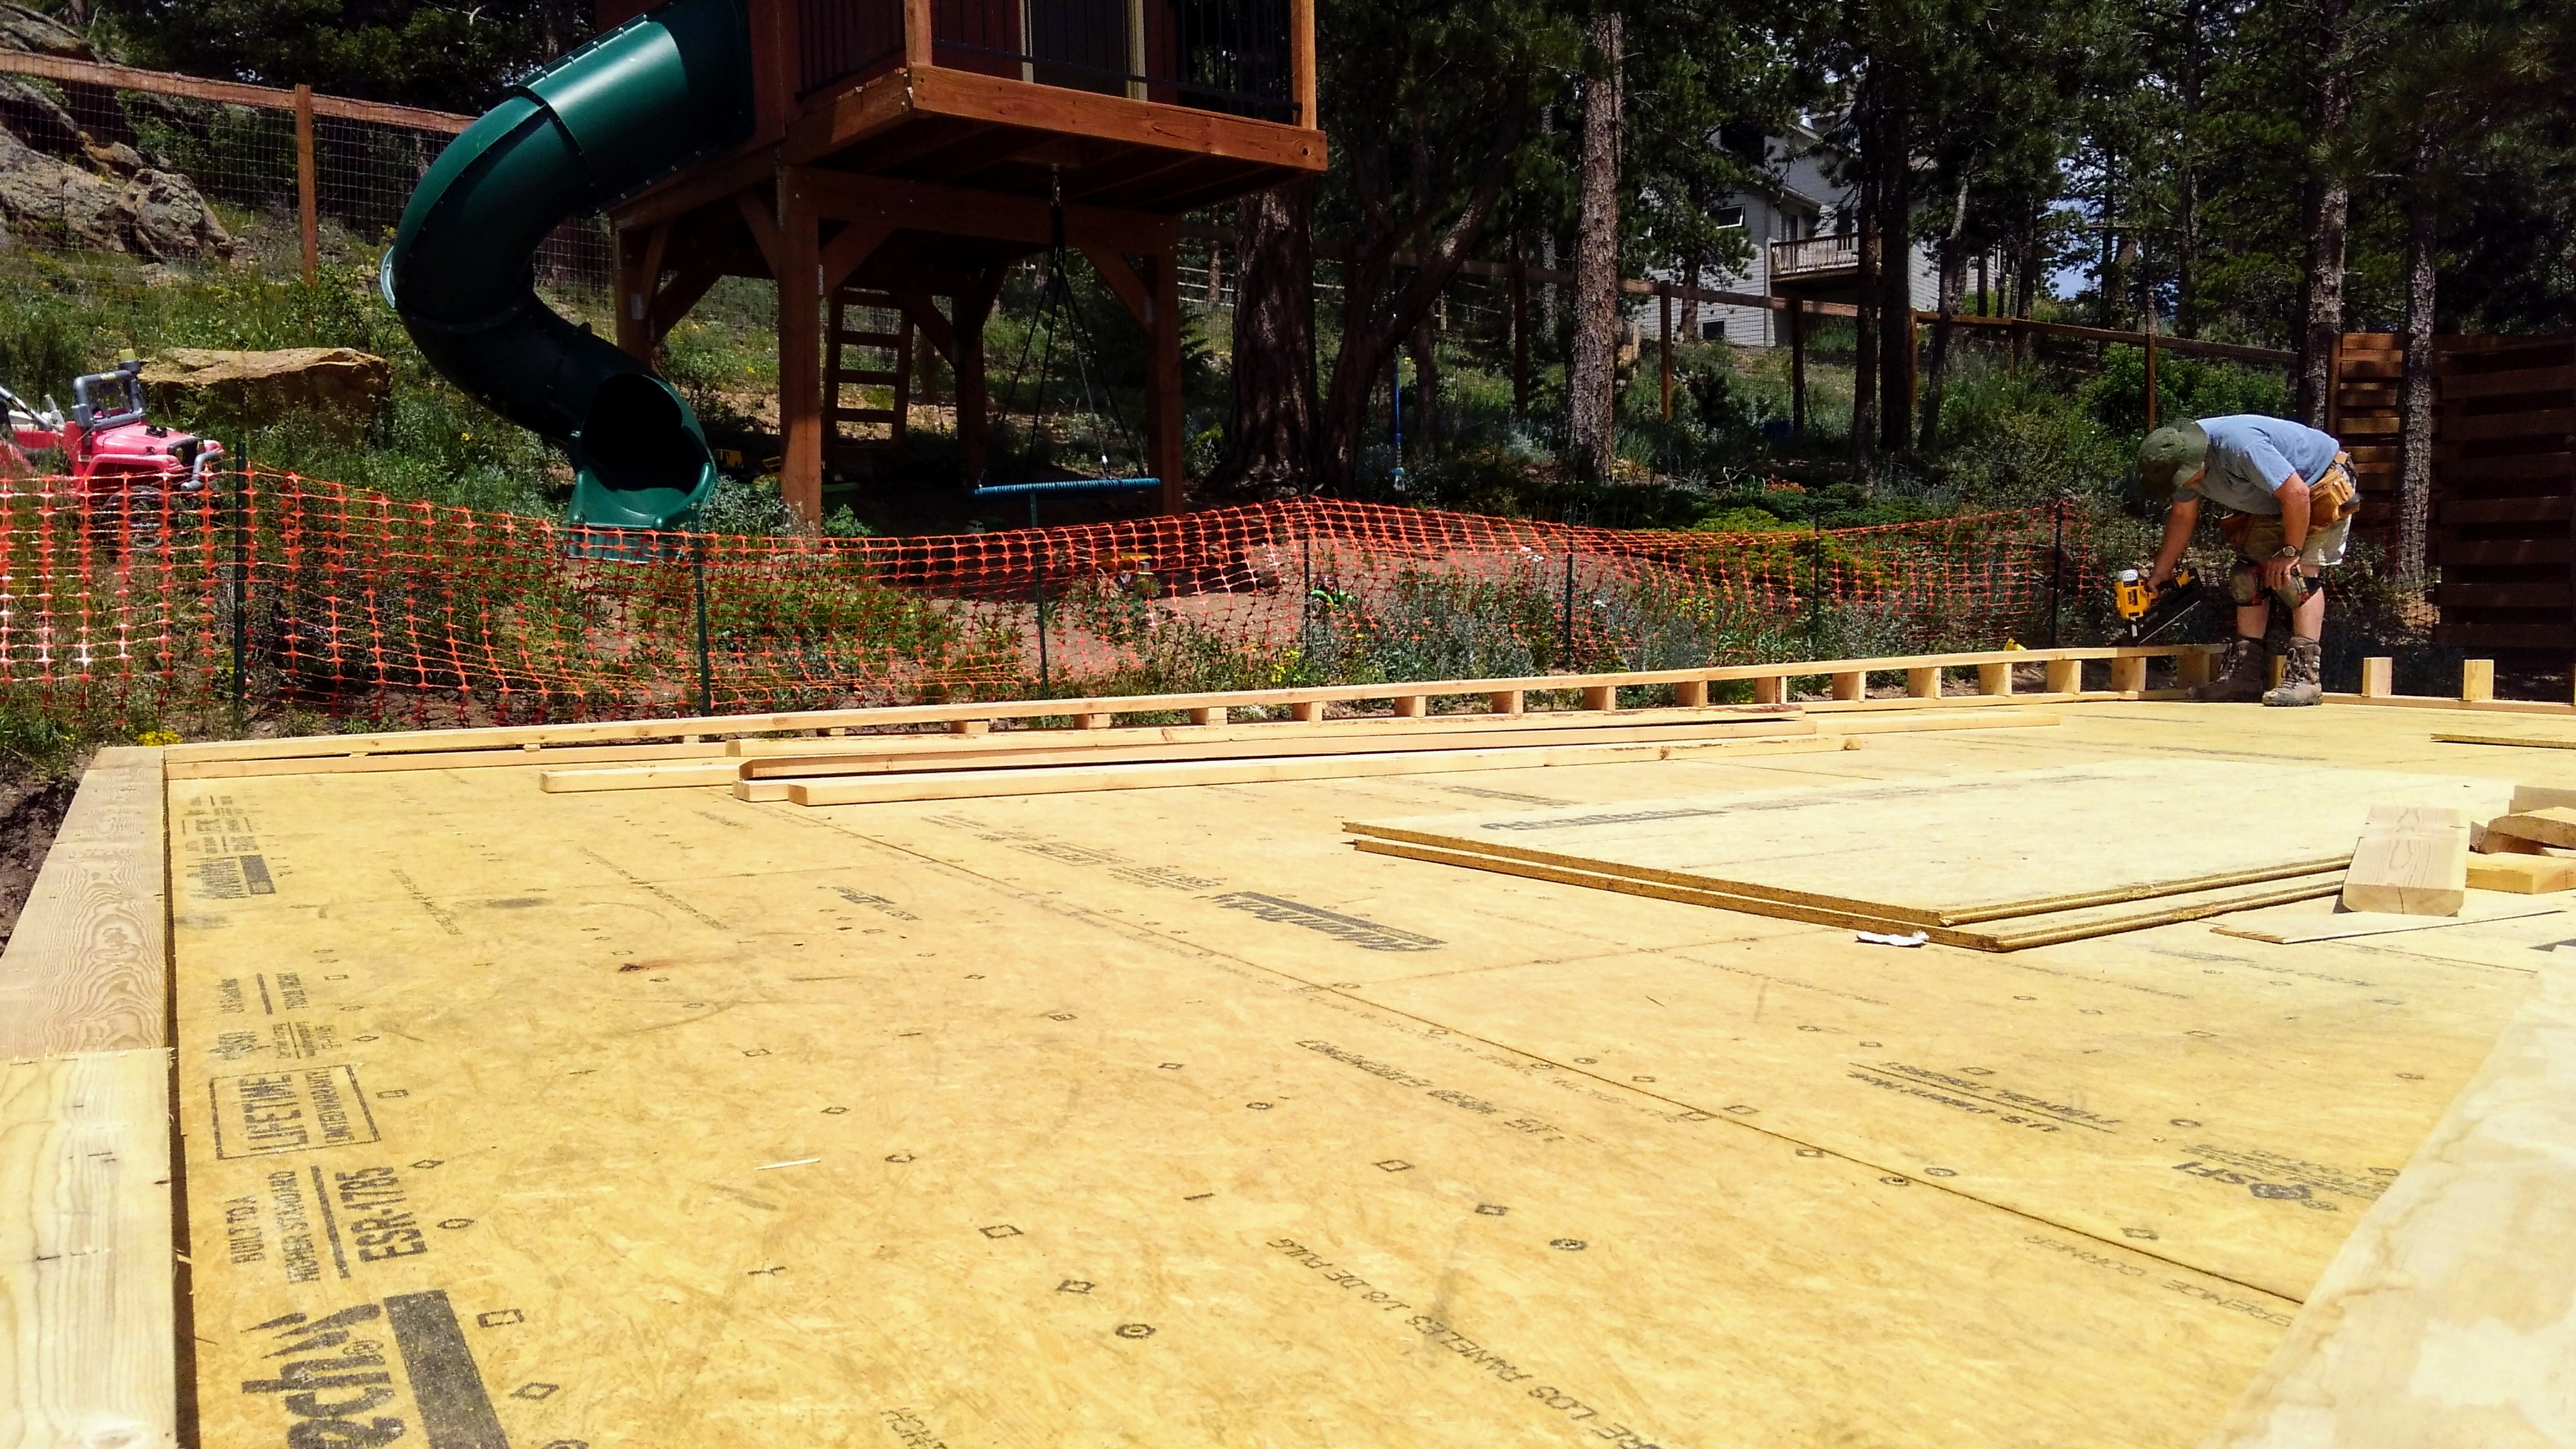
Once all the trusses were in place, the materials lift was used to get the decking sheets (Advantech) onto the roof. The first two sheets took the longest because they had to be secured in order to create a platform to place materials and work from. Construction adhesive and screws were used to secure the Advantech sheets to the trusses. Since the sheets are 4’x8′, it was key to have all the trusses 16″ on center to ensure that all the seams were located on a truss. Once the roof decking was on, the entire system was very sturdy.
The materials lift.
2×4 cross bracing to stabilize the trusses.
Roof decking material stacked up and ready to be attached.
Dave applying construction adhesive.
The rather perilous work installing the last row of decking
Our site supervisor, Alex, checking out progress.
Parapet wall construction.
Upon completion of the roof decking, Dave went on to build a parapet to hold the green roof material and the roof for the window well. To build the parapet wall, roof’s slope was taken into account. The wall is 4 inches high over the garage doors, increasing to 10 inches high to the rear of the garage.