


One of the annoyances of the this portion of the addition has been accessing the build site. The opening for the door into the house had to be delayed until the garage doors and exterior door were installed. As much as we enjoy the potential of entertaining bears, we decided it was best to wait until we were secure before breaching the wall between the house and the garage.
The process of breaching the wall was not for those who lack gumption. The poured concrete portion of the wall was 8 inches thick and reinforced with rebar (the foundation of this house is the one thing that was done correctly on this house; discovered during the wall breaching process). Fortunately for the project, Dave has gumption to spare.
Dave started by using a gas powered wet saw (Home Depot, rental department) to cut around the perimeter of the doorway. The saw blade only cut 4-5 inches deep. The idea was that once the cut was made, the wall would be weakened significantly and the doorway would open with a few hits of a sledge hammer. Unfortunately, this hypothesis was quickly proven false and a new plan was hatched.
Being the stubborn man of Scottish descent that he is, Dave took his impact driver, attached a masonry bit, and started drilling along the cut lines to further decrease the walls structural integrity. The DeWalt impact driver did its best, but the motor burned out. In further tribute to his ancestry, Dave replaced the motor on the impact driver. Realizing the tool was too small for the job at hand, a heavy duty Makita drill was rented (Home Depot, where else?) along with masonry and hammer drill bits. The perimeter was drilled and the sledge taken to the concrete wall. It still refused to budge.
Simple math was then employed and it was determined even if the entire section of wall could be knocked out in one piece, it would weigh over 1500 pounds and destroy the new concrete floor. So Dave decided that breaking the doorway into 8 sections would be the best option.
Dave continued to drill holes in the wall creating the 8 sections. When rebar was encountered, he drilled holes and chipped away at the concrete around the rebar. Once it was sufficiently exposed, Dave was able to cut the rebar with a grinder. This process was long, but ever so slowly the concrete wall came down.

Hope. 
More hope. 
Dave using the sledge to remove the last piece. 
The fully breached concrete wall. Evan is trying to breach the baby gate. 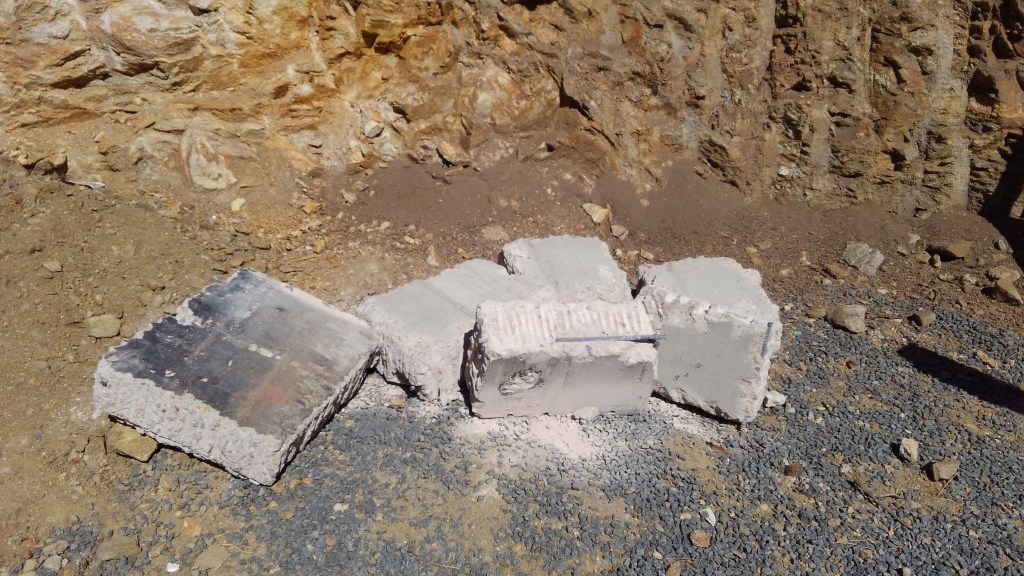
The enemy, lying vanquished in pieces.
Even with the concrete removed, the process was not over. The door height was in no way legal unless you happen to be a hobbit. The next process was to cut out the top plate and a course of logs.
The challenge of removing the logs was the long pins between the courses to hold the walls together. The pins would definitely provide serious harm so care had to be used when going through the undersized door.
Compared to the concrete portion of the doorway, the top plate and logs were rather easy to remove. The laser level was employed to ensure that the doorway was cut square. Dave used a chainsaw to make the initial crude cuts and did the fine work with a saws-all. This was done quickly and soon enough there was a full sized door opening leading to the new garage!

It is always fun to take a chainsaw to your house. An example of the structural pins is visible in this photo. 
Using a saws all to cut the along the joints between logs. 
Wall sconce somehow surviving 😦 
Removing the last piece .
Difficulty level (skills): low moderate – the tricky part was making sure the door opening was lined up properly with the stair landing and large enough (rough opening > finished opening). But if you can run a saw and swing a sledge, this job is in your wheelhouse.
Difficulty level (labor): extreme – this job was truly back breaking. The concrete was 8 inches thick and reinforced. We should have contracted this one out, but by the time that realization hit, Dave was far enough through the wall that he didn’t want to give up.
Pro tip: don’t engage Dave in a battle of wills.
