After all of Dave’s hard work, the blog seemed like a good place for his reflections as well as some answers to questions asked during the process (by ourselves or others). It always a good thing to publish a long forgotten draft.
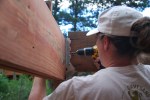
Q: How critical is that first row?
A: Extremely. Any mistake will be magnified in every following row. It will look terrible and there is the strong likelihood of having to rip a board (uneven and unsightly) or redo all the work. Or, ignore and let the next sap of a homeowner deal with it. Take the time, do it right the first time, starting at the first row.
Q: How did we ensure that all rows following the critical first row were done correctly? How did we keep the boards straight?
A: This is a benefit of manufactured decking. It is uniform coming from the factory. There was some slightly bowing due to transport and storage (the stuff is surprisingly flexible), but using clamps during the process solved that issue.
Pry bar and clamps to take the warp out of a board or adjust spacing.
For where wood was used (such as the framing), Dave took the time to hand select the pieces, eliminating anything that looked like snow skis (badly bowed).
Q: There is rot and structural deficiencies detailed in many photos. Wasn’t this caught on home inspection?
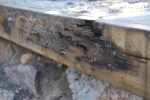
Dry rotted joist to be replaced.2 x 6 that is almost rotted through. The post that was askance and rotted out at the bottom was ‘attached’ in this area.
A: Some of it was. Our inspector found the issues with the stair joists and the cantilever. Unfortunately some of the issues were not visible until the decking was removed.
Q: What was holding parts of that deck together?
A: Nails. Luck. Carpenter ants holding hands and singing kumbaya.
With demolition parts one and two complete, along with the subsequent reassembly (one and two), the focus is fully on the stairs to the hot tub pad and the decking around it. Any hope that just perhaps this section of decking was done correctly was quickly lost. It was quickly evident that if this deck had been built in a more humid environment, it would have rotted away a dozen years ago. Even with the low humidity in Colorado, rotten spots were still found. Three cheers to the dry Colorado air. Enjoy the gallery of face palming construction decisions by a previous owner.
Critical Tools: Circular saw, pry bar, hammer, drill, pliers, knee pads, Sawzall, end of day margaritas.
Skill Level: Intermediate
Tip(s): Don’t use scrap wood to build a deck. Even if the scraps are a ‘good deal’.
The spacing between decking boards allows water to drain and air to circulate. Without the air circulation, the chances for rot are greatly increased.
Choose two of the three – good, fast, or cheap. Previous owners chose fast and cheap. Don’t be like the previous owners.
Gallery
Top of the stairs. Got to love it when folks are too lazy to cut an angle on the ‘reinforcing 2x4s’. Not helping to much when the 2×4’s aren’t properly installed (a grossly undersized solution) Nails will save the day!
No, nails won’t save the day if not enough were used and the board is rotting.
Bottom step pulled off. Drinking to commence.
Reinforcing 2×4 pulling away from stair horse.
Rotting 2×4? Check. Stair horse split by bolt? Check.
Stair horses were improperly over cut. The over cut essentially reduced the support to the equivalent provided by a 2×4. This is grossly undersized for stairs.
2×4 scraps being used to ‘reinforce’ the stair horses. This is NOT how to do things.
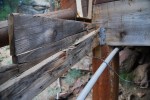
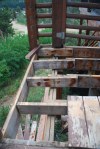
After the stairs and decking were removed, the framing was available for inspection. Band board starting to rot. How many pieces were used? Three. Not good.
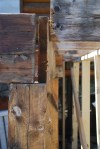
Nothing like having a free floating joint in space. No, this is not a marijuana reference. Note that the support post is 4 x 4. A 6 x 6 would be better.
So this band board joint is backed by a post. The post is sitting haphazardly on a rock. And there is a bolt going through the joint.
This craziness would make Jenga masters proud.
2 x 6 that is almost rotted through. The post that was askance and rotted out at the bottom was ‘attached’ in this area.
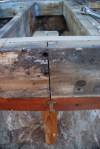
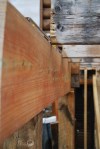
So they used brackets, good. Joist hangers, better. But only nailed
the brackets into the joists, not the band board. Very bad. Didn’t even bother to try and use chewing gum as a stickum. This devolves to . . .
. . . .no brackets. Just a few nails.
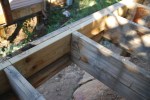
Ending on a high note. Joists overlap with inner band board by only two inches. Looks like mold has found a happy home.
So now that we have discovered the extent of the poor workmanship on the deck framing, it is time to repair the hazards and make this deck safe. Replacements included rotted support beams, an undersized beams, and improperly cantilevered joists. It is likely that the framing was not constructed fully from pressure treated lumber.
Check out the gallery captions for the nitty gritty details. Check out deck reassembly post 1 for information regarding the Trex installation. No Trex RainEscape here.
Preparation:Remove decking, curse at the unknown person(s) who built this portion of the deck
Critical Tools: Healthy amount of patience, well developed curse word vocabulary, screw gun, clamps, jig saw, circular saw, railing jig, level, nail gun, level, tap measure
Skill Level: Advanced/Expert. If you don’t know what you are doing, things will get ugly.
Tip(s): Step back to help see the forest for the trees. Some challenges are easily solved once it is determined the perceived problem does not affect the end goal.
Take the time to plan everything out. This will save so much trouble down the road.
Don’t go cheap on the materials. This is not the place to be a penny pinching skin flint. Don’t purchase your materials for some guy selling scraps of wood out of the back of his pick up. Buy real lumber. Pressure treated lumber.
Gallery
Test fitting a new beam to determine how far out of level the deck joists are.
Aluminum straight edge (re-purposed from drywall work) being used to confirm the extent of the joist sag.
Aluminum straight edge and level confirming that the sag has been removed from joists.
Using a marking line to help provide a visual edge for the measurement of the replacement beam.
Replacement beam (original was rotted and infested with carpenter ants AND too short) with first joist resting on it.
What do you mean vertical supports should be secured to the base?
Builder’s assistants 1 and 2 securing post to base with Simpson Strong Drive Connecting Screw.
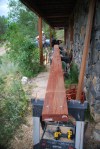
Replacement outer band board of the deck. Original was too short and constructed in two, non-overlapping pieces (bad). This 24 foot beam was constructed by taking two 16 foot long 2 X 10 and overlapping them 10 feet and securing with nails and 5/8″ X 5″ bolts every 2 feet. 6 foot lengths were used to fill in the ends.
New band board installed! Builder and builder’s assistant 1 managed to get it into place. Notice how the crown of the board is facing up. Crowns of each board using to construct the band board had to be be orientated in the same direction.
Replacement joist. Old joist was twisting and splitting.
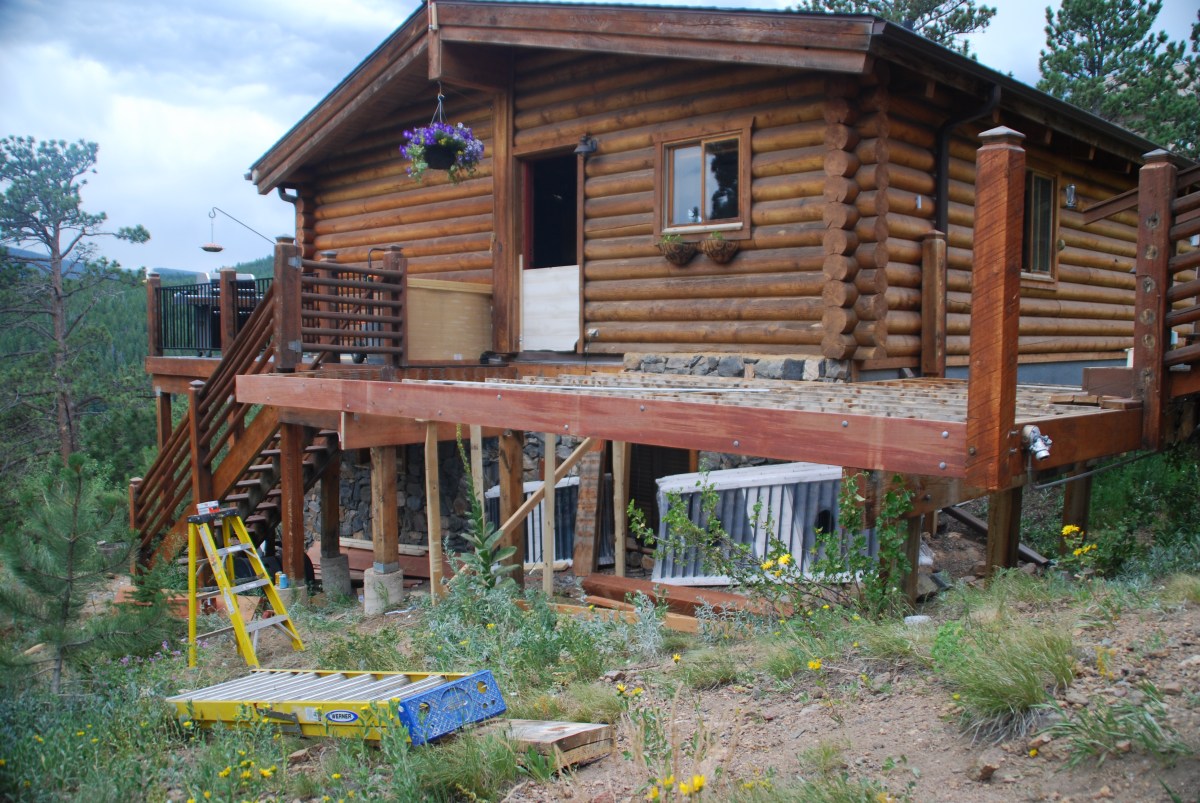
With Part 1 of the deck demolition and rebuild complete, we get to see what structural disasters are hidden in part 2. How can we be so confident that this portion of the deck is not structurally sound? The most visible symptoms is the drooping corner and the improperly cantilevered boards.
Once the decking came off, the situation was worse than originally thought. Check out the gallery below for great pictures of rotted boards and improperly done construction. This deck was permitted and it is hard to believe it passed inspection, a score and four years ago. It is amazing the deck didn’t collapse long ago. Time to do things right and repair this shoddy work.
Demolition went quickly using technique 3 described in the first demolition post. Tips described in the previous post also apply here.
Critical Tools: Circular saw, pry bar, hammer, drill, pliers, knee pads, Sawzall, end of day margaritas.
Skill Level: Intermediate
Tip(s): Don’t step on boards that have been cut with the circular saw. This will result in a painful trip through the deck.
Gallery:
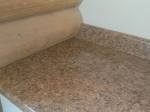
Bow in the old deck surface at the top of the stairs.
Deck board pulling away from others.
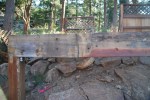
The leaning post is not indicative of good things.
Improperly done cantirlever is the reason for the deck slope. Shoddy construction essentially created a lever. Which also explains the bow in the deck surface.
The rotten wood might explain why the post is leaning.
Not a good thing when the rotting major support is held together by carpenter ants holding hands.
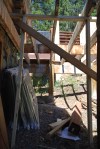
Temporary support of the joists after the rotten board was removed.
Next stage of the laundry room remodel is paint and cabinets! Paint is always a challenge. The laundry room original color scheme was mauve and tan, which simply had to go. We decided on a color scheme that had grey undertones, so that at least narrowed down our options from thousands to hundreds.
We settled on Balboa Mist (Benjamin Moore #1549) . A grey with blue/lavender undertones. Light in color because the laundry room is on the north side of the house and does not get a lot of natural light. In hindsight, we could have selected something with a little more color in it, but it works for now and we shall see if we are still liking it the next time our preferred paint comes on sale.
Preparation: Removed the single shelf from the wall and patched holes and the drywall bulge. Use fibrous tape when patching. Much better results and the homeowners that follow you won’t curse your repair nearly as vehemently.
Paint: Benjamin Moore Regal Select Matte Balboa Mist #1549. We have had a great experience with Benjamin Moore Regal Select paint. It is a thicker paint and provides excellent coverage. Durable as well.
Cabinets: All were Arcadia Diamond NOW cabinets available at Lowe’s. One sink cabinet, one 30″ wide base, one 30″W X 18″H wall, and one 36″W X 30″H (wanted 18″H, but that was ‘unavailable’ even to order).
Counter top: Laminate counter top purchased from Lowe’s. Since the picture is rather small on the website and doesn’t really get bigger with zooming, we took a it of a chance. Besides, it was sold in a 6 foot length and we needed just under 6 feet. Turned out fine. Nice combination of browns and golds.
Skill Level: Cabinets – intermediate; counter tops – expert. The counter tops would have been intermediate except for the log wall. That required a specialty cut utilizing a jig saw, planer, and palm sander. Fine details but the difference between wondering if the job was done by a professional or knowing it was done by the local yokel after a few beers. Check out this YouTube video for cutting laminate counter tops.
Tip(s): Buy a good laser level. It makes setting the cabinets so much easier.
Shark bites (or whatever brand you prefer). Spend the money. Hate plumbing work slightly less.
Spend the 40 or so dollars and buy the classic and affinity color fans (or the color fans for whatever line of paint you choose). We used to grab one or two of the color sample strips, take them home, decide we really didn’t like any of the colors, and go back to the store for more options. Having the color fans was SO. MUCH. EASIER.
When you show up at the paint store at 7 am, they assume you are a contractor and have an account.
Easiest way to keep an active toddler from helping? One parent takes the kiddo 2000 or so miles away to visit grandparents. This equates to almost a week of uninterrupted work.
Gallery
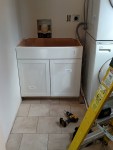
Plumbing modifications. Added valves for the sink and created an access point for the drain. Used existing washer plumbing.
Sink base cabinet in place.
New electrical outlet at counter top level. Hole had to be cut in the back of the base cabinet for a junction box where the lower outlet was.
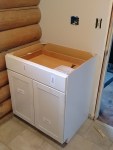
Base cabinet by door. Original plans called for it on window (log) wall. Application of logic indicated door swinging into entry doorway was not the best plan.
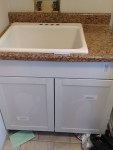
Utility sink and counter top installed.
Base cabinet with counter top by door. Original plans called for it on window (log) wall. Application of logic indicated door swinging into entry doorway was not the best plan.
Spacing blocks required to raise the counter top to prevent interference with the drawer.
Exterior side view of the counter top. The counter top lip would have interfered with the cabinet drawer without the spacing blocks.
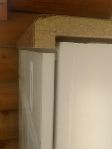
Close up of counter top meeting log wall. Required jigsaw, planer, and palm sander. A lot of work to make it look that pretty.
Utility sink with wall cabinet. Gap between the cabinet and washer/dryer stack is just big enough to slip a small step ladder – great for accessing the upper shelves.
Upper wall cabinet installed.
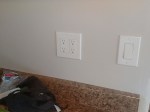
New outlets and light switch.
High shelving. We decided against cabinets to keep our costs down.
Hoses and wires neatly run. Washer connection box, once a dingy beige, freshly spray painted white. Devil’s in the details.