Denver Zoo

Destination: Denver Zoo, 2300 Steele Street, Denver, CO 80205

Date/Time: June 3, 9:45

Alex loves animals, so we decided to take him to the zoo for his birthday. This trip was a huge success. The Denver Zoo is very family friendly – you can bring your own food and drink (money saver!). Also, lots of families brought their own wagon for pulling the kids and food (we were not that smart, but next time). Unlike our standard herd of turtles approach, we were out of the house early and through the zoo gates at around quarter to ten. An earlier start is wise on beautiful, sunny weekend.

It was ungulate (hooved) animal week at the zoo. This meant that all the hooved animals were highlighted and there were some special activities going on. Like feeding the giraffes leaves! Alex absolutely loved this activity and said thank you to the giraffes when he was finished handing out leaves. Alex was also very excited to see the elephants.

In the North Shore area of the zoo, there is a great kid play area with a sand box and a ‘tidal pool’. Alex enjoyed the tidal pool immensely. It is amazing how wet he got splashing in water that was barely 2 inches deep in spots. We stopped for ice cream afterwards (Alex’s was free – part of the birthday bonus pack) and took off Alex’s pants to dry in the sun while we relaxed. Lots of sunshine and low humidity, his pants were almost dry in 20 minutes.

The zoo also has some great programs through out the day during feedings and show times. Check out the website. We found all the employees and volunteers to be very helpful and enthusiastic. There is also a carousel and train, but we are saving that fun for a future visit.

Peacocks, peahens, and geese roam freely on the zoo grounds. Be prepared to have a goose stare intently at you for food (don’t feed them) or witness a goose fight. The fuzzy goslings were adorable. Keeping Alex from chasing after the birds was challenging initially, but he quickly learned that walking near the birds was okay.

Fun fact: Giraffes have very long tongues (think foot plus) that they can wrap around objects they want to grip.
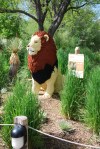
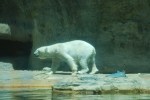
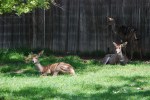
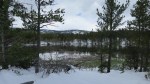
Gallery

Mud Lake

Destination: Mud Lake, Boulder County Open Space

Date: 5/21/2017

Time of Day: 10:30 am start. Herd of turtles again

Distance/Elevation/Difficulty: 1.9 miles (Tungsten and Kinnickinnick loops)/~300 feet/Easy

Time Elapsed: 90 minutes.

Trail map of Mud Lake

Comments: We could hike to Mud Lake from our house, but we didn’t want to add 1.2 miles through the spring snow to our hike. So we drove. We also remembered our YakTrax so walking on the packed snow was easier. The YakTrax worked well, but there were challenges with keeping them on our shoes. Snow would build up between the Trax and our shoes, dislodging the Trax. Alex did a great job in the snow and walked approximately a half mile before asking to be put in the Osprey.

During our hike, a couple of other hikers told us about a moose that was just off the trail. Unfortunately, the moose was gone by the time we arrived, as evidence in the tracks in the snow. Alex was disappointed but seemed to accept the explanation that ‘Mister Moose’ had to go home for lunch.

Part of the Tungsten loop borders Mud Lake Proper where we saw a beaver. Walking on, we saw a male and female duck pair (mallards, teals? They didn’t quack, but we are certain they were ducks of some sort) diving for food in the lake. Alex got a good giggle over the duck butts up in the air. Not a moose, but not a bad consolation prize.

Would we return? This is a great hike. Easy for the days where we don’t want to over exert our selves. Another advantage is the easy access from the house. Dave and Alex will be returning here for 9 weeks during the summer to participate in the Wild Bear Nature Center summer camp program.

Gallery

Aspen Alley

Destination: Aspen Alley, West Magnolia Recreation area

Date: 5/13/2017, our Mother’s Day weekend hike

Time of Day: 10 am start. Herd of turtles again

Distance/Elevation/Difficulty: 2.6 miles/462 feet/Easy

Time Elapsed: 90 minutes.

Comments: This area is known for encampments of homeless people. The summer weather is moderate and significant numbers of homeless people set up summer camps in this area. We didn’t see any camps on this hike.

Purple is the route we hiked out, orange is the route we hiked back.

We didn’t do the hike as listed on AllTrails. The route followed is shown below. The All Trails route includes the 342 loop around the clear cut area and 925. Coming back down 925B resulted in some slightly steeper and rockier terrain. We also ended up below the parking area and had to hike back up.

This area has some areas that were clear cut 3-5 years ago. This takes away from the scenic aspects of the hike while opening up some mountain vistas.

Would we return? This would be a beautiful hike in the fall after the aspens change color. There were some very nice aspen stands along the hike. There is a large number of trails in this area and overall this was an easy hike for when we want to get outdoors but not over exert ourselves.

Gallery

Lost Lake

Destination: Lost Lake in the Indian Peaks Wilderness

Date: 5/6/2017

Time of Day: 10 am start. This time reflects when we arrived, parked, got Alex loaded into his Osprey, and started walking towards the trail head. We are like a herd of turtles some days, and it was one of those days. This is a popular trail head on a beautiful spring day. We were parked in the designated parking area and were not forced to park in Eldora.

Distance/Elevation: 4.2 miles/931 feet

Time Elapsed: 3.5 – 4 hours. We did not hike around the lake, but this time includes Alex splashing in mud along the lake shore.

Comments: A beautiful hike. While there was a good amount of traffic, everyone was polite and all dogs encountered were leashed and well behaved. Upper half of trail was slippery with snow pack and we wished we had our YakTrax. Lesson learned for spring hiking. The Hessie trail head was about a 10 minute walk from the parking area, if the water level had been lower at a couple points, we would have attempted to drive to the trail head (2017 Subaru Outback).

Would we return? Definitely. There are campsites along the lake, we would like to hike up and go tent camping later in the summer. This would allow us to hike some of the other trails in the area.

Gallery


Master Bedroom: Finished Closet

The goals of the closet expansion was to

  1. Eliminate the illogically placed coat closet in the living room
  2. Increase our master bedroom closet space without truly extensive renovations
  3. Fit all of our clothes without requiring a dresser(s).

The verdict? Success! We ended up using  EasyClosets.com. Their DIY design interface was pretty easy to use and was truly DIY. Other sites wanted to send a consultant and we did not have time or tolerance for that. A consultant even verified that our design would work with our closet doors (more on that later). Only snafu was three drawers were missing from a box, one quick phone call later and they were shipped the next day. Other bonus of Easy Closets is two days after we ordered, the spring sale started. Asked nicely, and they retroactively applied the discount to our order. Will be ordering again from them.

So what was the deal with the closet doors? It wasn’t easy to get sliding doors on three separate tracks so 2/3 of the closet could be open at any given time. This was key to the closet organizer design. We thought we found the solution on Home Depot’s website, but the product had been discontinued. Dave ended up talking with the door guru who asked how handy he was. Dave responded that he was above average handy, and the guru proceeded to help him identify and order all the parts required to create the door. Only took 6 weeks for everything to come in.

So how are we doing without dressers? All of our clothes fit in the closet. It also helps that we are not clothes horses. And it also helps that we have a platform storage bed that can absorb some overflow as well as long term storage of seasonal items. Hanging more clothes and using the Kondo method for folding clothes made the no dresser system feasible. Gwyneth Paltrow’s Goop has a really useful tutorial. Swallow hard and follow the link, it was one of the best tutorials on the internet. It was truly amazing how much space the Kondo fold created in the drawers. Where did the dressers go? To a consignment shop in Fort Collins. With any luck, they sell.

Skill Level: Advanced intermediate. Doors were custom which meant there was no simple door with jam to install. Jams had to be built, track cut, spacers installed. The closet organizer was intermediate level assembly. If you can put together Ikea furniture, you will be fine. Hardest part of organizer install was getting the main support bar level and the proper height off of the floor.

Critical Tools: Laser level, hammer, screw gun

Gallery


Master Bath: Final Product

And after an eternity between the master bath demo and reassembly posts, pictures of a finished product! Well, let’s call it mostly finished. Curtains would help soften the log wall, but that will be a separate post when decisions are finally made.

The master bath has been functional for a month or two now; but we finally got the vast majority of the dry wall dust cleaned off the log walls, new towels (after determining we had our previous towels for over six years) and shower curtain purchased, and the closet door knob installed.

This is not a large bathroom, but it works well for us.

So glad for

  1. The double vanity. It is really nice having two separate sinks so we don’t have to stagger our night time routines.
  2. The medicine cabinets. Why houses built in the early 90s favored larger mirrors over medicine cabinets is beyond us. So happy to have a space to store our toiletries.
  3. The door to the bathroom. Our rental in Loveland had a master bath that was open to the bedroom; exception being the poopatorium. Ridiculous set up, especially if you have one person rising early for work.
  4. The upper storage. This utilizes the void space above the closet and dramatically increases the storage capabilities of the house. We already have our suitcases, Christmas decorations, and a couple of other miscellaneous storage boxes tucked up in this nook.

What we miss

  1. The separate poopatorium. It was nice having the toilet sequestered off so the rest of the bathroom could be used in tandem.

What the (far) future holds

  1. The current tile in the tube is a standard subway tile. Completely functional, just a little boring. Someday, this will be replaced.

Gallery

Master Bedroom: Closet Expansion

It is another demo and rebuild post! There seems to be a lot of demo and rebuilding posts (laundry room, master bath), but no posts showing the finished product. That would be a correct assessment. The answer is simple; because no room is completely done yet. The laundry room and master bath have been pushed to a point of functionality, but we still have a FinishingList. Why not finishing the finishing details? Well, we have a move in date in approximately 3 weeks. We want to get the really messy stuff done when we aren’t living there full time. The fine points can be done after we move in, if necessary.

That being said, what is being torn apart this time? The master bedroom closet and a coat closet on the other side of the wall (weirdest location, no where near a door that could be considered a main entrance of the house). The door to the coat closet will be walled in and the wall between the closets will be taken down. The opening of the closet in the master bedroom will be expanded. What can go wrong? Fun surprises like plumbing or vent pipes in the wall to be torn down. We can only wait and see.

No big surprises! A run of coaxial cable and nothing that would otherwise derail this project was found. Dave proceeded to close up the one opening and proceed with his favorite remodeling task – drywall work. Too bad Alex didn’t get to enjoy the giant running loop created by the removal of the wall.

So the question is, what are we going to do with the unpainted space? Built in cabinets. That is for another post though.

Preparation: Remove trim

Critical Tools: Sawzall, hammer, pry bar, beer

Skill Level: Medium – to reduce drywall repairs to the closet opening, you have to be careful with what you take down.

Tip(s): Measure carefully and be judicious in what you take down. If too much is taken down, more work will be created when you have to put it all back up.

Living in a drywall work environment is unpleasant. Sand when the least amount of people are around.

Gallery

Master Bath: Reassembly

What comes apart must go back together! After the fun of demo, the master bath needed to be reassembled. We have been enjoying sharing the hall bath with Alex, but it would be nice to have our own bathroom back.

So, what was involved in the reassembly? First, some unplanned work. In the demo post, the recessed medicine cabinet plan was thwarted by the sink vent pipe and forcing the cabinets to become surface mounted. Like a butterfly flapping its wings and causing a hurricane on the other side of the world, the vent pipe location increased the work load. First, the recessed cut out had to be repaired. Then, a box had to be built as a mount for the lights above the medicine cabinet. Why build this box? Without the box, the lights would be shining directly over the medicine cabinet. The box provides the proper clearance for the lights. This would not have been necessary if the cabinets could have been recessed like originally planned.

Second, in addition to drywall repair, was the hanging of new drywall over the newly framed closet and elevated storage area. All the seams needed to be mudded, taped, and mudded. The walls were sanded smooth and were ready for primer and paint.

The toilet was the third stage of the master bath reassembly. A new wax ring and toilet flange extension. The old wax ring is best if used once. A new one cost $6, which is a small price to pay to prevent sewage leaking. The toilet flange extension was required because we increased the depth of the floor. Don’t forget to purchase new bolts as well. Otherwise you might just have to go out to the store. Again.

And finally, the vanity. The vanity is a beast – it was very interesting to carry it up to the main floor from the garage. The quality of the construction was evident when the holes were drilled for the water and sewer lines – no MDF here, but real plywood.

Skill Level: Expert. Why? Drywall. Custom wooden box build. Wiring work (switching out light fixtures). Plumbing work. Drilling a vanity cabinet for plumbing work. Don’t attempt if you can’t put together IKEA furniture. Even if you have, find a friend with construction experience.

Critical tools: All of them. And the kitchen sink for good measure. Select tools: Drywall (spackling knives, drywall saw, screw gun, nail gun); plumbing (PEX crimpers, hole saw, saw to cut pipe); electrical (wire cutters, wire strippers)

Tips:  Add your sink hardware before setting the vanity top on base.

Paint before setting toilet and vanity. Reduces cut in work, saves time.

Try and coordinate drywall for all projects and hire it out to the pros.

Don’t reuse the toilet’s wax ring.

Paint: Benjamin Moore Regal Select Matte Finish Blue Heather (1620).

Vanity: Wyndham Collection Sheffield Espresso

Lights: allen & roth Merington

Medicine Cabinet: Kohler Aluminum Cabinet


Master Bath: Demolition

With the major work in the laundry room completed and those nagging fine details left, we have begun to focus our efforts on the master bath. So what are we doing to this move in ready bathroom? New flooring, paint, single vanity is being replaced with a double. This means the existing linen closet is going to be replaced with a smaller one. Smart moves for a house that is already short on storage. We hope to recoup some of our lost linen closet storage space with some overhead cubbies.

What the master bath looked like before we decided to overhaul it.

First step of the process – demolition! First sub-step of demolition – remove the toilet and vanity. The vanity was not installed correctly, so removing it was a simple as dragging it out of the bathroom (once the plumbing connections were disconnected). The vanity will be given a new top a re-used in the hall bath. Until that day, it shall live in the garage. Next sub-step of demolition was the removal of the shelves from the linen closet followed by the drywall. Stripping off the drywall was the moment of truth – and we were lucky. No nasty surprised like a pipe in the wall we wanted to remove. The project can proceed unhindered! The framing was removed and was in such good shape it could be reused.

The floor tiles, vinyl, but not peel and stick, were well adhered to subfloor with mastic. With the exception of a few tiles in the closet that were pulling up, the tiles were not removed. 3/8″ plywood was screwed down on top of the tile to provide a clean surface for the thin-set to adhere to. Check out our first laundry room post for flooring details.

Final part of the demo process was creating the cut-outs for the recessed medicine cabinets. Our first surprise arrived in the form of a vent pipe where the cabinet was supposed to be recessed. Since the cabinets are recess or surface mount, plans were changed and the medicine cabinets will now be mounted on the wall surface.

Preparation: Remove light fixtures, toilet, vanity

Critical Tools: Sawzall, hammer, scraper, wrenches, strong back, beer

Skill Level: Easy

Tip(s): Have more trash bags than you think you are going to need. When in doubt, buy the big box of heavy duty contractor bags. Drywall weighs a lot.

Don’t use your tools of destruction recklessly. Recover and reuse what you can.

Drain the water from the toilet. Wear rubber gloves and have an old towel that you can throw away. You need that towel to stuff in the sewer pipe (the hole in the floor).

Turn off your water valves.

Gallery

Laundry Room: Paint, Cabinets, and Countertops

Next stage of the laundry room remodel is paint and cabinets! Paint is always a challenge. The laundry room original color scheme was mauve and tan, which simply had to go. We decided on a color scheme that had grey undertones, so that at least narrowed down our options from thousands to hundreds.

We settled on Balboa Mist (Benjamin Moore #1549) . A grey with blue/lavender undertones. Light in color because the laundry room is on the north side of the house and does not get a lot of natural light. In hindsight, we could have selected something with a little more color in it, but it works for now and we shall see if we are still liking it the next time our preferred paint comes on sale.

Preparation: Removed the single shelf from the wall and patched holes and the drywall bulge. Use fibrous tape when patching. Much better results and the homeowners that follow you won’t curse your repair nearly as vehemently.

Paint: Benjamin Moore Regal Select Matte Balboa Mist #1549. We have had a great experience with Benjamin Moore Regal Select paint. It is a thicker paint and provides excellent coverage. Durable as well.

Cabinets: All were Arcadia Diamond NOW cabinets available at Lowe’s. One sink cabinet, one 30″ wide base, one 30″W X 18″H wall, and one 36″W X 30″H (wanted 18″H, but that was ‘unavailable’ even to order).

Counter top: Laminate counter top purchased from Lowe’s. Since the picture is rather small on the website and doesn’t really get bigger with zooming, we took a it of a chance. Besides, it was sold in a 6 foot length and we needed just under 6 feet. Turned out fine. Nice combination of browns and golds.

Critical Tools: Laser level, Dewalt drill/driver, jigsaw, planer, palm sander, pipe cutter, oscillating tool

Skill Level: Cabinets – intermediate; counter tops – expert. The counter tops would have been intermediate except for the log wall. That required a specialty cut utilizing a jig saw, planer, and palm sander. Fine details but the difference between wondering if the job was done by a professional or knowing it was done by the local yokel after a few beers. Check out this YouTube video for cutting laminate counter tops.

Tip(s): Buy a good laser level. It makes setting the cabinets so much easier.

Shark bites (or whatever brand you prefer). Spend the money. Hate plumbing work slightly less.

Spend the 40 or so dollars and buy the classic and affinity color fans (or the color fans for whatever line of paint you choose). We used to grab one or two of the color sample strips, take them home, decide we really didn’t like any of the colors, and go back to the store for more options. Having the color fans was SO. MUCH. EASIER.

When you show up at the paint store at 7 am, they assume you are a contractor and have an account.

Easiest way to keep an active toddler from helping? One parent takes the kiddo 2000 or so miles away to visit grandparents. This equates to almost a week of uninterrupted work.

Gallery