

What comes apart must go back together! After the fun of demo, the master bath needed to be reassembled. We have been enjoying sharing the hall bath with Alex, but it would be nice to have our own bathroom back.
So, what was involved in the reassembly? First, some unplanned work. In the demo post, the recessed medicine cabinet plan was thwarted by the sink vent pipe and forcing the cabinets to become surface mounted. Like a butterfly flapping its wings and causing a hurricane on the other side of the world, the vent pipe location increased the work load. First, the recessed cut out had to be repaired. Then, a box had to be built as a mount for the lights above the medicine cabinet. Why build this box? Without the box, the lights would be shining directly over the medicine cabinet. The box provides the proper clearance for the lights. This would not have been necessary if the cabinets could have been recessed like originally planned.
Second, in addition to drywall repair, was the hanging of new drywall over the newly framed closet and elevated storage area. All the seams needed to be mudded, taped, and mudded. The walls were sanded smooth and were ready for primer and paint.
The toilet was the third stage of the master bath reassembly. A new wax ring and toilet flange extension. The old wax ring is best if used once. A new one cost $6, which is a small price to pay to prevent sewage leaking. The toilet flange extension was required because we increased the depth of the floor. Don’t forget to purchase new bolts as well. Otherwise you might just have to go out to the store. Again.
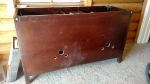
And finally, the vanity. The vanity is a beast – it was very interesting to carry it up to the main floor from the garage. The quality of the construction was evident when the holes were drilled for the water and sewer lines – no MDF here, but real plywood.
Skill Level: Expert. Why? Drywall. Custom wooden box build. Wiring work (switching out light fixtures). Plumbing work. Drilling a vanity cabinet for plumbing work. Don’t attempt if you can’t put together IKEA furniture. Even if you have, find a friend with construction experience.
Critical tools: All of them. And the kitchen sink for good measure. Select tools: Drywall (spackling knives, drywall saw, screw gun, nail gun); plumbing (PEX crimpers, hole saw, saw to cut pipe); electrical (wire cutters, wire strippers)
Tips: Add your sink hardware before setting the vanity top on base.
Paint before setting toilet and vanity. Reduces cut in work, saves time.
Try and coordinate drywall for all projects and hire it out to the pros.
Don’t reuse the toilet’s wax ring.
Paint: Benjamin Moore Regal Select Matte Finish Blue Heather (1620).
Vanity: Wyndham Collection Sheffield Espresso
Lights: allen & roth Merington
Medicine Cabinet: Kohler Aluminum Cabinet


2 thoughts on “Master Bath: Reassembly”