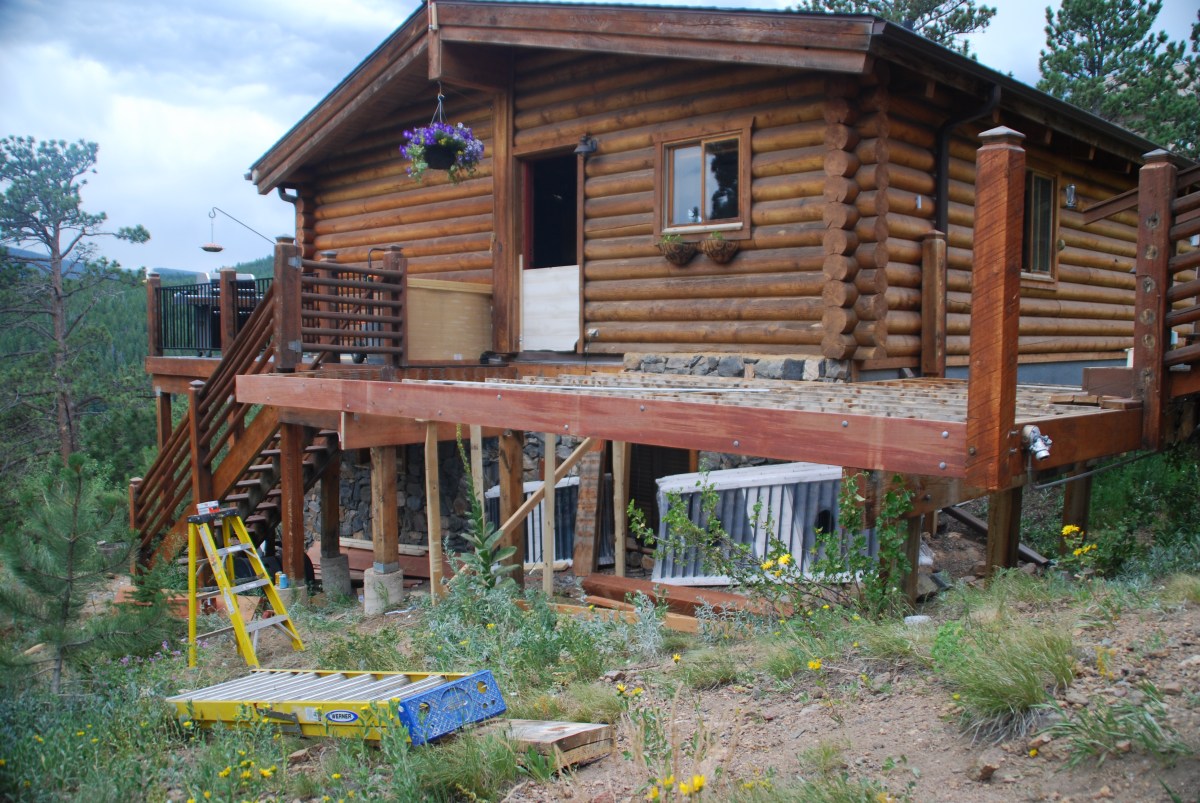
With demolition parts one and two complete, along with the subsequent reassembly (one and two), the focus is fully on the stairs to the hot tub pad and the decking around it. Any hope that just perhaps this section of decking was done correctly was quickly lost. It was quickly evident that if this deck had been built in a more humid environment, it would have rotted away a dozen years ago. Even with the low humidity in Colorado, rotten spots were still found. Three cheers to the dry Colorado air. Enjoy the gallery of face palming construction decisions by a previous owner.
Critical Tools: Circular saw, pry bar, hammer, drill, pliers, knee pads, Sawzall, end of day margaritas.
Skill Level: Intermediate
Tip(s): Don’t use scrap wood to build a deck. Even if the scraps are a ‘good deal’.
The spacing between decking boards allows water to drain and air to circulate. Without the air circulation, the chances for rot are greatly increased.
Choose two of the three – good, fast, or cheap. Previous owners chose fast and cheap. Don’t be like the previous owners.
Gallery
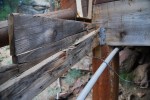
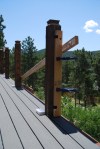
Top of the stairs. Got to love it when folks are too lazy to cut an angle on the ‘reinforcing 2x4s’. Not helping to much when the 2×4’s aren’t properly installed (a grossly undersized solution) Nails will save the day!
No, nails won’t save the day if not enough were used and the board is rotting.
Bottom step pulled off. Drinking to commence.
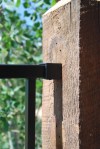
Reinforcing 2×4 pulling away from stair horse.
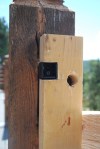
Rotting 2×4? Check. Stair horse split by bolt? Check.
Stair horses were improperly over cut. The over cut essentially reduced the support to the equivalent provided by a 2×4. This is grossly undersized for stairs.
2×4 scraps being used to ‘reinforce’ the stair horses. This is NOT how to do things.
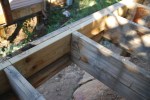
After the stairs and decking were removed, the framing was available for inspection. Band board starting to rot. How many pieces were used? Three. Not good.
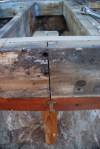
Nothing like having a free floating joint in space. No, this is not a marijuana reference. Note that the support post is 4 x 4. A 6 x 6 would be better.
So this band board joint is backed by a post. The post is sitting haphazardly on a rock. And there is a bolt going through the joint.
This craziness would make Jenga masters proud.
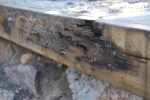
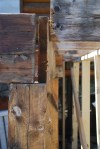
2 x 6 that is almost rotted through. The post that was askance and rotted out at the bottom was ‘attached’ in this area.
So they used brackets, good. Joist hangers, better. But only nailed
the brackets into the joists, not the band board. Very bad. Didn’t even bother to try and use chewing gum as a stickum. This devolves to . . .
. . . .no brackets. Just a few nails.
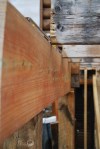
Ending on a high note. Joists overlap with inner band board by only two inches. Looks like mold has found a happy home.
So now that we have discovered the extent of the poor workmanship on the deck framing, it is time to repair the hazards and make this deck safe. Replacements included rotted support beams, an undersized beams, and improperly cantilevered joists. It is likely that the framing was not constructed fully from pressure treated lumber.
Check out the gallery captions for the nitty gritty details. Check out deck reassembly post 1 for information regarding the Trex installation. No Trex RainEscape here.
Preparation:Remove decking, curse at the unknown person(s) who built this portion of the deck
Critical Tools: Healthy amount of patience, well developed curse word vocabulary, screw gun, clamps, jig saw, circular saw, railing jig, level, nail gun, level, tap measure
Skill Level: Advanced/Expert. If you don’t know what you are doing, things will get ugly.
Tip(s): Step back to help see the forest for the trees. Some challenges are easily solved once it is determined the perceived problem does not affect the end goal.
Take the time to plan everything out. This will save so much trouble down the road.
Don’t go cheap on the materials. This is not the place to be a penny pinching skin flint. Don’t purchase your materials for some guy selling scraps of wood out of the back of his pick up. Buy real lumber. Pressure treated lumber.
Gallery
Test fitting a new beam to determine how far out of level the deck joists are.
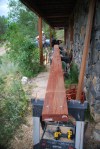
Aluminum straight edge (re-purposed from drywall work) being used to confirm the extent of the joist sag.
Aluminum straight edge and level confirming that the sag has been removed from joists.
Using a marking line to help provide a visual edge for the measurement of the replacement beam.
Replacement beam (original was rotted and infested with carpenter ants AND too short) with first joist resting on it.
What do you mean vertical supports should be secured to the base?
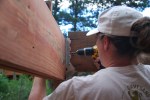
Builder’s assistants 1 and 2 securing post to base with Simpson Strong Drive Connecting Screw.
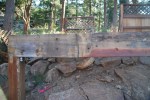
Replacement outer band board of the deck. Original was too short and constructed in two, non-overlapping pieces (bad). This 24 foot beam was constructed by taking two 16 foot long 2 X 10 and overlapping them 10 feet and securing with nails and 5/8″ X 5″ bolts every 2 feet. 6 foot lengths were used to fill in the ends.
New band board installed! Builder and builder’s assistant 1 managed to get it into place. Notice how the crown of the board is facing up. Crowns of each board using to construct the band board had to be be orientated in the same direction.
Replacement joist. Old joist was twisting and splitting.
What is demolished must be rebuilt. At least that is the logic for the deck – we need somewhere to drink our margaritas. The first two parts of the deck to be demolished and reassembled are the front of the house and the side to the kitchen door. These were thought to be the easy portion of the deck repair until the struggles of demolition were encountered (see demolition post part 1). Once these two sections are done, the deck will be over halfway done area wise and about 25% done work wise.
In the planning for the future part of the deck reassembly, Trex RainEscape is being installed under the decking along the front of the house. This system redirects rainwater and snow melt from dripping under the deck. So if you have grand plans to have a dry outdoor living space under your deck in the future, spend the money and install the system when you first put down the new decking.
We made the decision that we wanted the decking to run in the same direction, instead of running parallel to each side of the house. Front of the house was no problem – one small section of joists was replaced; the new joist orientation is perpendicular to the original. This was done there would be something to secure the decking to in the direction we wanted. The larger problem was the side deck up to the kitchen door. The joists ran the wrong way for the deck direction and did not need to be replaced. The solution? Blocking, nailed in perpendicular between the joists.
Railing is by Fortress. It is iron with 4 layers of black powder coat. Here’s to hoping it lives up to its name and keeps Alex in and isn’t too damaged with multiple Tonka dump truck crashes.
Tip(s): Like with tile flooring, get your first board right. Everything else builds off of this board and if it isn’t square, the problem will only amplify.
Eat your Wheaties for breakfast. The Trex boards are heavy.
Trex boards may need to be trimmed slightly so they end at the center of the joist. Unless your carpenter was Jesus, the joists may vary slightly in their on center measurement.
Create a bracket jig. Saves from measuring posts over and over again to ensure proper bracket position.
Gallery
Nailing the RainEscape in place. The slope is increased by reducing the trough material overlap with the joist.
Taping down the RainEscape seam.
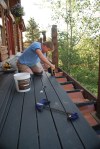
Screwing the fasteners in place.
Pry bar and clamps to take the warp out of a board or adjust spacing.
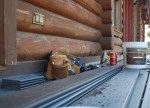
Tools of the trade.
Old deck, juxtapositioned next to new.
Cross brace to stabilize and straighten post. Bracket jig is clamped on.
Checking that the post is vertical.
Close up of bracket jig.
Deck railing section shorter than 8 feet.
Marking the railing for the cut. Measurements were done in finger widths.