What is demolished must be rebuilt. At least that is the logic for the deck – we need somewhere to drink our margaritas. The first two parts of the deck to be demolished and reassembled are the front of the house and the side to the kitchen door. These were thought to be the easy portion of the deck repair until the struggles of demolition were encountered (see demolition post part 1). Once these two sections are done, the deck will be over halfway done area wise and about 25% done work wise.
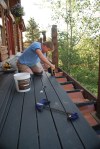
In the planning for the future part of the deck reassembly, Trex RainEscape is being installed under the decking along the front of the house. This system redirects rainwater and snow melt from dripping under the deck. So if you have grand plans to have a dry outdoor living space under your deck in the future, spend the money and install the system when you first put down the new decking.
We made the decision that we wanted the decking to run in the same direction, instead of running parallel to each side of the house. Front of the house was no problem – one small section of joists was replaced; the new joist orientation is perpendicular to the original. This was done there would be something to secure the decking to in the direction we wanted. The larger problem was the side deck up to the kitchen door. The joists ran the wrong way for the deck direction and did not need to be replaced. The solution? Blocking, nailed in perpendicular between the joists.
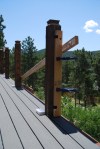
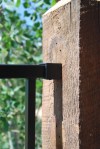
Railing is by Fortress. It is iron with 4 layers of black powder coat. Here’s to hoping it lives up to its name and keeps Alex in and isn’t too damaged with multiple Tonka dump truck crashes.
Preparation: Remove decking
Critical Tools: Screw gun, clamps, pry bar, jig saw, circular saw, railing jig
Skill Level: Intermediate
Tip(s): Like with tile flooring, get your first board right. Everything else builds off of this board and if it isn’t square, the problem will only amplify.
Eat your Wheaties for breakfast. The Trex boards are heavy.
Trex boards may need to be trimmed slightly so they end at the center of the joist. Unless your carpenter was Jesus, the joists may vary slightly in their on center measurement.
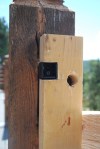
Create a bracket jig. Saves from measuring posts over and over again to ensure proper bracket position.
Gallery