March 31, 2016: Tasting Notes – Belgian Blond and Vanilla Bourbon Imperial Porter

BelgianBlondVBIP
Belgian Blond (left) and Vanilla Bourbon Imperial Porter (right).

These are the tasting notes from our Belgian Blond (BB) and Vanilla Bourbon Imperial Porter (VBIP) extract/grain combination brew days. It should be noted that with this tasting Jess is suffering from allergy related stuffiness and could only be confident she drank beer; we are relying on Dave’s impressions since he is the less allergy-struck party. We will re-taste when our sinuses clear and most things no longer taste like well-chewed paper.

Belgian Blond

  • Original gravity: 1.043
  • Final gravity: 1.006
  • % ABV: 4.9
  • IBU: ~10

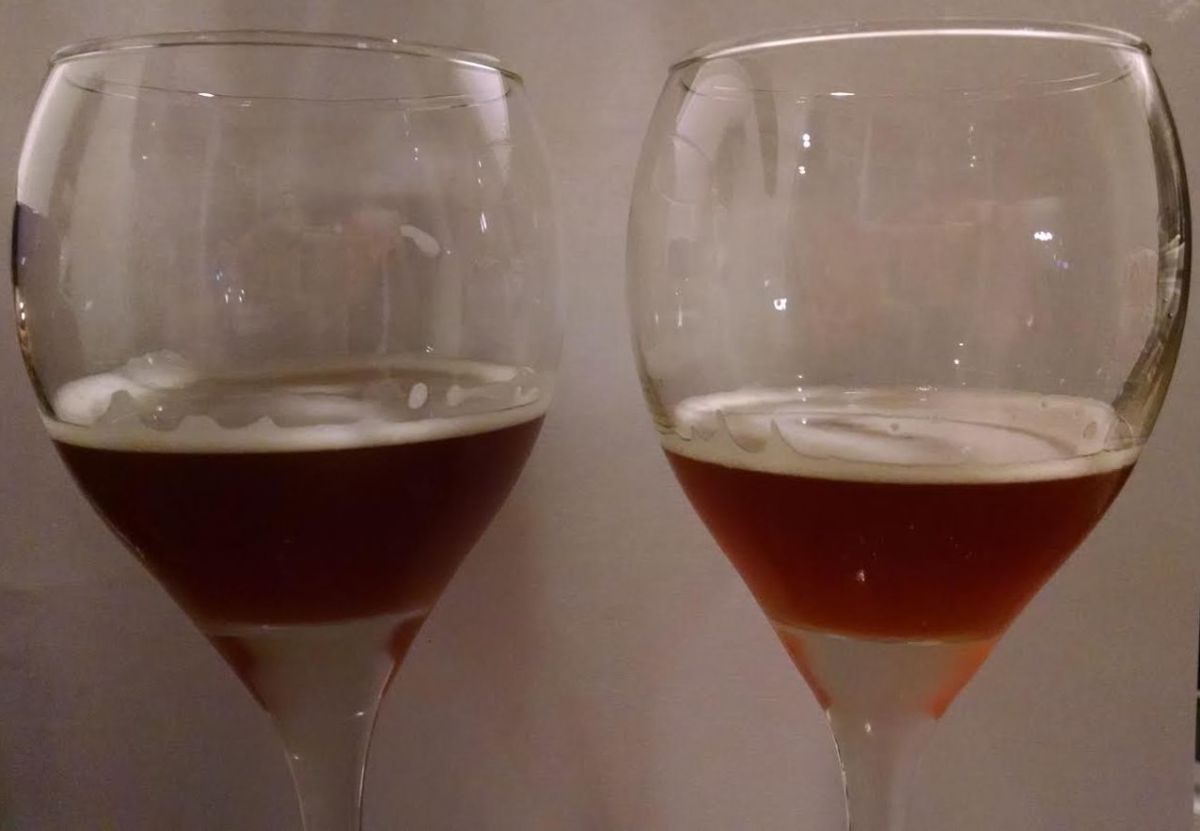
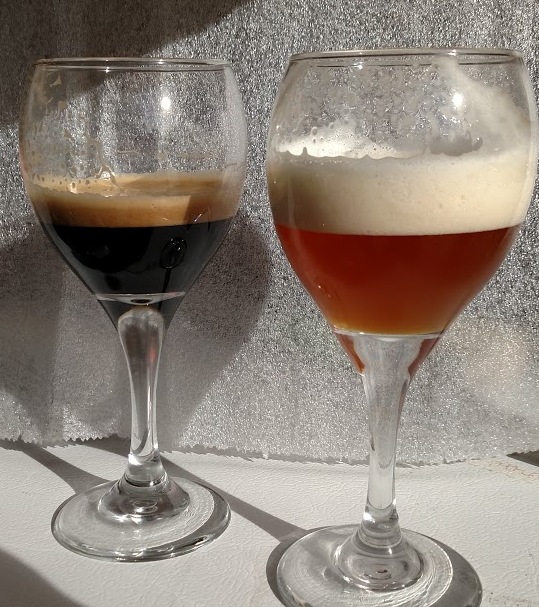
Visual Impressions: BB was darker than we were expecting (straw). Chill haze. Initial pour had good head, but foam stability is poor.

Aroma Impressions: Smelled strongly of cloves. No hop character. This was consistent with the aromas noted during fermentation.

Flavor Impressions: Dry. No hope bitterness. Phenolic after taste.

Vanilla Bourbon Imperial Porter

  • Original gravity: 1.083
  • Final gravity: 1.010
  • % ABV: 9.8
  • IBU: Data for calculations not captured

Visual Impressions: VBIP is dark. Initial pour had some head, but foam stability poor.

Aroma Impressions: Vanilla. Bourbon. Hint of leather (phenolic). No prominent hop aroma.

Flavor Impressions: Vanilla and bourbon present, but not overwhelming. Bitter after taste, but not harsh. Dry. Creamy mouth feel.

Notes

  • We forgot again and did all our fermenter and keg cleaning with water straight from the tap. The chlorination could be why the phenolic aroma is present in the VBIP and enhancing the natural phenolic character (due to yeast strain) of the BB.
  • The starter culture improved our attenuation. Forced fermentation wort studies will be conducted on wort batches in the future to determine final attenuation.
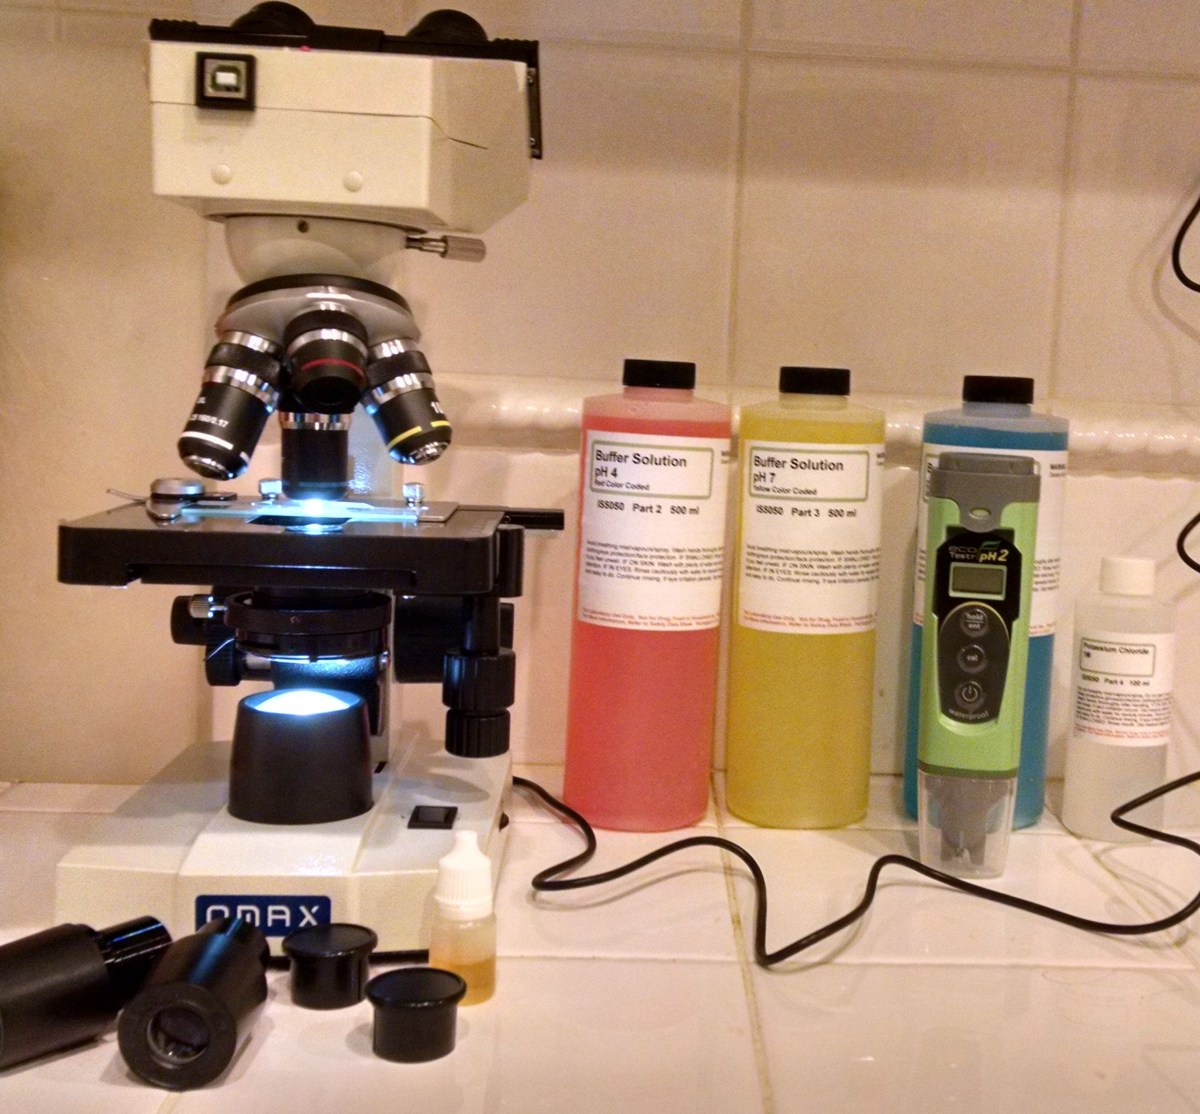
  • DATA! Still need pipetters for performing accurate dilutions, but once these are obtained, Jess is looking forward to constructing yeast growth curves to go along with the specific gravity curves. This is a late developing thought, but the pH of the fermentation can also be tracked, logged, and graphed.

March 20, 2016: Belgian Blond

This is another extract/grain kit. Not because we were short on time, but because we didn’t think far enough in advance to order our grains from More Beer for delivery by Saturday. The local home brew stores we are familiar with did not have the grains we wanted for another attempt at an amber ale. So we settled for the Belgian Blond kit from The Brewmeister.

Fermentation_BelgianBlonde
Graph of Belgian Blond wort specific gravity during fermentation.

The milled grains were steeped at 72 degrees Celsius for 20 minutes, with the steep temperature decreasing to 70 degrees Celsius over the time course. The liquid malt extract (LME) was added to the water and mixed to ensure the mix was homogeneous. Initial volume was approximately 8 gallons. The sweet wort was brought to a vigorous boil for 60 minutes. Hop additions were made at 45 and 5 minutes (1 oz each addition). Hopped wort was cooled to 20 degrees Celsius and transferred to a Speidel 30L HDPE fermenter and aerated for 90 seconds with oxygen. The wort was inoculated with 1 L of 36 hour starter culture of WLP500. Original gravity was 1.043. Gravity readings were taken at 8 to 24 hour intervals over the course of fermentation.

What went well?

  • The stand proves its worth every time we brew on it.

    800X bright field microscope image of WLP500 starter culture.
    800X bright field microscope image of WLP500 starter culture.
  • Captured more relevant data.
  • The microscope purchase was well worth it. This yeast strain had an extended lag phase and sampling the starter culture 8 hours after inoculation showed actively budding cells.

Areas for improvement

  • Data capture. Still need to get a form together.
  • Rather sporadic time intervals of gravity readings and the long gap between pitching and the next reading.
  • Water usage. Estimate of 4 gallons of water used for every gallon of finished beer. We will keep looking for ways to decrease our water consumption.

Recipe:

  • 6.6 lbs Briess Pilsner LME
  • 1 lb Pilsner malt
  • 1 lb Munich malt
  • 2 oz Styrian Goldings (1.4% alpha acids), split (45 minutes, 5 minutes)
  • 1/2 tablet whirlfoc (5 minutes)
  • Yeast: WLP500 (Monastery Ale, Lot #: 1023586)

Day 25: 01/20/2016 – Davis, CA

Day25RouteDestination: Davis, CA

Route: I-280N, I-80E, CA-24E, I-680N, I-80E

Mileage: 99 miles

Our last day on the road! At least for a while. We are three days short of a full four weeks on this adventure. Abby just needs to get us 99 more miles before she gets to rest. We need to be in Davis by 1:30 to meet our landlord Karen and collect keys. Should be easy right?

Looking at the map, we notice we pass through Concord, CA. Which just so happens to be the home of a More Beer flagship store. That is just too tempting to pass up. So we stop. And fritter away time deciding what all grain kits to purchase (our recipe books are in the trailer, somewhere, so to take it easy on our travel fried brains, a kit it is). Alex plays happily with the assortment of toys and chalk that the store has in child friendly area, so we have some uninterrupted shopping time. We finally pay attention to the time and realize Google Maps estimates we have 75 more minutes of driving. Quickly adding 10% to that time to account for Abby’s slower speed, we realize we should have left 5 minutes ago. We weigh our grains, pay, collect Alex, and return to the road.

We make relatively good time, even after stopping to pay a $15 toll for I-80. The road after the toll was smooth, so it is money well spent. We arrive in our new neighborhood, immediately dropping home values with road grime covered Abby and trailer. After going through the house with Karen and paying February rent, we squeeze Abby and the trailer in the driveway and start unpacking.

It is a bit surreal standing in a kitchen that is approximately 3 times larger than the living space we have in Abby. Not being able to get milk out of the fridge while sitting at the dining room table is going to take some getting used to.

We are home.

March 15, 2016: Bourbon Vanilla Imperial Porter

It was Tuesday! Jess was in class, Alex was in daycare, the sun was shining, and Dave took full advantage to brew. The selected beer was a simple Imperial Porter from Experimental Homebrewing (Beechum and Conn, pg 122) as a combination dry malt extract (DME) and grain brew (see below for malt extract/grain bill).

The milled grains were steeped at 70 degrees Celsius for 20 minutes. 6 lbs of DME was dissolved and the sweet wort was boiled for 60 minutes. Hops additions were at 4o and 10 minutes. Wort was cooled to 20 degrees Celsius and the wort was inoculated with a 1.1 L of a 36 hour starter culture. Wort was aerated with oxygen for three 30 second intervals. The Speidel 30L HDPE fermenter was transferred to a 20 degree Celsius incubator. Original gravity was 1.083.

Graph of specific gravity of Imperial Porter wort.

During fermentation, specific gravity readings were taken at approximate 12 hour intervals and graphed. The final gravity achieved by fermentation was 1.010, reached by Thursday evening. On Saturday, we decided that we would transfer the Imperial Porter to a secondary fermenter and add vanilla bean (usually we just use our keg as our bright tank). Bourbon will be added at kegging, so the final beer will be a Bourbon Vanilla Imperial Porter.

What went well?

  • The starter culture gave led to a vigorous fermentation. Happy yeast make good beer.
  • Our set up. Everything went smoothly on Dave’s second brew on the system. Hoses weren’t falling on the ground and everything was consolidated in a single location.
  • The extract kit with specialty grain steep was easy. Doesn’t mean we are giving up whole grain, but when you need to save some time or perhaps your mash tun isn’t quite big enough to handle doubling the grain bill, DME as substitute for the base malt is easy.
  • Taking the gravity at intervals. It is nice knowing how the fermentation is progressing.

What went poorly?

  • Missed capturing some information (hop alpha acids %, weights, yeast lot number, amount of water used) but we are working on a spreadsheet to capture all the data. Yes, there are programs, but why go electronic when there is good old paper and pen?
  • Not that this went poorly – we are just going to have to wait ~ 2 to 3 more weeks before we can taste. Patience. Bah!

Recipe

  • 6 lbs DME
  • 2.75 lbs Munich Malt (10L)
  • 1.6 lbs Brown Malt (70L)
  • 1.38 lbs Chocolate Malt (350L)
  • 1 lb Crystal Malt (120L)
  • 0.5 lb Crystal Malt (60L)
  • 0.75 oz (?) Magnum Hop Pellet (40 minutes)
  • 0.5 oz (?) Progress Hop Pellet (10 minutes)
  • Whirlfloc (10 minutes)
  • 2 vanilla beans, scrapped (into secondary) and chopped (into secondary)
  • 375 mL Bourbon (into keg)
  • Yeast: Wyeast 1056

March 20, 2016: Tasting Notes – Amber Ale Update

Two temperature mash on left, single temperature on right.

So an update on our poor, under-attenuated amber ales. We have been discussing dumping them because we are going to need the kegerator space. However, they earned a reprieve when 1. our bitter chocolate oatmeal stout keg kicked and freed up space and 2. we decided to make a vanilla bourbon stout that will need to be racked for 10 – 14 days. So, the amber ales survive!

We decided to see if anything has changed in the past week since our first tasting and we were pleasantly surprised! The picture doesn’t do the clarity justice (a light box will be added to the to be purchased list), but the beer is clear! Especially the single temperature mash. We are also pleased the quantity and stability of the single mash foam. These two beers were poured within a minute of each other and the picture taken within a couple minutes of pour. The flavor of both beers is still sweet and under-hopped. The two temperature mash has a drier finish hidden under the residual sweetness.

So what to do next? Since their dates with drain destiny have been placed on hold, we might as well dry hop the amber ales and see if they improve.

Founding of our QA/QC Microbiology Laboratory

The new toys arrived today! So what did we purchase and why?

  • Alex checking out the microscope.
    Alex checking out the microscope.

    Bright-field microscope (OMAX CS-MD82ES10) with a 1.3 MP digital camera built in. Combined with a hemocytometer, we will be able to perform cell counts (with the hemocytometer) and standardize our pitching rate. Everything we do needs to be consistent. So we need to start good QA/QC practice early. Speaking of starting early, Alex go in on the microscope action too.

  • Oakton Ecotstr pH meter. Also picked up calibration buffers. This is great for testing yeast viability. Set
    A future microbiologist (?) taking a his first look through a microscope.
    A future microbiologist (?) taking a his first look through a microscope.

    up a small culture, pitch some yeast, monitor how fast the pH drops. The faster the drop, the more viable the yeast culture. This can also be monitored by weighing the starter culture. As CO2 is being evolved, the culture will decrease in weight. Just need a good balance and to remember to weigh the culture immediately after pitching the yeast. A good quality laboratory balance is more expensive and will be purchased at a later date. pH meter will suffice for now.

  • A hemocytometer. Simple, a specialized microscope slide with a grid pattern and reservoirs with a very specific volume. Used for cell counts. Should be delivered on Monday.

Jess is going to go scrounging at the UC Davis surplus store for some general laboratory supplies like a pipettor or two, tips, a pipet aid, some serological pipets, test tubes, and pretty much anything that catches her eye and has a good price on it. If it isn’t at the surplus store, back to Amazon we go! That’s right, we got everything on Amazon. Also, check out MicroscopeNet, this site is where we originally found the microscope we ordered from Amazon. Why Amazon? We already have a Prime account with them. It was easy.

March 13, 2016: Tasting Notes (Amber Ale Two Ways)

This is a continuation of the home brew we started February 28, 2016.

Fermentation was finished by March 3, 2016 and we sampled the beer to obtain the gravity reading. We then dropped the temperature to -1 degree Celsius to facilitate chill haze formation and precipitation on March 4, 2016. We transferred to kegs on March 7, 2016 after Alex went to bed.

We tasted the beer on March 13, 2016 with Jesse, a friend and classmate.

Amber Ale Two Temperature Mash Stats:

Original Gravity: 1.0611

Final Gravity: 1.027

%ABV: 4.46

IBU: 41

Amber Ale Single Temperature Mash Stats:

Original Gravity: 1.0663

Final Gravity: 1.0298

%ABV: 5.12

IBU: 41

Notes:

  • The final gravity it is clear we did not achieve full attenuation (~1.015).
  • It is not surprising the aroma is very malty with very little hop aroma.
  • Color is amber with a hint of red. Two temperature mash may be a bit darker.
  • Beer is cloudy.
  • Both beers live up to their malty aroma in flavor and are sweet. Very little hop bitterness is evident.
  • The two temperature mash is dryer than the one temperature mash, but with the poor attenuation, difficult to distinguish.
  • They are not bad . . . but they aren’t exactly good. Both beers are an excellent example of how bitterness from hops make beers drinkable by balancing the sweetness.
  • Beers are drinkable if done in small amounts. Should not be paired with sweet foods.
  • Single temperature mash is preferred.

Plan of Action:

Jesse talked us out of our panicked throw the kitchen sink at the next brew and got us back to a place of logical thinking.

What we know: poor attenuation, acetaldehyde aromas during fermentation, hint of diacetyl in finished beer. Yeast were pitched directly from the pure pack (no starter) and aeration was done by shaking the fermenter. We used WLP002 (British Ale yeast)

What this points to: Unhappy yeast because of lazy home brewers. Which is frustrating because we were careful in other aspects of our experiment.

What we will do for the next brew:

  • Use a starter culture. ~1.5L for a 19L fermentation.
  • Consider aeration of the wort with an aeration stone and oxygen (we just got a new oxygen tank).
  • We will hold off on any bittering hop additions on the theory that the sweetness is overwhelming the bitterness.
  • We will add more aroma hops at the end of the boil.
  • We will take more frequent gravity measurements to better track fermentation.

February 18, 2016: Tasting Notes (Sunset Pale Ale, Bitter Chocolate Oatmeal Stout)

First tasting of the beers was 2/13/2016. A second tasting was conducted on 2/18/2016. Of course we drank the beers between tastings! Check out this post for details for brew day and this post for details from kegging day.

Overall, we are pleased with the beers and continue to learn through the process.

Sunset Pale Ale:

2/13/2016 – Golden in appearance with a hint of red. Beer is cloudy. Excellent foam. Aroma was piney hop notes with underlying citrus. Drier finish that is bitter and slight astringent. Lingering bitterness, but not unpleasant. Paired well with food, especially foods with higher fat content (think cheese). Beer was tasted in the early afternoon.

2/18/2016 – Piney hop notes are diminished and there is now an oxidized character to the aroma. The chemical responsible for this character is trans-2-nonenal. Bitterness reduced and astringency increased. Tasting was done early evening.

Off aromas likely from oxidation due to a poor keg purge. There was also a significant amount of head space in the keg after beer was transferred in. Keg was also rinsed with chlorinated water instead of water passed through a charcoal filter. We will see if any aromas that could be attributed to 2,6-dichlorphenol. We also do not know what our water chemistry is at our rental; the chemistry could impact the flavor and stability of the beer, and may impact the pale ale style more significantly than others. It is fun operating in the blind.

Bitter Chocolate Oatmeal Stout:

2/13/2016 – Dark brown, almost black in appearance. Excellent foam that was very stable. To borrow from wine tasting, the beer has ‘legs’ and coats the glass after swirling. Aroma contained roasted, chocolate and coffee characteristics. No noticeable hop character. Sweet and bitter characters with a silky mouth feel. Lingering bitterness, but not unpleasant. Beer is drinkable, and is filling. Gravity reading and %ABV need to be redone – it feels like it has and ABV higher than 5.5%. Beer was tasted in the early afternoon.

2/18/2016 – Aroma similar, perhaps with a hint of hop starting to come through. No major differences between tastings.

February 12, 2016: Sunset Pale Ale and Bitter Chocolate Oatmeal Stout

This is a continuation of the home brew we started January 31, 2016.

Fermentation was finished by February 5, 2016. The couple days intended for the diacetyl rest stretched into about four. After sampling the green beer to obtain a gravity reading, we dropped the temperature to 2 degrees Celsius to facilitate chill haze formation and precipitation. After letting the beer rest a couple more days, we plopped Alex in front of the electronic babysitter while we sanitized and carbon dioxide purged our kegs and transferred the beer. All calculations were performed using the tools found on Brewer’s Friend.

Sunset Pale Ale Stats:

Original Gravity: 1.059

Final Gravity: 1.0265

%ABV: 4.33

IBU: 61

Bitter Chocolate Oatmeal Stout

Original Gravity: 1.090

Final Gravity: 1.0484

%ABV: 5.51

IBU: 76

January 31, 2016: Sunset Pale Ale & Stone’s Bitter Chocolate Oatmeal Stout

So, we decided to take a break from chronicling our move to California to start our home brew diary! So if you are reading this and wondering how we are brewing on the road, well, we are not. The chronicles of our westward journey are being provided after the fact. We arrived at our rental in Davis, CA on January 20, 2016. Perhaps we should have altered you, gentle reader, that this paragraph contained spoilers. Ah well. Check out our travel posts. At the minimum, there are some pretty pictures.

On our travels, we just happened to pass by Concord, CA, home of a More Beer! retail store. Of course we stopped. And bought two all grain kits: Sunset Pale Ale (#583) and Stone’s Bitter Chocolate Oatmeal Stout (#800). The goal was to brew the beautiful weekend of January 23rd, but common sense prevailed. We decided to postpone until we got better settled into our new home and Dave reassembled the brew equipment.

What went right

  1. Strike water temperature to achieve the correct mash. Jess took the time to calculate the heat input required to raise the malt to mashing temperature (Q=m*Cp*(T2-T1); where Cp of the mash is estimated at 1680 J/kg*Celsius). This heat input was then used to calculate the temperature the strike water needed to be heated to in order to achieve the desired temperature at mash in.
  2. Alex enjoyed tasting the malted barley and helping wash and sanitize the hoses. As long what is being cleaned isn’t Alex’s face or hands, he is all for it. He was a good brewer’s assistant. Never fear, once the propane burners were lit, he was safely inside.

What went wrong

  1. The weather. A cooler day, the constant breeze illustrated the powers of convection. Throw in the fact that the wind blew out our burners a couple of times, it is no wonder it took so long to heat our liquids.
  2. Shaking the dust off. It was series of little things because we haven’t brewed in a couple of months. Finding the proper hose with the right couplings, a kettle that was leaking due to the gaskets, remembering that the pump needed to be primed. Those small things add up to some serious lost time.
  3. Chocolate nibs are an impressive clogging agent, especially coupled with a plate chiller. This only emphasizes how our process needs to be refined. We will get there. Nothing a little whirlpool action and some filtration won’t solve.
  4. The amount of water we needed to use to chill our wort. We definitely need to improve our water conservation. Or hide our usage from our neighbor. The target is conservation.

Sunset Pale Ale Recipe and Stats

Grain Bill: 8 lbs American Pale, 2 lbs Munich, 0.5 lbs Carastan, 0.5 lbs Carapils

Hops (Pellets): 1 oz Amarillo 8.5% AA 60′, 0.5 oz Northern Brewer 7.0% AA 30′, 0.5 oz Cascade 5.5% AA 10′, 1 oz Amarillo 8.5% AA 5′, 1 oz Tettnanger 4.6% AA dry hop

Yeast: White Labs Pure Pitch WLP001 California Ale

Original Gravity: 1.059

Final Gravity: TBD

Fermentation Temp: 20 Celsius

Observations:

  1. Fermentation started by Monday morning.


Stone’s Bitter Chocolate Oatmeal Stout

Grain Bill: 15 lbs Two Row, 2 lbs Flaked Oats, 1.5 lbs Pale Chocolate Malt, 1 lb Black Patent, 1 lb Roasted Barley, 1 lb Crystal 15 L, 8 oz Carapils

Hops (Pellets): 4 oz Willamette

Additions: 4 oz Cacao Nibs added with 15′ left in boil

Yeast: White Labs PurePitch WLP001 California Ale

Original Gravity: 1.090

Final Gravity: TBD

Fermentation Temp: 20 Celsius

Observations:

  1. After mash was finished, the air bubbles on top of the grain bed were multi-colored which is indicative of a good mash.
  2. A lot of trub at end. Clogged the plate chiller pretty quickly.
  3. This is going to be a dark, dark beer.
  4. Fermentation was going around midday Monday.