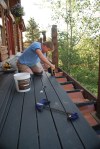
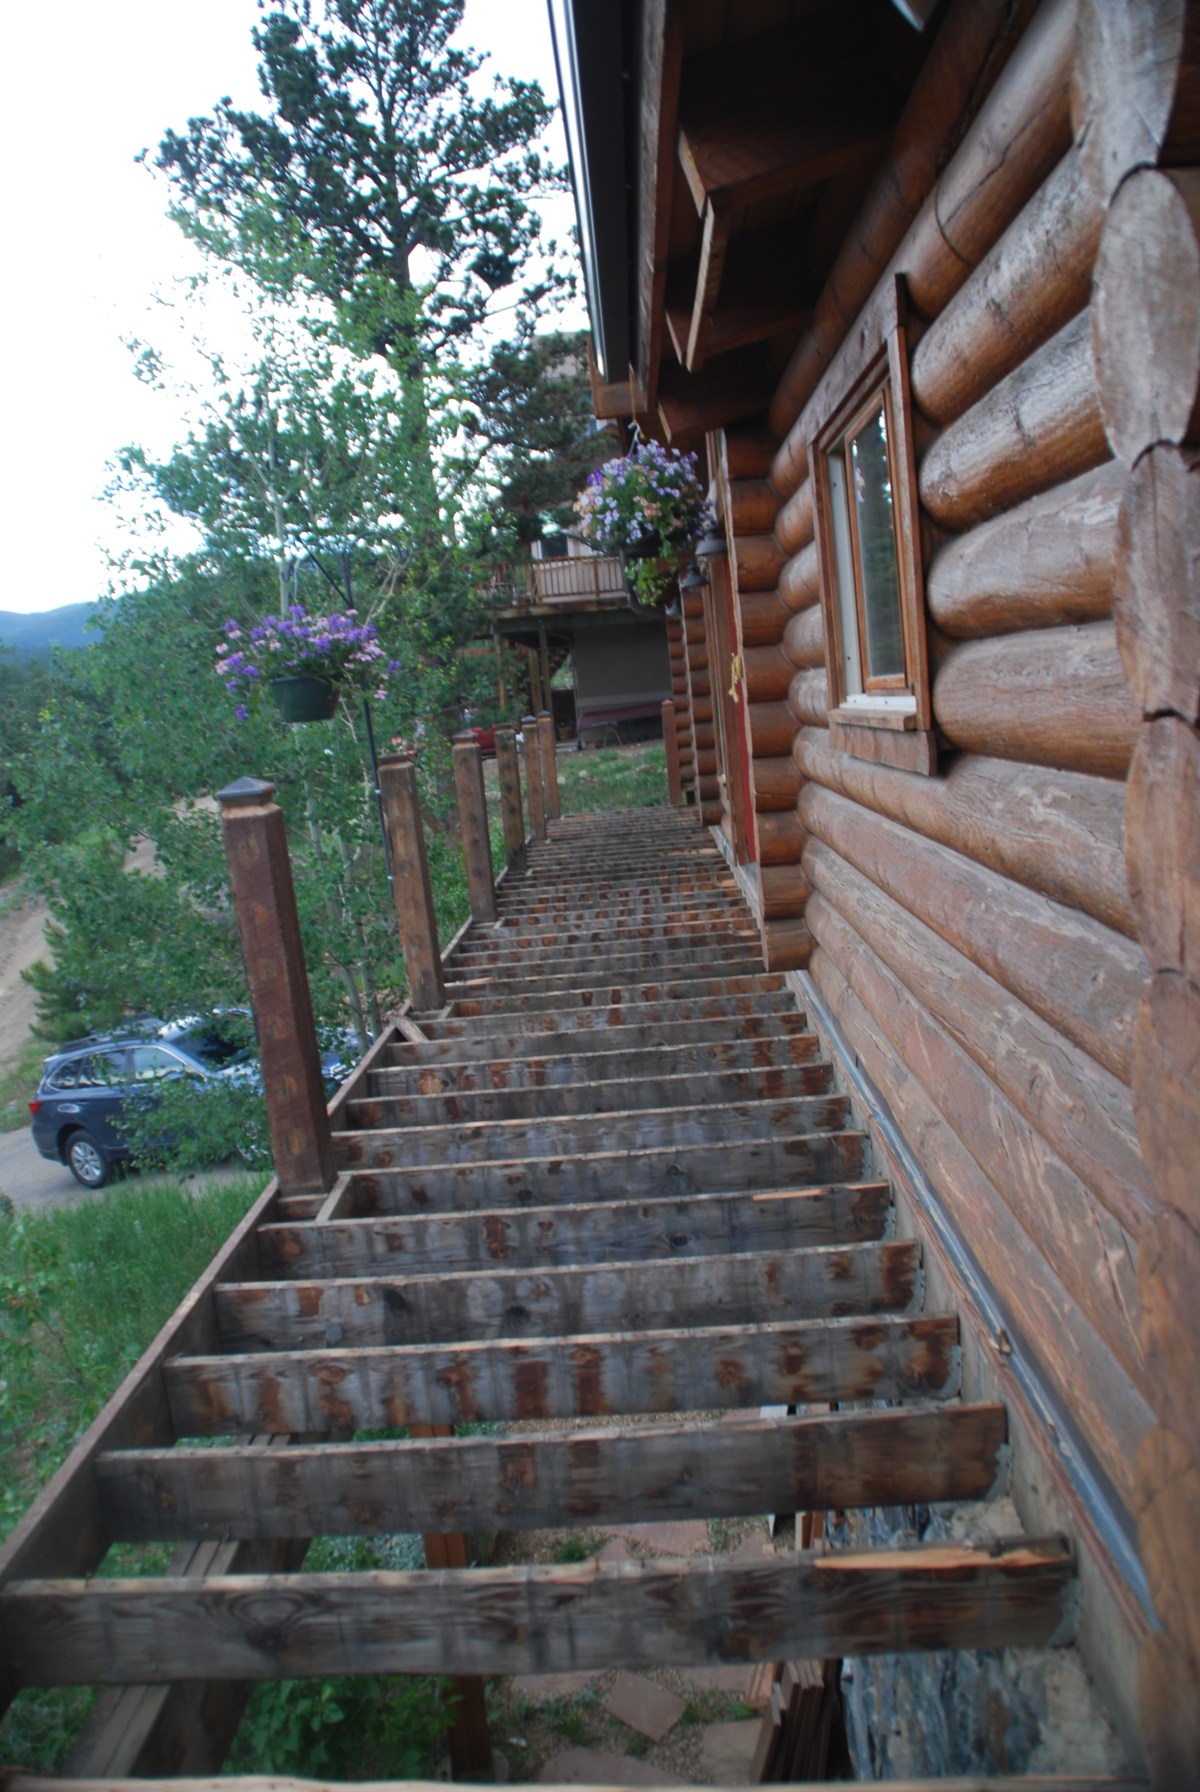
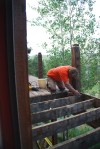
With demolition parts one and two complete, along with the subsequent reassembly (one and two), the focus is fully on the stairs to the hot tub pad and the decking around it. Any hope that just perhaps this section of decking was done correctly was quickly lost. It was quickly evident that if this deck had been built in a more humid environment, it would have rotted away a dozen years ago. Even with the low humidity in Colorado, rotten spots were still found. Three cheers to the dry Colorado air. Enjoy the gallery of face palming construction decisions by a previous owner.
Critical Tools: Circular saw, pry bar, hammer, drill, pliers, knee pads, Sawzall, end of day margaritas.
Skill Level: Intermediate
Tip(s): Don’t use scrap wood to build a deck. Even if the scraps are a ‘good deal’.
The spacing between decking boards allows water to drain and air to circulate. Without the air circulation, the chances for rot are greatly increased.
Choose two of the three – good, fast, or cheap. Previous owners chose fast and cheap. Don’t be like the previous owners.
Gallery
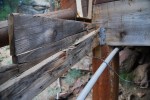
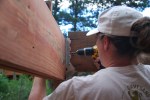
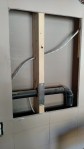
Top of the stairs. Got to love it when folks are too lazy to cut an angle on the ‘reinforcing 2x4s’. Not helping to much when the 2×4’s aren’t properly installed (a grossly undersized solution) Nails will save the day!
No, nails won’t save the day if not enough were used and the board is rotting.
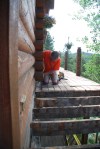
Bottom step pulled off. Drinking to commence.
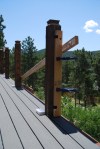
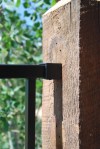
Reinforcing 2×4 pulling away from stair horse.
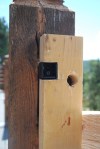
Rotting 2×4? Check. Stair horse split by bolt? Check.
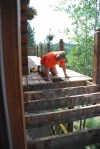
Stair horses were improperly over cut. The over cut essentially reduced the support to the equivalent provided by a 2×4. This is grossly undersized for stairs.
2×4 scraps being used to ‘reinforce’ the stair horses. This is NOT how to do things.
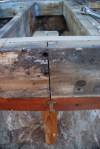
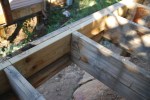
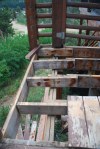
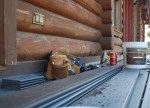
After the stairs and decking were removed, the framing was available for inspection. Band board starting to rot. How many pieces were used? Three. Not good.
Nothing like having a free floating joint in space. No, this is not a marijuana reference. Note that the support post is 4 x 4. A 6 x 6 would be better.
So this band board joint is backed by a post. The post is sitting haphazardly on a rock. And there is a bolt going through the joint.
This craziness would make Jenga masters proud.
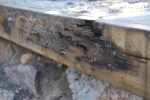
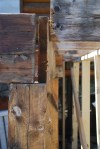
2 x 6 that is almost rotted through. The post that was askance and rotted out at the bottom was ‘attached’ in this area.
So they used brackets, good. Joist hangers, better. But only nailed
the brackets into the joists, not the band board. Very bad. Didn’t even bother to try and use chewing gum as a stickum. This devolves to . . .
. . . .no brackets. Just a few nails.
Ending on a high note. Joists overlap with inner band board by only two inches. Looks like mold has found a happy home.
So now that we have discovered the extent of the poor workmanship on the deck framing, it is time to repair the hazards and make this deck safe. Replacements included rotted support beams, an undersized beams, and improperly cantilevered joists. It is likely that the framing was not constructed fully from pressure treated lumber.
Check out the gallery captions for the nitty gritty details. Check out deck reassembly post 1 for information regarding the Trex installation. No Trex RainEscape here.
Preparation:Remove decking, curse at the unknown person(s) who built this portion of the deck
Critical Tools: Healthy amount of patience, well developed curse word vocabulary, screw gun, clamps, jig saw, circular saw, railing jig, level, nail gun, level, tap measure
Skill Level: Advanced/Expert. If you don’t know what you are doing, things will get ugly.
Tip(s): Step back to help see the forest for the trees. Some challenges are easily solved once it is determined the perceived problem does not affect the end goal.
Take the time to plan everything out. This will save so much trouble down the road.
Don’t go cheap on the materials. This is not the place to be a penny pinching skin flint. Don’t purchase your materials for some guy selling scraps of wood out of the back of his pick up. Buy real lumber. Pressure treated lumber.
Gallery
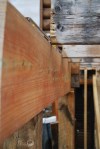
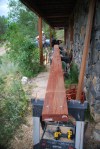
Test fitting a new beam to determine how far out of level the deck joists are.
Aluminum straight edge (re-purposed from drywall work) being used to confirm the extent of the joist sag.
Aluminum straight edge and level confirming that the sag has been removed from joists.
Using a marking line to help provide a visual edge for the measurement of the replacement beam.
Replacement beam (original was rotted and infested with carpenter ants AND too short) with first joist resting on it.
What do you mean vertical supports should be secured to the base?
Builder’s assistants 1 and 2 securing post to base with Simpson Strong Drive Connecting Screw.
Replacement outer band board of the deck. Original was too short and constructed in two, non-overlapping pieces (bad). This 24 foot beam was constructed by taking two 16 foot long 2 X 10 and overlapping them 10 feet and securing with nails and 5/8″ X 5″ bolts every 2 feet. 6 foot lengths were used to fill in the ends.
New band board installed! Builder and builder’s assistant 1 managed to get it into place. Notice how the crown of the board is facing up. Crowns of each board using to construct the band board had to be be orientated in the same direction.
Replacement joist. Old joist was twisting and splitting.
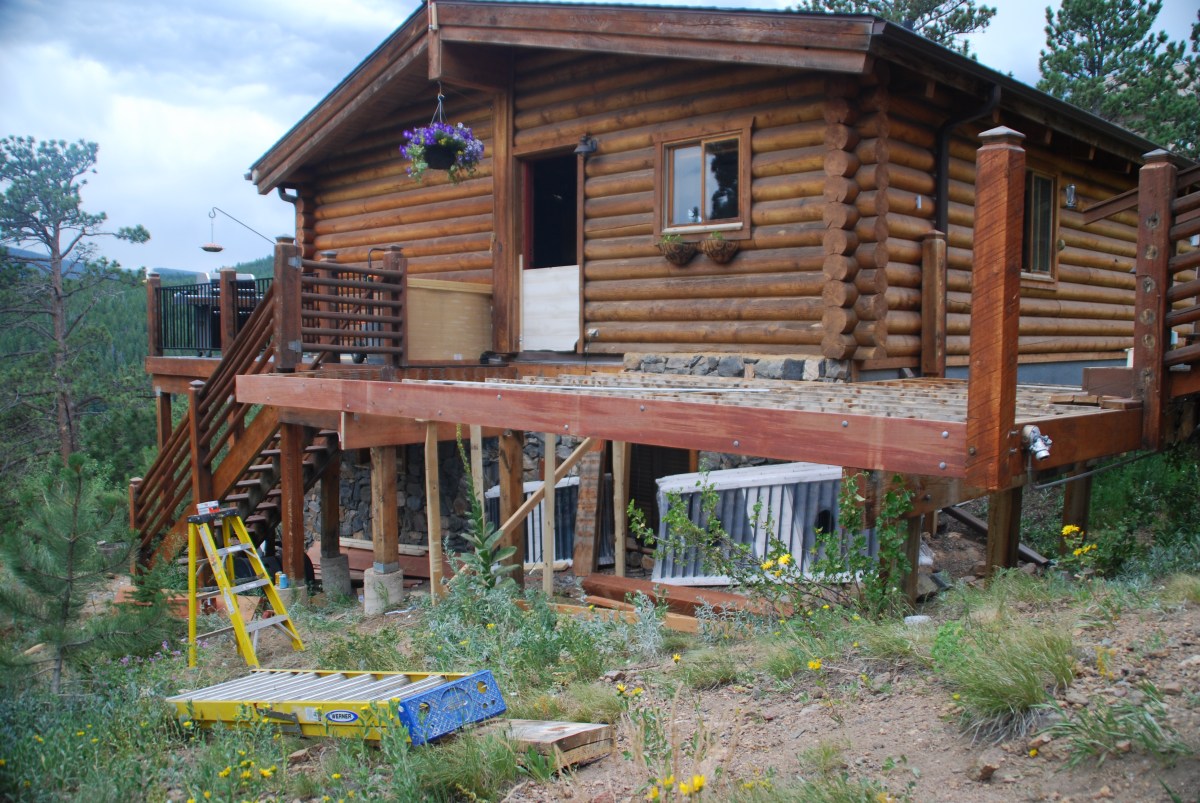
With Part 1 of the deck demolition and rebuild complete, we get to see what structural disasters are hidden in part 2. How can we be so confident that this portion of the deck is not structurally sound? The most visible symptoms is the drooping corner and the improperly cantilevered boards.
Once the decking came off, the situation was worse than originally thought. Check out the gallery below for great pictures of rotted boards and improperly done construction. This deck was permitted and it is hard to believe it passed inspection, a score and four years ago. It is amazing the deck didn’t collapse long ago. Time to do things right and repair this shoddy work.
Demolition went quickly using technique 3 described in the first demolition post. Tips described in the previous post also apply here.
Critical Tools: Circular saw, pry bar, hammer, drill, pliers, knee pads, Sawzall, end of day margaritas.
Skill Level: Intermediate
Tip(s): Don’t step on boards that have been cut with the circular saw. This will result in a painful trip through the deck.
Gallery:
Bow in the old deck surface at the top of the stairs.
Deck board pulling away from others.
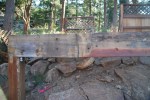
The leaning post is not indicative of good things.
Improperly done cantirlever is the reason for the deck slope. Shoddy construction essentially created a lever. Which also explains the bow in the deck surface.
The rotten wood might explain why the post is leaning.
Not a good thing when the rotting major support is held together by carpenter ants holding hands.
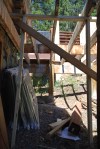
Temporary support of the joists after the rotten board was removed.
What is demolished must be rebuilt. At least that is the logic for the deck – we need somewhere to drink our margaritas. The first two parts of the deck to be demolished and reassembled are the front of the house and the side to the kitchen door. These were thought to be the easy portion of the deck repair until the struggles of demolition were encountered (see demolition post part 1). Once these two sections are done, the deck will be over halfway done area wise and about 25% done work wise.
In the planning for the future part of the deck reassembly, Trex RainEscape is being installed under the decking along the front of the house. This system redirects rainwater and snow melt from dripping under the deck. So if you have grand plans to have a dry outdoor living space under your deck in the future, spend the money and install the system when you first put down the new decking.
We made the decision that we wanted the decking to run in the same direction, instead of running parallel to each side of the house. Front of the house was no problem – one small section of joists was replaced; the new joist orientation is perpendicular to the original. This was done there would be something to secure the decking to in the direction we wanted. The larger problem was the side deck up to the kitchen door. The joists ran the wrong way for the deck direction and did not need to be replaced. The solution? Blocking, nailed in perpendicular between the joists.
Railing is by Fortress. It is iron with 4 layers of black powder coat. Here’s to hoping it lives up to its name and keeps Alex in and isn’t too damaged with multiple Tonka dump truck crashes.
Tip(s): Like with tile flooring, get your first board right. Everything else builds off of this board and if it isn’t square, the problem will only amplify.
Eat your Wheaties for breakfast. The Trex boards are heavy.
Trex boards may need to be trimmed slightly so they end at the center of the joist. Unless your carpenter was Jesus, the joists may vary slightly in their on center measurement.
Create a bracket jig. Saves from measuring posts over and over again to ensure proper bracket position.
Gallery
Nailing the RainEscape in place. The slope is increased by reducing the trough material overlap with the joist.
Taping down the RainEscape seam.
Screwing the fasteners in place.
Pry bar and clamps to take the warp out of a board or adjust spacing.
Tools of the trade.
Old deck, juxtapositioned next to new.
Cross brace to stabilize and straighten post. Bracket jig is clamped on.
Checking that the post is vertical.
Close up of bracket jig.
Deck railing section shorter than 8 feet.
Marking the railing for the cut. Measurements were done in finger widths.
Deck boards – some were replaced by the previous owner, entire deck desperately needs repainting.
With summer in full swing and the inside projects complete, it is time to tackle the deck! What is wrong with the deck one may ask? Best guess it is close to 25 years old. It desperately needs to be repainted, boards need to be replaced, and our home inspector cautioned us against standing too close to the edge in one portion (structure is unsound). Throw in the horizontal railings that a young boy can easily climb, combined with a 15 foot drop, the safety issue is even greater. With that in mind, time to replace the deck and railing!
Horizontal railings perfect for Adventure Alex to climb. Top rail broke while we leaned on it.
In general, the framing is in good condition and does not need replacement. The structurally unsound portion will be repaired to code and common sense. The decking will be replaced with Trex Enhance, color clamshell (grey). Grey was selected because there is so many brown tones with the log cabin, we didn’t want to look like we failed at matching. So we decide to do a cooler grey to help balance all that warm wood. Decking materials, including RainEscape for front deck, were purchased from Deck Superstore in Commerce City, CO (go check out their decking test area) and all lumber for framing repairs was purchased from Home Depot.
So, demolition, easy enough, right? Well, in this case some care had to be taken in removing the decking to avoid damage to the framing. We wanted to reuse as much as the framing as possible. So how was the decking removed?
Technique 1: Unscrew boards and pull them up.
Problems: Screw heads were filled with paint. Screws were stripped and could not be backed out. Screws were brittle and broke off. Boards had to be pried out with a crowbar and screws had to be broken off. A generous estimate was 10 feet of decking was removed in 4 hours.
Technique 2: Use a reciprocating saw with metal blade to cut screws (run between decking and joist.
Problems: Screws were far tougher than regular nails. Significant effort was required to cut through a few screws. This was draining on the saw batteries (multiple recharges would have been required throughout the day), saw blades, and Dave’s reserve of curse words.
Technique 3: Use a circular saw to cut decking boards between the joists from above. Knock board out, shearing the screw.
Problems: With the exception of copious amounts of saw dust generated and some wear and tear on the knees (if knee pads are owned, employ them here!) this technique was the winner! Very few screws that had to be broken off. 45 feet of decking was removed in 4 hours. A four-fold increase in productivity!
Preparation: Relocate planter, block off construction area (from the wanderings of dogs and child)
Don’t use your tools of destruction recklessly. Recover and reuse what you can.
Clean up area every day, with a sharp eye on the look out for screws/nails in the driveway.
Check the joists carefully. An initial glance and the discoloration might be indicative of rot. In this case, it is where stain/paint dripped between deck boards.
Annoyed? Have a beer. Really annoyed? Go for the margarita.
Gallery
Screw head filled with paint.
The fruits of 4 hours of demolition technique 1.
Circular saw to cut deck boards along the joist.
Sawzall to do the close cutting near the house.
Dislodging cut deck boards.
Breaking off screws that did not break off with deck board.
Dry rotted joist to be replaced.
Split joist to be replaced.
A deck free of decking. Joists at far end that run perpendicular will be replaced.
Deck free of decking from the other end of the house.
Increase our master bedroom closet space without truly extensive renovations
Fit all of our clothes without requiring a dresser(s).
The verdict? Success! We ended up using EasyClosets.com. Their DIY design interface was pretty easy to use and was truly DIY. Other sites wanted to send a consultant and we did not have time or tolerance for that. A consultant even verified that our design would work with our closet doors (more on that later). Only snafu was three drawers were missing from a box, one quick phone call later and they were shipped the next day. Other bonus of Easy Closets is two days after we ordered, the spring sale started. Asked nicely, and they retroactively applied the discount to our order. Will be ordering again from them.
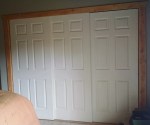
So what was the deal with the closet doors? It wasn’t easy to get sliding doors on three separate tracks so 2/3 of the closet could be open at any given time. This was key to the closet organizer design. We thought we found the solution on Home Depot’s website, but the product had been discontinued. Dave ended up talking with the door guru who asked how handy he was. Dave responded that he was above average handy, and the guru proceeded to help him identify and order all the parts required to create the door. Only took 6 weeks for everything to come in.
So how are we doing without dressers? All of our clothes fit in the closet. It also helps that we are not clothes horses. And it also helps that we have a platform storage bed that can absorb some overflow as well as long term storage of seasonal items. Hanging more clothes and using the Kondo method for folding clothes made the no dresser system feasible. Gwyneth Paltrow’s Goop has a really useful tutorial. Swallow hard and follow the link, it was one of the best tutorials on the internet. It was truly amazing how much space the Kondo fold created in the drawers. Where did the dressers go? To a consignment shop in Fort Collins. With any luck, they sell.
Skill Level: Advanced intermediate. Doors were custom which meant there was no simple door with jam to install. Jams had to be built, track cut, spacers installed. The closet organizer was intermediate level assembly. If you can put together Ikea furniture, you will be fine. Hardest part of organizer install was getting the main support bar level and the proper height off of the floor.
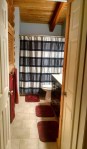
And after an eternity between the master bath demo and reassembly posts, pictures of a finished product! Well, let’s call it mostly finished. Curtains would help soften the log wall, but that will be a separate post when decisions are finally made.
The master bath has been functional for a month or two now; but we finally got the vast majority of the dry wall dust cleaned off the log walls, new towels (after determining we had our previous towels for over six years) and shower curtain purchased, and the closet door knob installed.
This is not a large bathroom, but it works well for us.
So glad for
The double vanity. It is really nice having two separate sinks so we don’t have to stagger our night time routines.
The medicine cabinets. Why houses built in the early 90s favored larger mirrors over medicine cabinets is beyond us. So happy to have a space to store our toiletries.
The door to the bathroom. Our rental in Loveland had a master bath that was open to the bedroom; exception being the poopatorium. Ridiculous set up, especially if you have one person rising early for work.
The upper storage. This utilizes the void space above the closet and dramatically increases the storage capabilities of the house. We already have our suitcases, Christmas decorations, and a couple of other miscellaneous storage boxes tucked up in this nook.
What we miss
The separate poopatorium. It was nice having the toilet sequestered off so the rest of the bathroom could be used in tandem.
What the (far) future holds
The current tile in the tube is a standard subway tile. Completely functional, just a little boring. Someday, this will be replaced.
Gallery
Looking into the master bath from the master bedroom.
Double vanity and medicine cabinets.
Other half of the double vanity.
Looking back toward the master bedroom. Storage is hiding behind the upper door.
It is another demo and rebuild post! There seems to be a lot of demo and rebuilding posts (laundry room, master bath), but no posts showing the finished product. That would be a correct assessment. The answer is simple; because no room is completely done yet. The laundry room and master bath have been pushed to a point of functionality, but we still have a FinishingList. Why not finishing the finishing details? Well, we have a move in date in approximately 3 weeks. We want to get the really messy stuff done when we aren’t living there full time. The fine points can be done after we move in, if necessary.
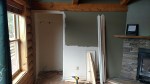
That being said, what is being torn apart this time? The master bedroom closet and a coat closet on the other side of the wall (weirdest location, no where near a door that could be considered a main entrance of the house). The door to the coat closet will be walled in and the wall between the closets will be taken down. The opening of the closet in the master bedroom will be expanded. What can go wrong? Fun surprises like plumbing or vent pipes in the wall to be torn down. We can only wait and see.
No big surprises! A run of coaxial cable and nothing that would otherwise derail this project was found. Dave proceeded to close up the one opening and proceed with his favorite remodeling task – drywall work. Too bad Alex didn’t get to enjoy the giant running loop created by the removal of the wall.
So the question is, what are we going to do with the unpainted space? Built in cabinets. That is for another post though.
Preparation: Remove trim
Critical Tools: Sawzall, hammer, pry bar, beer
Skill Level: Medium – to reduce drywall repairs to the closet opening, you have to be careful with what you take down.
Tip(s): Measure carefully and be judicious in what you take down. If too much is taken down, more work will be created when you have to put it all back up.
Living in a drywall work environment is unpleasant. Sand when the least amount of people are around.
Gallery
The coat closet in the living room. It will soon serve a greater function.
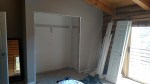
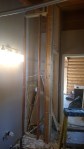
The master bedroom closet. The drywall to the right of the opening will be removed to create the larger closet.
Drywall removed from the wall between closets. Looks pretty clean.
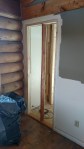
View of closet door from the living room.
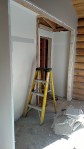
Beginning to frame in the coat closet door.
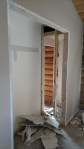
The wall between closets is gone. No surprises!
And adios closet!
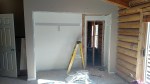
Newly enlarged master closet door. New drywall is where the coat closet door used to be located.
What comes apart must go back together! After the fun of demo, the master bath needed to be reassembled. We have been enjoying sharing the hall bath with Alex, but it would be nice to have our own bathroom back.
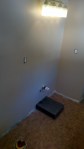
So, what was involved in the reassembly? First, some unplanned work. In the demo post, the recessed medicine cabinet plan was thwarted by the sink vent pipe and forcing the cabinets to become surface mounted. Like a butterfly flapping its wings and causing a hurricane on the other side of the world, the vent pipe location increased the work load. First, the recessed cut out had to be repaired. Then, a box had to be built as a mount for the lights above the medicine cabinet. Why build this box? Without the box, the lights would be shining directly over the medicine cabinet. The box provides the proper clearance for the lights. This would not have been necessary if the cabinets could have been recessed like originally planned.
Second, in addition to drywall repair, was the hanging of new drywall over the newly framed closet and elevated storage area. All the seams needed to be mudded, taped, and mudded. The walls were sanded smooth and were ready for primer and paint.
The toilet was the third stage of the master bath reassembly. A new wax ring and toilet flange extension. The old wax ring is best if used once. A new one cost $6, which is a small price to pay to prevent sewage leaking. The toilet flange extension was required because we increased the depth of the floor. Don’t forget to purchase new bolts as well. Otherwise you might just have to go out to the store. Again.
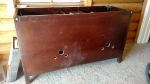
And finally, the vanity. The vanity is a beast – it was very interesting to carry it up to the main floor from the garage. The quality of the construction was evident when the holes were drilled for the water and sewer lines – no MDF here, but real plywood.
Skill Level: Expert. Why? Drywall. Custom wooden box build. Wiring work (switching out light fixtures). Plumbing work. Drilling a vanity cabinet for plumbing work. Don’t attempt if you can’t put together IKEA furniture. Even if you have, find a friend with construction experience.
Critical tools: All of them. And the kitchen sink for good measure. Select tools: Drywall (spackling knives, drywall saw, screw gun, nail gun); plumbing (PEX crimpers, hole saw, saw to cut pipe); electrical (wire cutters, wire strippers)
Tips: Add your sink hardware before setting the vanity top on base.
Paint before setting toilet and vanity. Reduces cut in work, saves time.
Try and coordinate drywall for all projects and hire it out to the pros.
With the major work in the laundry room completed and those nagging fine details left, we have begun to focus our efforts on the master bath. So what are we doing to this move in ready bathroom? New flooring, paint, single vanity is being replaced with a double. This means the existing linen closet is going to be replaced with a smaller one. Smart moves for a house that is already short on storage. We hope to recoup some of our lost linen closet storage space with some overhead cubbies.
What the master bath looked like before we decided to overhaul it.
First step of the process – demolition! First sub-step of demolition – remove the toilet and vanity. The vanity was not installed correctly, so removing it was a simple as dragging it out of the bathroom (once the plumbing connections were disconnected). The vanity will be given a new top a re-used in the hall bath. Until that day, it shall live in the garage. Next sub-step of demolition was the removal of the shelves from the linen closet followed by the drywall. Stripping off the drywall was the moment of truth – and we were lucky. No nasty surprised like a pipe in the wall we wanted to remove. The project can proceed unhindered! The framing was removed and was in such good shape it could be reused.
The floor tiles, vinyl, but not peel and stick, were well adhered to subfloor with mastic. With the exception of a few tiles in the closet that were pulling up, the tiles were not removed. 3/8″ plywood was screwed down on top of the tile to provide a clean surface for the thin-set to adhere to. Check out our first laundry room post for flooring details.
Final part of the demo process was creating the cut-outs for the recessed medicine cabinets. Our first surprise arrived in the form of a vent pipe where the cabinet was supposed to be recessed. Since the cabinets are recess or surface mount, plans were changed and the medicine cabinets will now be mounted on the wall surface.
Tip(s): Have more trash bags than you think you are going to need. When in doubt, buy the big box of heavy duty contractor bags. Drywall weighs a lot.
Don’t use your tools of destruction recklessly. Recover and reuse what you can.
Drain the water from the toilet. Wear rubber gloves and have an old towel that you can throw away. You need that towel to stuff in the sewer pipe (the hole in the floor).
Turn off your water valves.
Gallery
Toilet removed, sewer pipe stuffed with towel.
Vanity removed as well. Black box is vent diverter.
Closet with shelves removed.
Drywall removed. The kind souls who worked on the house previously left extra wire in the wall. Not to code, but helpful.
Salvaged 2 x 4 boards.
The vent pipe that forced the medicine cabinets to become surface mounted. And more mudding and taping of drywall.
Alex helping Dave by crawling through a Ditra tunnel.