Distance/Elevation/Difficulty: 4.3 miles (total)/~180 feet/Easy
Time Elapsed: 180 minutes.
Comments: This was a beautiful hike that was even more enjoyable since we were hiking with friends. Based on their advice, we arrived at 9 am in the Brainard Lake parking lot. The Long Lake lot was already full and the ranger said a 6 – 6:30 am arrival was needed to ensure a spot in the Long Lake lot! This is not happening with Alex. Starting at the Brainard Lake lot added 1.5 miles round trip to our 2.8 mile hike, so be prepared to for a longer walk. The Long Lake Loop is also known as the Jean Lunning Loop.
Alex did great and hiked approximately 3.5 miles (out to the trail, the trail, and was carried from the trail head to the parking lot). In general, the trail is smooth and wide. There are some wooden bridges above swampy sections, but they are very sturdy. Leashed dogs are welcome and all pups we encountered were very well behaved. Alex dipped his toes in the lake and confirmed it was cold. Despite the chilly, he had a great time wading in the lake.
Would we return? Definitely. The road up to the recreation area is good and there is a campground. We hope to bring Abby up soon for a long weekend so we can get an early start and go on longer day hikes. Another option we look forward to is taking a picnic to Brainard Lake – no hiking, just Alex splashing in the water.
Gallery
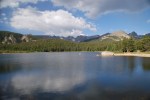
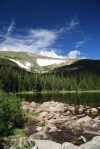
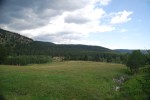
Outflow of Brainard Lake.
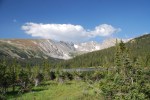
View of Long Lake and Niwot Ridge.
South St. Vrain Creek with Apache Peak (13,441 ft) and Shoshoni Peak (12,967 ft).
Destination: Rainbow Lakes, Roosevelt National Forest
Date: 8/13/2017
Time of Day: 9:45 am start
Distance/Elevation/Difficulty: 2.6 miles (total)/~396 feet/Easy
Time Elapsed: 180 minutes.
Comments: This is the second time we hiked (or tried to hike this trail). Our first hike was almost two months ago, the first weekend that the trails and campground was open. It was a madhouse. This weekend was much quieter: we were able to get a parking spot in the trail head lot, campground was not full, and there were fewer people dispersed camping along the road to the trail head.
We were actually hiking at 9:45. Out of the house by 9:15 and the road was much improved compared to two months ago. It seems like gravel was brought in and a road grader touch the surface to help reduce the bone rattling drive. We would actually think about bringing Abby up the road (if poor Abby was in running condition).
As with our first trip, the trail is still poorly marked and the multitude of social trails just add to the challenge. Following the trail was easier this time with the snow fields melted away and down trees cleared. We clearly saw where we lost the trail on our first hike and where the trail went. It is no wonder we lost it, two months ago it was covered with snow. With the snow gone it was little more than a goat path through some rocks.
As the trail heads down to the second lake, there is an option to take the second switch back and go to the lake shore, or continue on straight towards the third and fourth lakes. The distance between lake 1 and 2 is very close, it is a longer hike from lake 2 to 3, and lakes 3 and 4 are adjacent. There is a fifth lake close to lake 4, but we did not pick out the trail to head that way.
While we were dipping our toes in the frigid water of lake 2, fellow hikers shared the report of a moose sighting in lake 4. Alex, who desperately wants to see a moose, led the way. Unfortunately, we arrived at the lake after Mr. Moose had gone home to take a nap. According to Alex, Mr. Moose is a fan of Thomas the Train and was going to watch Thomas after his nap.
Alex was in a hiking mood and hiked the entire trail out and back. A great little trooper. This took us 3 hours to do the full loop (and we foolishly though we walked close to 2.6 miles the first time. Ha!). Considering the size of rocks Alex had to clamber over and that we stopped to dip our toes in a frigid lake, 3 hours was a good pace.
Ah, college kids: About 1/10 of a mile shy of the trail head, we saw a group of college kids heading up to the lakes to fish. One kid carrying a half dozen poles, another kid with a bucket, a couple kids carrying food/camp chairs, and the two poor souls at the end lugging up a cooler. Filled with ice (and beers?)? These poor souls thought the lake (and only one lake) was much closer to the parking lot than the 3/4 of a mile they had in front of them.
Other observations: Mushroom hunters! We saw several people carrying buckets and looking for mushrooms. When asked, one person said that it wasn’t the most successful forage she has ever done.
Would we return? Definitely. It was so much easier the second time around without the snow on the ground. It would be nice to find the fifth lake and perhaps see the moose. One should note, that these are small ‘lakes’ (ponds really). So if expectations are along the size of the Great Lakes, disappointment will abound.
Gallery
Map of Indian Peaks Wilderness at the Rainbow Lakes/Arapaho Glacier trail head.
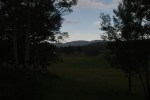
Moon over the mountains at lake 1.
Dipping our feet in the very cold water of lake 2.
Alex wanted to dip his toes in further.
Rock field.
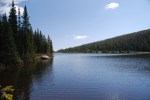
Lake 4.
A very hardy flowering bush growing from between the rocks.
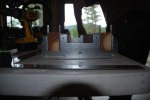
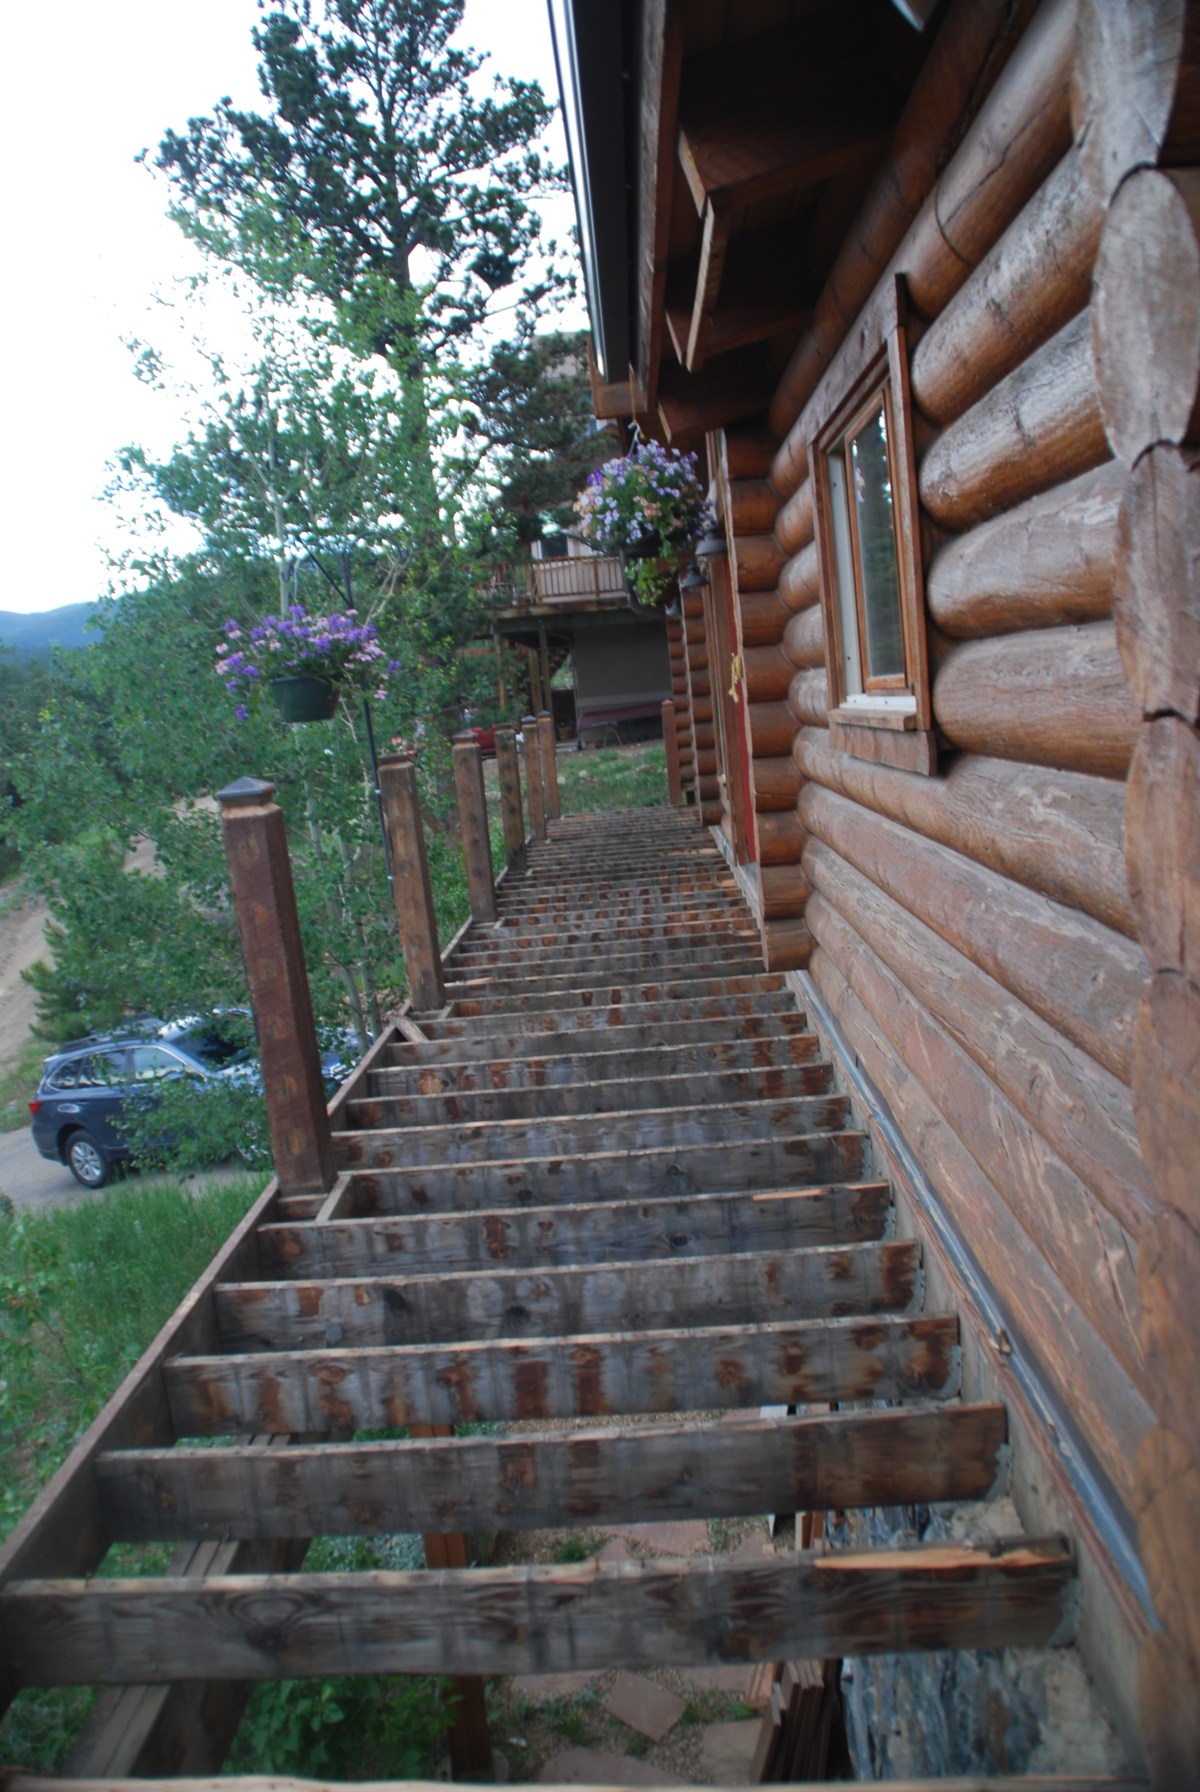
The deck is heading towards the home stretch! Part 2 of the deck reassembly covers many of the repairs (and then some) that the upper deck needed. New band board was put in along with joist hangers (that were nailed appropriately).
What was truly revolutionary were the StairLok stair brackets (purchased from Deck Superstore). Trex does not recommend an unsupported span greater than 16 inches for their product, which is an awful narrow stair. Our stair widths were 36 (lower to upper deck) and 40 inches (ground to lower deck). After some research, we opted for StairLok because they are easier to build, stronger, and use less material than traditional stair building methods. The gallery describes the process for building the stairs.
Preparation:Remove decking, watch rotten post fall away when railing is removed (see Demo post part 3)
Decking – Healthy amount of patience, well developed curse word vocabulary, screw gun, clamps, jig saw, circular saw, railing jig, level, nail gun, level, tap measure
Skill Level: Advanced/Expert. If you don’t know what you are doing, things will get ugly.
Tip(s): Check the step frame with a carpenters square. The brackets have a tendency to rack. Confirming that the stairs are square saves a ton of headache during the install.
Use a stop block when numerous pieces that same size need to be cut. Check to make sure the block hasn’t slid at regular intervals in the cutting process.
Set up an assembly line: pre-cut all the stair frames and cross bracing. Then start building. Nothing slows a process down like having to constantly switch tools.
Gallery
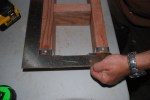
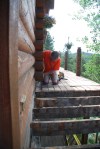
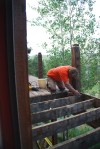
2x4s in Stair lock bracket. 2x4s were cut 3 inches narrower than stair width to account for stair horses.
Using screws to fasten the sides of the StairLok bracket to the 2x4s.
Metal tabs bent over and screwed into the bottom of the 2×4.
Using a nail gun to secure the cross braces/nailers between the 2x4s.
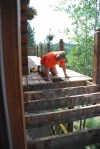
Using a carpenter’s square to verify that the stair is square and hasn’t racked.
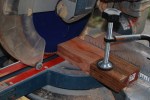
Using a wood block clamped to the to chop saw as a stop block for quick cutting of the cross braces.
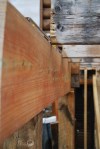
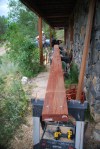
Trex boards overhang 1.5 inches. This overhang will rest on the stair horse.
Securing the Trex board to the StairLok system.
Use of a Trex system hidden fastener as a spacer for the stair treads.
With demolition parts one and two complete, along with the subsequent reassembly (one and two), the focus is fully on the stairs to the hot tub pad and the decking around it. Any hope that just perhaps this section of decking was done correctly was quickly lost. It was quickly evident that if this deck had been built in a more humid environment, it would have rotted away a dozen years ago. Even with the low humidity in Colorado, rotten spots were still found. Three cheers to the dry Colorado air. Enjoy the gallery of face palming construction decisions by a previous owner.
Critical Tools: Circular saw, pry bar, hammer, drill, pliers, knee pads, Sawzall, end of day margaritas.
Skill Level: Intermediate
Tip(s): Don’t use scrap wood to build a deck. Even if the scraps are a ‘good deal’.
The spacing between decking boards allows water to drain and air to circulate. Without the air circulation, the chances for rot are greatly increased.
Choose two of the three – good, fast, or cheap. Previous owners chose fast and cheap. Don’t be like the previous owners.
Gallery
Top of the stairs. Got to love it when folks are too lazy to cut an angle on the ‘reinforcing 2x4s’. Not helping to much when the 2×4’s aren’t properly installed (a grossly undersized solution) Nails will save the day!
No, nails won’t save the day if not enough were used and the board is rotting.
Bottom step pulled off. Drinking to commence.
Reinforcing 2×4 pulling away from stair horse.
Rotting 2×4? Check. Stair horse split by bolt? Check.
Stair horses were improperly over cut. The over cut essentially reduced the support to the equivalent provided by a 2×4. This is grossly undersized for stairs.
2×4 scraps being used to ‘reinforce’ the stair horses. This is NOT how to do things.
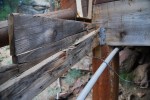
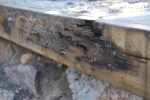
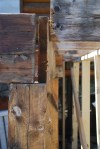
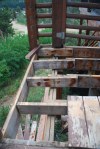
After the stairs and decking were removed, the framing was available for inspection. Band board starting to rot. How many pieces were used? Three. Not good.
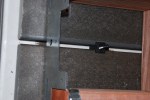
Nothing like having a free floating joint in space. No, this is not a marijuana reference. Note that the support post is 4 x 4. A 6 x 6 would be better.
So this band board joint is backed by a post. The post is sitting haphazardly on a rock. And there is a bolt going through the joint.
This craziness would make Jenga masters proud.
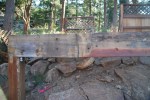
2 x 6 that is almost rotted through. The post that was askance and rotted out at the bottom was ‘attached’ in this area.
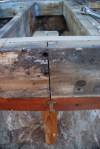
So they used brackets, good. Joist hangers, better. But only nailed
the brackets into the joists, not the band board. Very bad. Didn’t even bother to try and use chewing gum as a stickum. This devolves to . . .
. . . .no brackets. Just a few nails.
Ending on a high note. Joists overlap with inner band board by only two inches. Looks like mold has found a happy home.
We actually extracted ourselves from the deck project and went hiking – Saturday and Sunday this week!
Destination: Caribou Ranch, Boulder County Open Space
Date: 7/21/2017
Time of Day: 10:30 am start
Distance/Elevation/Difficulty: 4.2 miles (DeLonde out and back + Bluebird loop)/~340 feet/Easy (DeLonde) & Moderate (Bluebird)
Time Elapsed: 120 minutes.
Comments: This is an enjoyable and easy hike with bucolic mountain pastures and stunning mountain vistas. The rain amplified the Ponderosa Pine aroma. It was easy to imagine cows and horses grazing in the mountain meadows. Just stunning.
The DeLonde trail is rather easy trail. Narrow in some spots, but not excessively rocky and minimal tree roots. It passes through stands of Ponderosa pines and Aspen. About half of the DeLonde trail is on the old Switzerland (ran from Boulder to Ward) narrow gauge railway line and was quite wide and smooth. A pretty easy hike to the DeLonde homestead.
Read more about the Caribou Ranch recording studio. In the ’70s and ’80s some of the most famous albums in rock history were recorded nearby.
The Bluebird Loop from the DeLonde homestead is initially narrow and rocky. After the mine spur turn off, the trail opens up (likely due to the return to the narrow gauge railway bed) and is very easy to walk on.
Our herd of turtles start cost us during the hike. We got caught in a late morning rainstorm. Alex was a trooper and did about 2.5 miles of the entire hike. But the rain pushed him over the edge. As Jess was piggy backing him out the last 1.5 miles, he sounded like a little gremlin growling.
Caribou Ranch Gallery
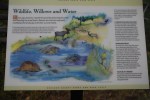
Educational sign – Wetlands and wildlife.
Mountain vistas.
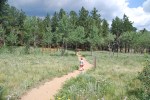
Alex, leading the way at full speed ahead.
Alex leading us around the bend.
A peek at the DeLonde homestead through the trees.
Heading down the lane from the DeLonde homestead from the Switzerland Trail.
Meadows and mountains.
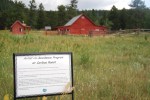
The barn is now housing for an artist in residence (new artist every week).
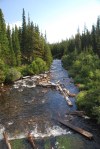
Creek along the Bluebird loop.
Mountains across the meadow.
Blue skies heading our way.
Wildflower, 1 of 3
Wildflower, 2 of 3.f
Wildflower, 3 of 3
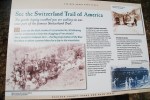
Educational sign – Switzerland Trail of America
Educational sign – the DeLonde homestead.
Destination: Aspen Alley, West Magnolia Recreation area
Comments: We last visited Aspen Alley over Mother’s Day. Since our last visit, the Aspens are in full leaf and the clear cut areas were full of wild flowers. This hike we found the right trail through Aspen Alley. We also remembered not to go down 926B, since it was a more difficult hike to get back to the car.
Aspen Alley hiking route.
Aspen Alley Gallery
Storm clouds starting to roll in.
The rain beginning to fall.
Blue skies in the distance.
Flowers and insects, 1 of 3. Bee on thistle flower.
Flowers and insects, 2 of 3. Unopened thistle flower, no insect.
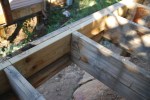
So now that we have discovered the extent of the poor workmanship on the deck framing, it is time to repair the hazards and make this deck safe. Replacements included rotted support beams, an undersized beams, and improperly cantilevered joists. It is likely that the framing was not constructed fully from pressure treated lumber.
Check out the gallery captions for the nitty gritty details. Check out deck reassembly post 1 for information regarding the Trex installation. No Trex RainEscape here.
Preparation:Remove decking, curse at the unknown person(s) who built this portion of the deck
Critical Tools: Healthy amount of patience, well developed curse word vocabulary, screw gun, clamps, jig saw, circular saw, railing jig, level, nail gun, level, tap measure
Skill Level: Advanced/Expert. If you don’t know what you are doing, things will get ugly.
Tip(s): Step back to help see the forest for the trees. Some challenges are easily solved once it is determined the perceived problem does not affect the end goal.
Take the time to plan everything out. This will save so much trouble down the road.
Don’t go cheap on the materials. This is not the place to be a penny pinching skin flint. Don’t purchase your materials for some guy selling scraps of wood out of the back of his pick up. Buy real lumber. Pressure treated lumber.
Gallery
Test fitting a new beam to determine how far out of level the deck joists are.
Aluminum straight edge (re-purposed from drywall work) being used to confirm the extent of the joist sag.
Aluminum straight edge and level confirming that the sag has been removed from joists.
Using a marking line to help provide a visual edge for the measurement of the replacement beam.
Replacement beam (original was rotted and infested with carpenter ants AND too short) with first joist resting on it.
What do you mean vertical supports should be secured to the base?
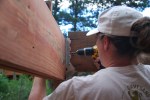
Builder’s assistants 1 and 2 securing post to base with Simpson Strong Drive Connecting Screw.
Replacement outer band board of the deck. Original was too short and constructed in two, non-overlapping pieces (bad). This 24 foot beam was constructed by taking two 16 foot long 2 X 10 and overlapping them 10 feet and securing with nails and 5/8″ X 5″ bolts every 2 feet. 6 foot lengths were used to fill in the ends.
New band board installed! Builder and builder’s assistant 1 managed to get it into place. Notice how the crown of the board is facing up. Crowns of each board using to construct the band board had to be be orientated in the same direction.
Replacement joist. Old joist was twisting and splitting.
With Part 1 of the deck demolition and rebuild complete, we get to see what structural disasters are hidden in part 2. How can we be so confident that this portion of the deck is not structurally sound? The most visible symptoms is the drooping corner and the improperly cantilevered boards.
Once the decking came off, the situation was worse than originally thought. Check out the gallery below for great pictures of rotted boards and improperly done construction. This deck was permitted and it is hard to believe it passed inspection, a score and four years ago. It is amazing the deck didn’t collapse long ago. Time to do things right and repair this shoddy work.
Demolition went quickly using technique 3 described in the first demolition post. Tips described in the previous post also apply here.
Critical Tools: Circular saw, pry bar, hammer, drill, pliers, knee pads, Sawzall, end of day margaritas.
Skill Level: Intermediate
Tip(s): Don’t step on boards that have been cut with the circular saw. This will result in a painful trip through the deck.
Gallery:
Bow in the old deck surface at the top of the stairs.
Deck board pulling away from others.
The leaning post is not indicative of good things.
Improperly done cantirlever is the reason for the deck slope. Shoddy construction essentially created a lever. Which also explains the bow in the deck surface.
The rotten wood might explain why the post is leaning.
Not a good thing when the rotting major support is held together by carpenter ants holding hands.
Temporary support of the joists after the rotten board was removed.
What is demolished must be rebuilt. At least that is the logic for the deck – we need somewhere to drink our margaritas. The first two parts of the deck to be demolished and reassembled are the front of the house and the side to the kitchen door. These were thought to be the easy portion of the deck repair until the struggles of demolition were encountered (see demolition post part 1). Once these two sections are done, the deck will be over halfway done area wise and about 25% done work wise.
In the planning for the future part of the deck reassembly, Trex RainEscape is being installed under the decking along the front of the house. This system redirects rainwater and snow melt from dripping under the deck. So if you have grand plans to have a dry outdoor living space under your deck in the future, spend the money and install the system when you first put down the new decking.
We made the decision that we wanted the decking to run in the same direction, instead of running parallel to each side of the house. Front of the house was no problem – one small section of joists was replaced; the new joist orientation is perpendicular to the original. This was done there would be something to secure the decking to in the direction we wanted. The larger problem was the side deck up to the kitchen door. The joists ran the wrong way for the deck direction and did not need to be replaced. The solution? Blocking, nailed in perpendicular between the joists.
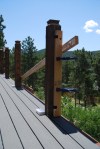
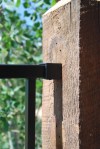
Railing is by Fortress. It is iron with 4 layers of black powder coat. Here’s to hoping it lives up to its name and keeps Alex in and isn’t too damaged with multiple Tonka dump truck crashes.
Tip(s): Like with tile flooring, get your first board right. Everything else builds off of this board and if it isn’t square, the problem will only amplify.
Eat your Wheaties for breakfast. The Trex boards are heavy.
Trex boards may need to be trimmed slightly so they end at the center of the joist. Unless your carpenter was Jesus, the joists may vary slightly in their on center measurement.
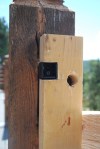
Create a bracket jig. Saves from measuring posts over and over again to ensure proper bracket position.
Gallery
Nailing the RainEscape in place. The slope is increased by reducing the trough material overlap with the joist.
Taping down the RainEscape seam.
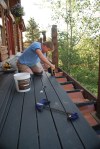
Screwing the fasteners in place.
Pry bar and clamps to take the warp out of a board or adjust spacing.
Tools of the trade.
Old deck, juxtapositioned next to new.
Cross brace to stabilize and straighten post. Bracket jig is clamped on.
Checking that the post is vertical.
Close up of bracket jig.
Deck railing section shorter than 8 feet.
Marking the railing for the cut. Measurements were done in finger widths.
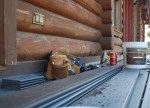
Deck boards – some were replaced by the previous owner, entire deck desperately needs repainting.
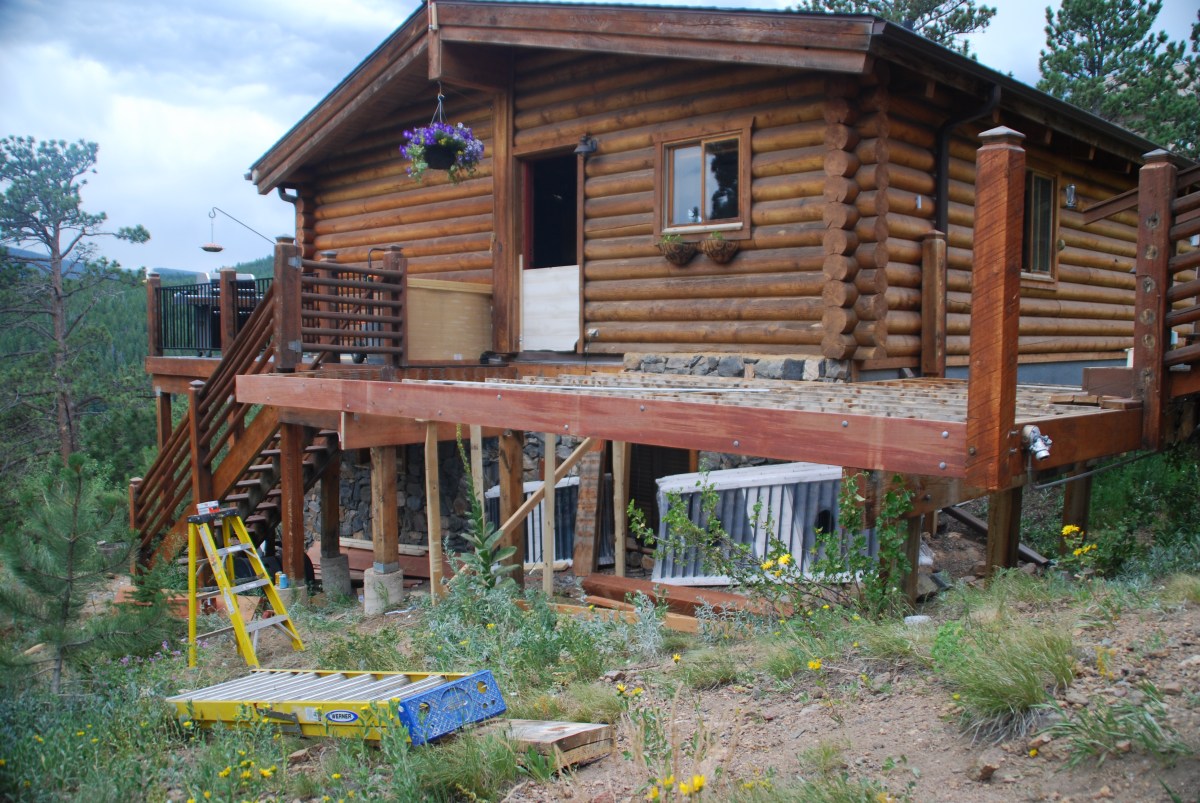
With summer in full swing and the inside projects complete, it is time to tackle the deck! What is wrong with the deck one may ask? Best guess it is close to 25 years old. It desperately needs to be repainted, boards need to be replaced, and our home inspector cautioned us against standing too close to the edge in one portion (structure is unsound). Throw in the horizontal railings that a young boy can easily climb, combined with a 15 foot drop, the safety issue is even greater. With that in mind, time to replace the deck and railing!
Horizontal railings perfect for Adventure Alex to climb. Top rail broke while we leaned on it.
In general, the framing is in good condition and does not need replacement. The structurally unsound portion will be repaired to code and common sense. The decking will be replaced with Trex Enhance, color clamshell (grey). Grey was selected because there is so many brown tones with the log cabin, we didn’t want to look like we failed at matching. So we decide to do a cooler grey to help balance all that warm wood. Decking materials, including RainEscape for front deck, were purchased from Deck Superstore in Commerce City, CO (go check out their decking test area) and all lumber for framing repairs was purchased from Home Depot.
So, demolition, easy enough, right? Well, in this case some care had to be taken in removing the decking to avoid damage to the framing. We wanted to reuse as much as the framing as possible. So how was the decking removed?
Technique 1: Unscrew boards and pull them up.
Problems: Screw heads were filled with paint. Screws were stripped and could not be backed out. Screws were brittle and broke off. Boards had to be pried out with a crowbar and screws had to be broken off. A generous estimate was 10 feet of decking was removed in 4 hours.
Technique 2: Use a reciprocating saw with metal blade to cut screws (run between decking and joist.
Problems: Screws were far tougher than regular nails. Significant effort was required to cut through a few screws. This was draining on the saw batteries (multiple recharges would have been required throughout the day), saw blades, and Dave’s reserve of curse words.
Technique 3: Use a circular saw to cut decking boards between the joists from above. Knock board out, shearing the screw.
Problems: With the exception of copious amounts of saw dust generated and some wear and tear on the knees (if knee pads are owned, employ them here!) this technique was the winner! Very few screws that had to be broken off. 45 feet of decking was removed in 4 hours. A four-fold increase in productivity!
Preparation: Relocate planter, block off construction area (from the wanderings of dogs and child)
Don’t use your tools of destruction recklessly. Recover and reuse what you can.
Clean up area every day, with a sharp eye on the look out for screws/nails in the driveway.
Check the joists carefully. An initial glance and the discoloration might be indicative of rot. In this case, it is where stain/paint dripped between deck boards.
Annoyed? Have a beer. Really annoyed? Go for the margarita.
Gallery
Screw head filled with paint.
The fruits of 4 hours of demolition technique 1.
Circular saw to cut deck boards along the joist.
Sawzall to do the close cutting near the house.
Dislodging cut deck boards.
Breaking off screws that did not break off with deck board.
Dry rotted joist to be replaced.
Split joist to be replaced.
A deck free of decking. Joists at far end that run perpendicular will be replaced.
Deck free of decking from the other end of the house.
With a the vast majority of the house projects started since purchase completed, it is back to brewing beer! We are starting with our tried and true Alex’s Amber Ale. This recipe is dialed in and it is extremely consistent. That being said, some substitutions were made due to sourcing limitations on home brew supply shopping day. Specialty grains and hops were purchased from CO Brew in Denver.
Admittedly, making this many changes to the recipe is not ideal, but combined with the brew equipment changes, this just may be a disastrous day.
Our day started late because we didn’t dry fit any of the equipment. If we had done this, we would have realized we needed some extra parts to make everything work. This set back our day and resulted in the extension of some steps of the process.
The day was also a wee bit windy and the propane burners could not maintain the desired vigorous boil. Evaporation was reduced, resulting in a higher volume of lower gravity wort.
Efficiency:
Why the low efficiency? Our sparge was too fast. As seen in the gallery pictures, our brew space is set up under out deck on the some of the rare flat space on our property. We were unable to mount the sparge arm due to the low clearance and sparged through the vorlauf port. The fast sparge likely resulted in poor sugar extraction from the grain bed.
Other Issues:
We discovered the thermometer on the HLT reads 4 degrees high and the thermometer on the mash tun reads 4 degrees low. We completely undershot our target mash temp, but not nearly as bad as initially thought.
What the future holds
A brew shed. Currently our brew equipment is buried and it is a fight to set everything up. We could brew on the deck and have sufficient room for our sparge arm, but we would have to disassemble the brew tree to get it up the stairs. It would be nice to have a dedicated space to brewing.
Thermometer calibration
Purchased more valves. Goal was to use the whirlpool port on the boil kettle, but after thinking about the set-up, we realized we failed to purchase a valve that would help prevent the back flow of hot wort. This is a peril of failing to dry fit a new set up at least a week in advance.
Gallery
SS Brewtech MBE boil kettle valve and site glass deconstructed for a thorough cleaning.
HLT, mash tun, and brew kettle.
Another perspective on the HLT, mash tun and brew kettle.